Managing Pipelines
Pipelines are the essential tool in Spinnaker for controlling how to deploy your application. A pipeline is composed of a series of stages that can be combined in almost any order, which makes pipelines flexible, consistent, and repeatable.
You can configure your pipelines to run entirely automatically or require manual intervention to ensure that everything is working as expected. Similarly, pipelines can either be automatically triggered by a wide range of external inputs, including other pipelines, or be manually triggered.
This guide explains how to configure and control pipelines, including creating, adding triggers to, or disabling pipelines.
Create a pipeline
- Select the application in which you would like to create a pipeline.
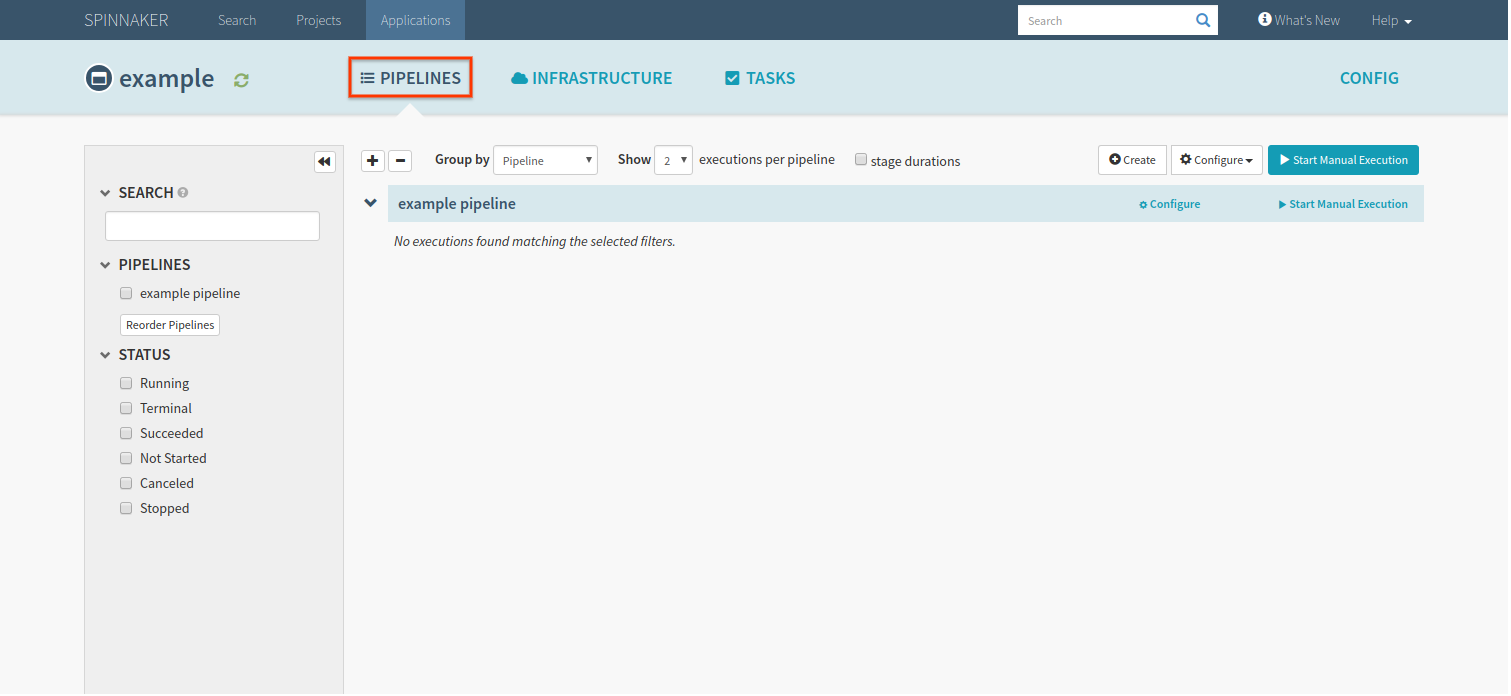
- Navigate to the Pipelines tab in the Spinnaker UI.
- Click Create, located in the upper right corner of the Pipelines tab.
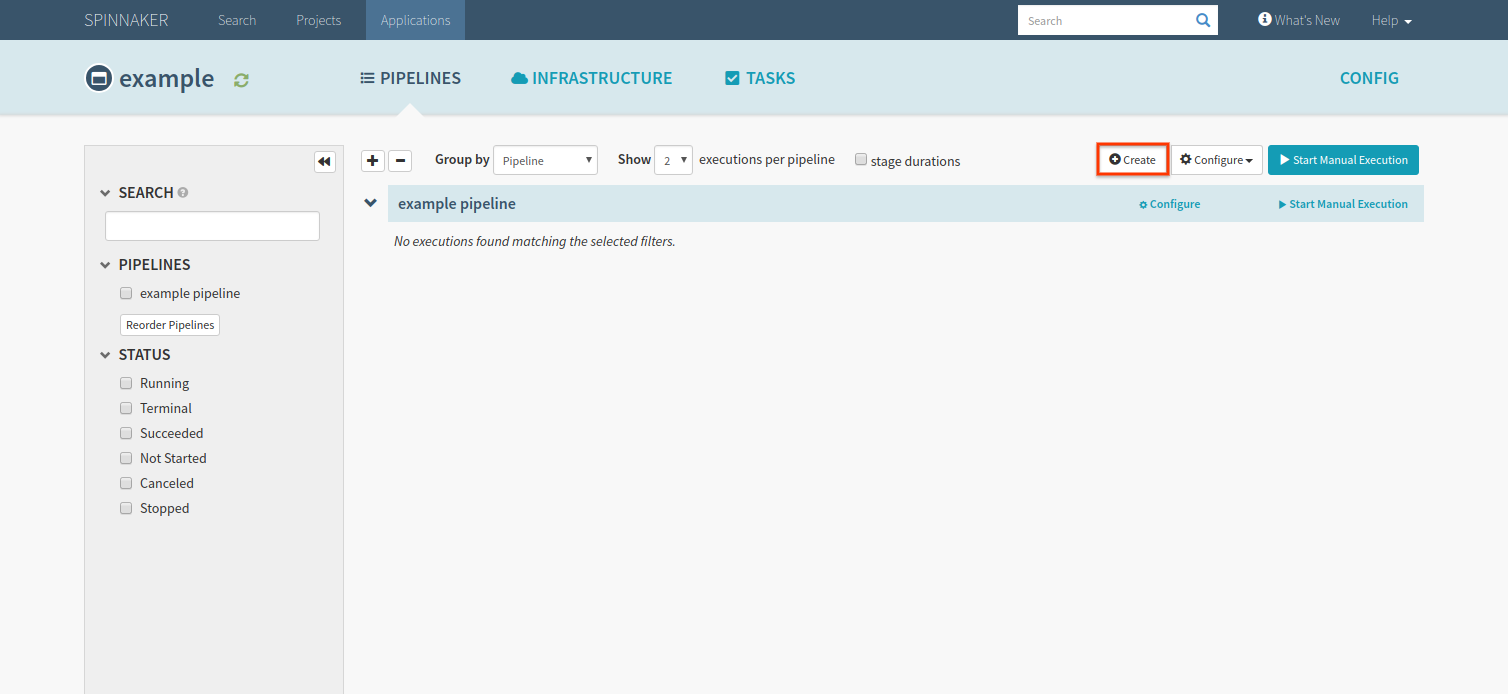
- Choose Pipeline from the drop down menu and name your pipeline.
After you create your pipeline, add stages to specify the actions that your pipeline will perform.
Add a trigger
Make sure that you are editing the Configuration stage of your pipeline.

- Select Add Trigger.

- Choose your desired trigger type from the drop-down menu that appears, and input any further required configuration.
For further information on how triggers work, see the documentation on pipeline triggers .
Add a stage
The first step in any pipeline is Configuration, where you can set up pipeline triggers and parameters. Each stage specifies an action the pipeline will take once it’s configured.
- Select Add stage from your pipeline configuration screen.
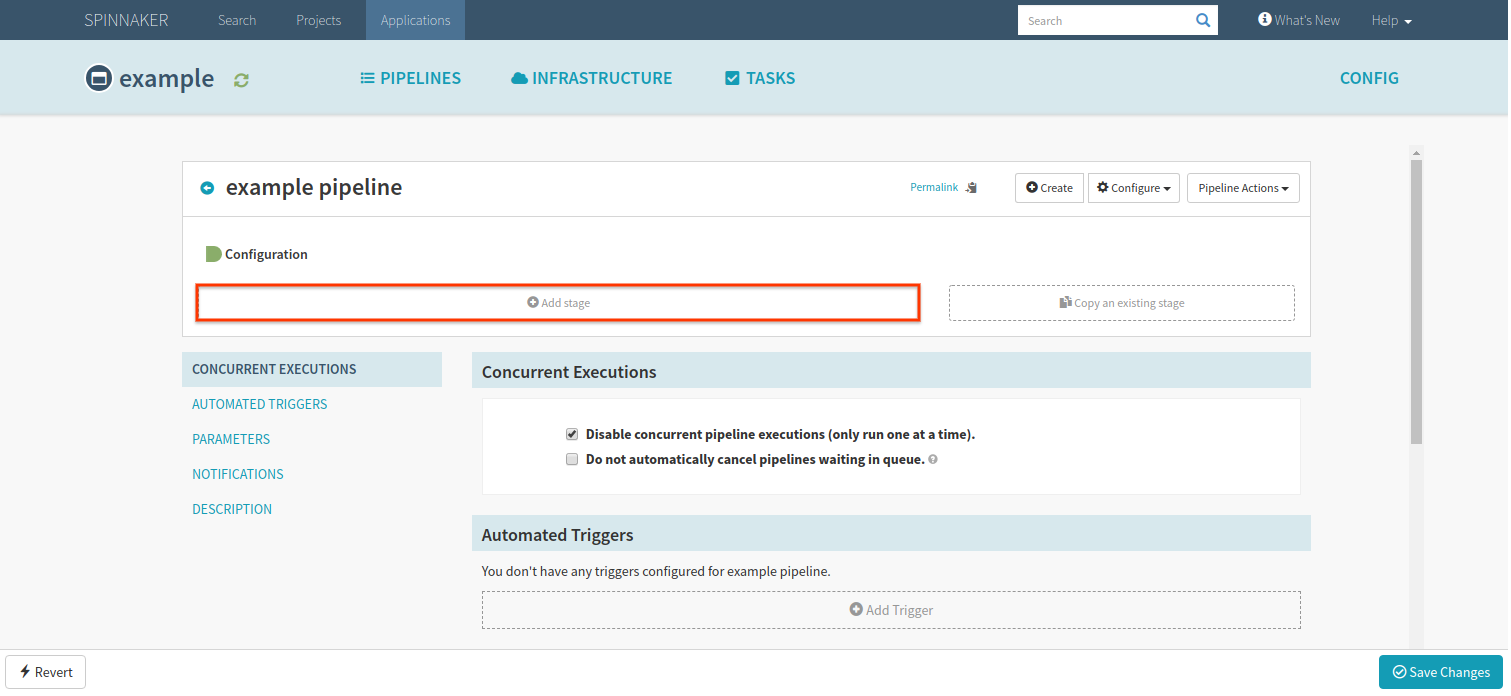
- Set the stage type using the drop-down menu.
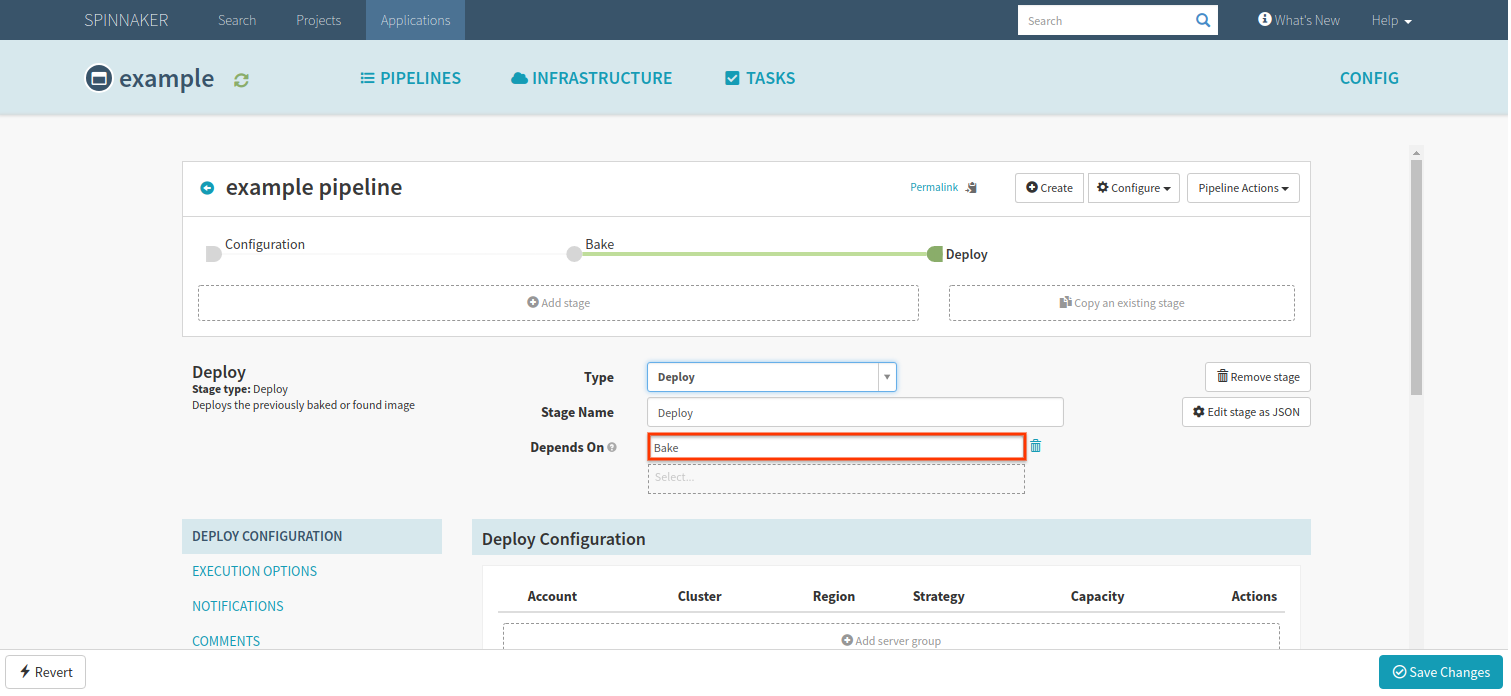
- If this isn’t the first stage in your pipeline, make sure that this stage
depends on the desired upstream stage(s) using the Depends On field.
You can add as many stages as your pipeline needs, in any order that makes sense for you.
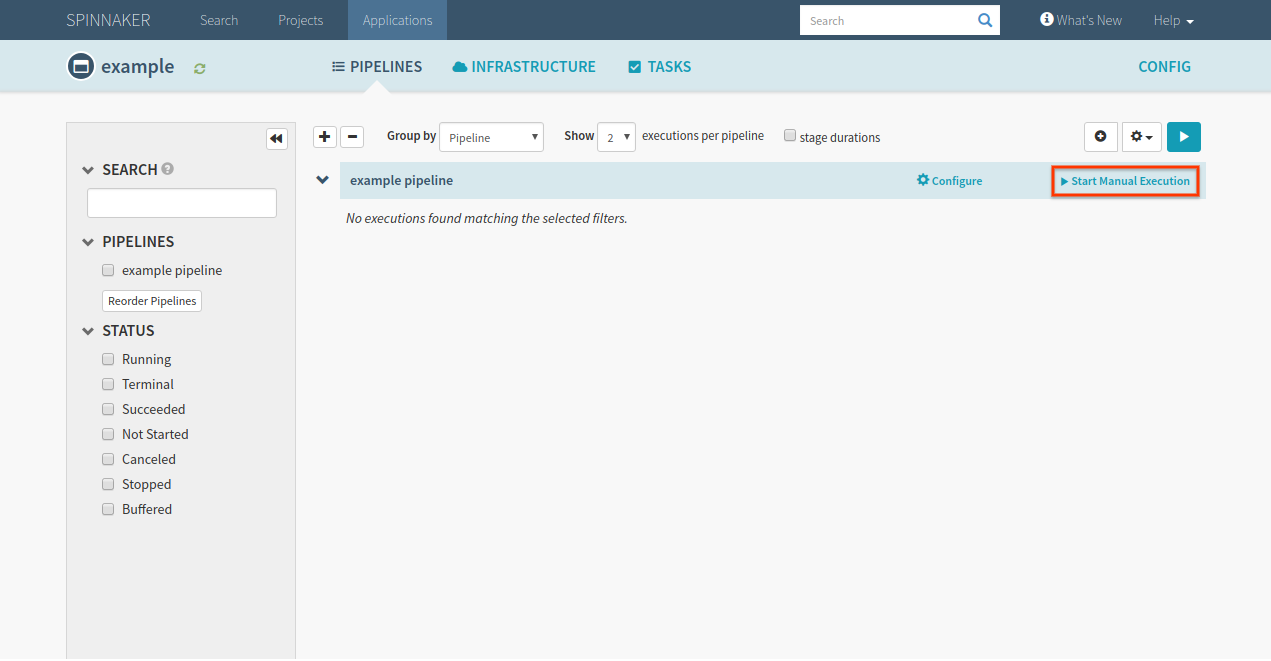
Manually run a pipeline
From the Pipelines tab, click Start Manual Execution on the pipeline you want to run. Spinnaker then shows you a confirmation dialog, where you can add any necessary parameters.
Linking to the Manual Execution dialog
You can create a deep link to the confirmation dialog for any pipeline by adding
a startManualExecution parameter to the URL for an application’s pipelines
view. The parameter’s value can be either the pipeline name or its ID.
To prepopulate pipeline parameter values in the dialog, just include them as parameters in the URL.
For example:
- you have an an application named “myapp”
- the application has a pipeline named “deploy-to-prod”
- the pipeline has one parameter,
region - the pipeline’s ID is
12345 - your Spinnaker installation is hosted at https://my.spinnaker.example.com
These links would open the dialog automatically:
- https://my.spinnaker.example.com/#/applications/myapp/executions?startManualExecution=deploy-to-prod
- https://my.spinnaker.example.com/#/applications/myapp/executions?startManualExecution=12345
These links would open the dialog automatically, and pre-populate the region
parameter with us-central-1
- https://my.spinnaker.example.com/#/applications/myapp/executions?startManualExecution=deploy-to-prod®ion=us-central-1
- https://my.spinnaker.example.com/#/applications/myapp/executions?startManualExecution=12345®ion=us-central-1
Disable a pipeline
Disabling a pipeline prevents any triggers from firing, as well as preventing users from running it manually.
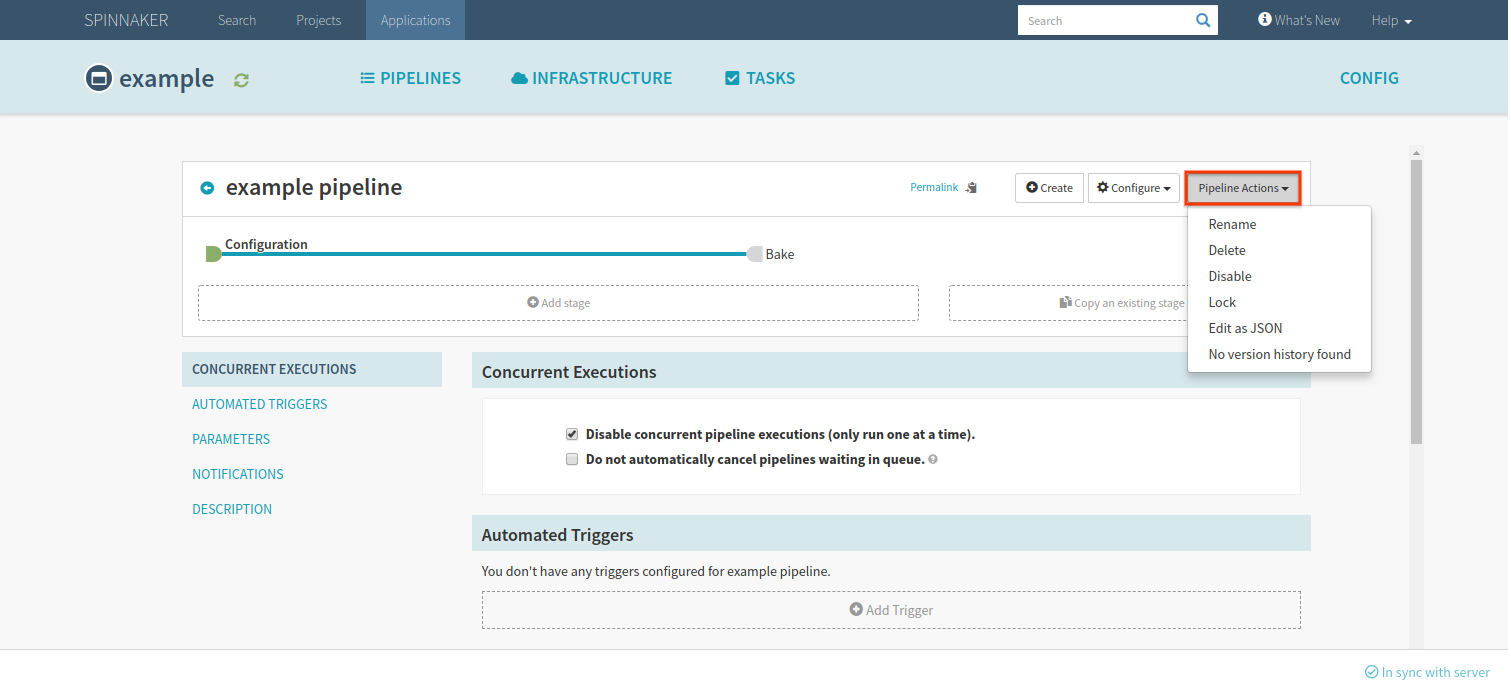
- From the Pipelines tab, click Configure to modify an existing
pipeline.

- Click Pipeline actions in the upper right corner, and select Disable.
In order to re-enable your disabled pipeline, select Pipeline Actions and choose Enable.
Delete a pipeline
- From the Pipelines tab, click Configure to modify an existing
pipeline.
- Click Pipeline actions in the upper right corner, and select Delete.
Edit a pipeline as JSON
Warning: The JSON you write here is not validated – Edit as JSON essentially allows you to modify the pipeline via a free-form textbox. Be careful! It’s very easy to break the pipeline, although you can restore from revision history to roll back any changes.
Spinnaker represents pipelines as JSON behind the scenes. Any changes you make to your pipeline using the UI are converted to JSON when Spinnaker saves the pipeline.
When you use the Edit as JSON feature, you are directly editing the payload. Edit as JSON allows you to set pipeline fields or properties not exposed by the UI.
In order to edit your pipeline as JSON:
- From the Pipelines tab, click Configure to modify an existing
pipeline.
- Click Pipeline Actions in the upper right corner, and select
Edit as JSON.
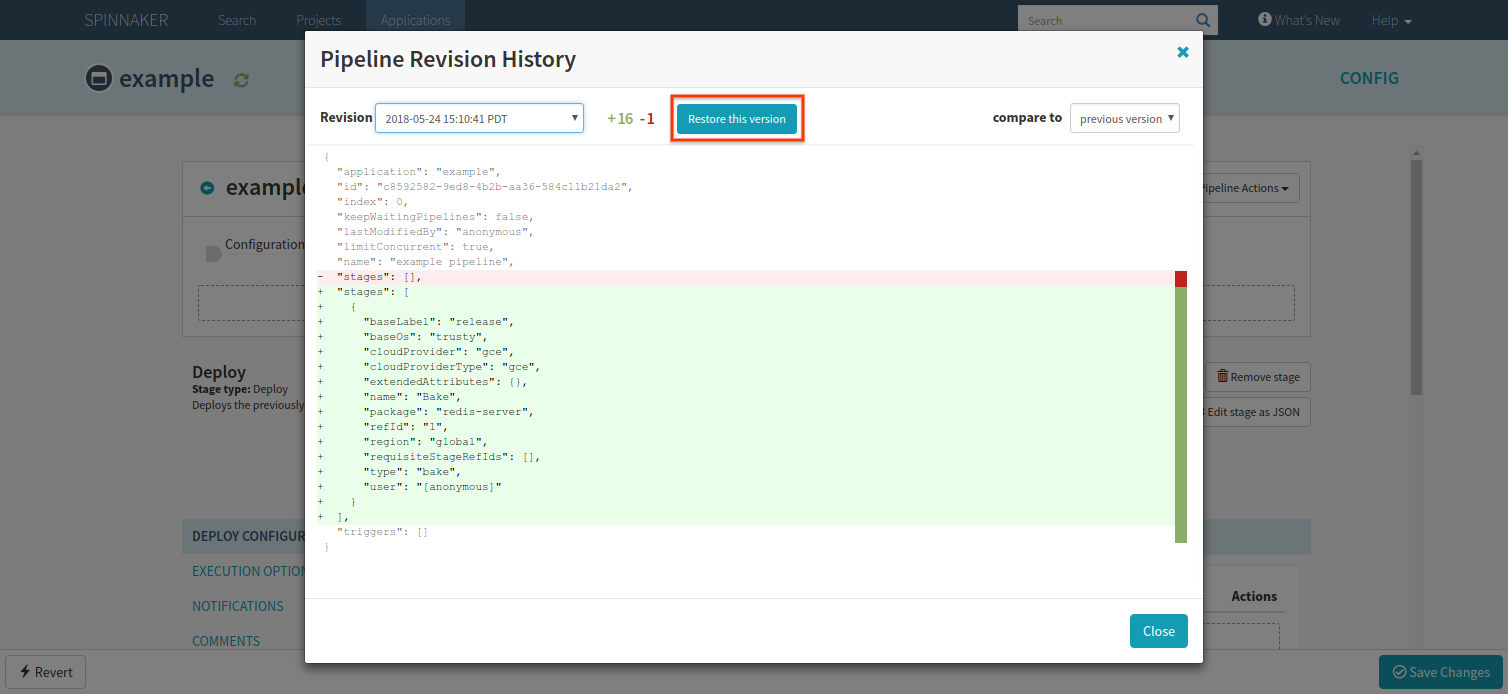
View and restore revision history
Each time you save your pipeline, the current version is added to revision history. You can use revision history to diff two versions of a pipeline or to restore an older version of a pipeline.
Note: If you are using Minio or Redis as your storage service , you won’t be able to use revision history because neither supports it.
- From the Pipelines tab, click Configure to modify an existing
pipeline.
- Click Pipeline Actions in the upper right corner, and select
View revision history.
This pulls up a window that shows a JSON representation of your current pipeline. From there, you can see all previously saved versions via the drop-down menu in the upper left corner.
Diff two versions of a pipeline
You can compare any version of your pipeline to either the version before it or the current pipeline.
- View revision history.
- Select a version from the Revision drop-down.
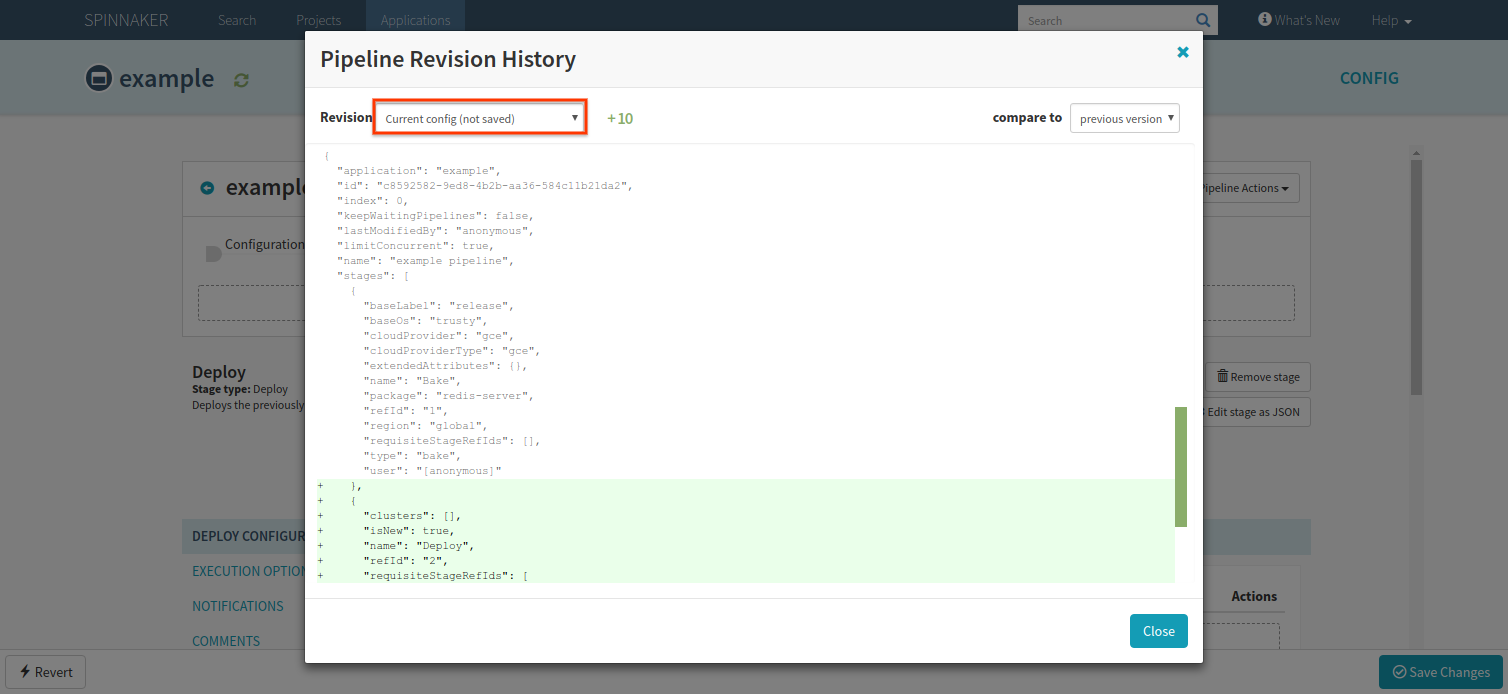
- Choose whether to compare that version to the current or previous version.
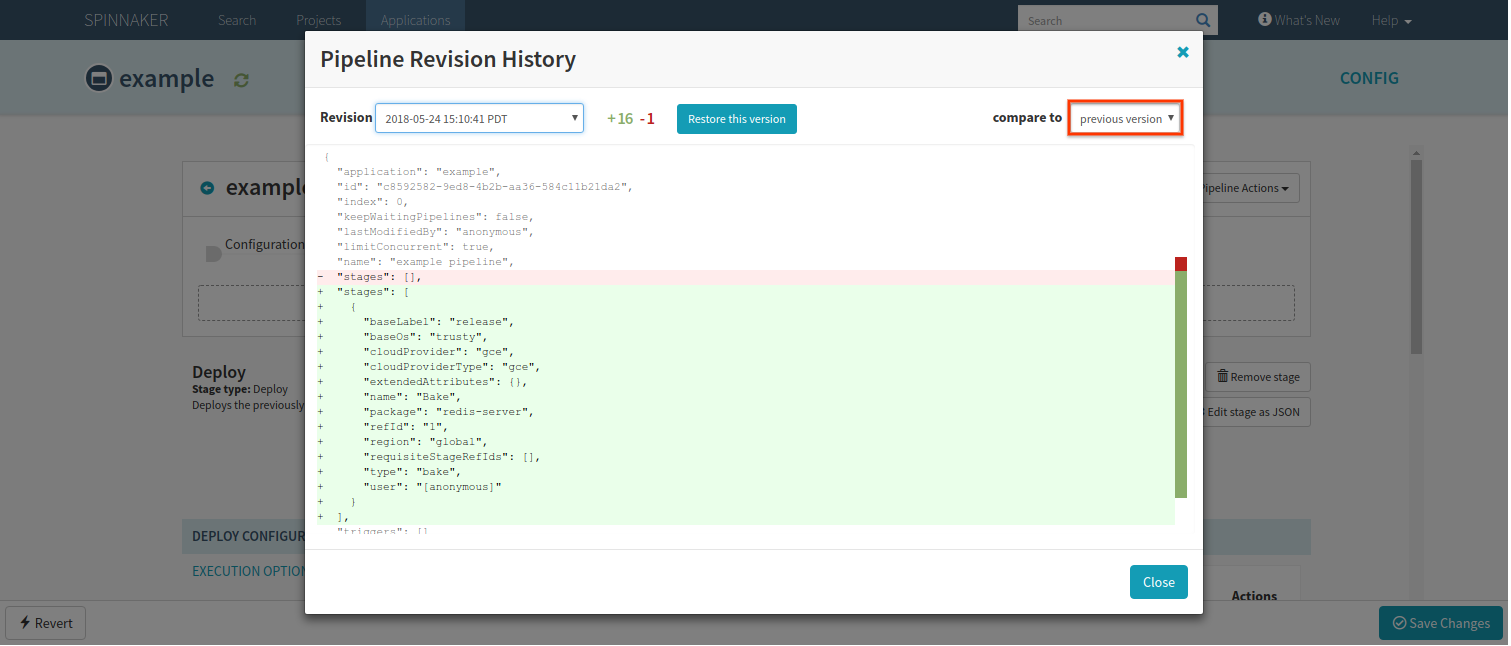
Restore a previous version
- Choose a version from the Revision drop-down.
- A button appears that allows you to restore your pipeline to that version. If
you restore an older version, the current version of your pipeline is saved in
your revision history in case you want to return to it in the future.
Lock a pipeline
Locking a pipeline prevents all users from modifying the pipeline using the Spinnaker UI. You can still update a locked pipeline via the API.
- From the Pipelines tab, click Configure to modify an existing
pipeline.
- Click Pipeline Actions in the upper right corner, and select
Lock.
Rename a pipeline
- From the Pipelines tab, click Configure to modify an existing
pipeline.
- Click Pipeline Actions in the upper right corner, and select
Rename.