Configure an application
Once you’ve created an application , you can finish configuring it before adding infrastructure and pipelines.
Start configuring
-
From within the application, click CONFIG at the top right of the Spinnaker screen.
The application attributes you defined when you created the app are shown at the top.
Note Spinnaker can infer applications based on existing infrastructure. In these cases, there are no application attributes. For applications that you want to use as applications (as described in this guide) you’ll have to add the attributes.
-
If you want to change any of these attributes, click Edit Application Attributes.
Create pipeline notifications
Spinnaker can send notifications upon completion of certain types of pipeline activity. These notifications are optional.
-
Click Add Notification Preferences
-
Select the notification medium:
- SMS
- Slack
-
Provide the information for the type you chose:
- email address
- Phone number
-
Choose each pipeline event that will trigger this notification:
- A pipeline started
- A pipeline finished
- A pipeline failed
-
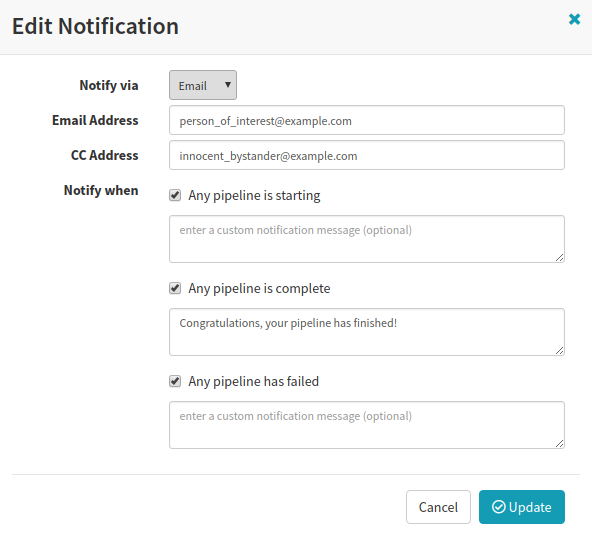
For each event, enter any custom text you want included in the notification.
For example, for Any pipeline is complete you could enter “Congratulations, your pipeline has finished!” Custom notification text is optional.
-
Click Update
-
Repeat these steps to add more notifications, if you want.
-
Click Edit next to any existing notification to change its preferences, or click Remove to delete it.
Enable or disable application features
You can disable any of the main features available in your application, if you don’t need them. Disabling one of these features merely removes it from the Deck user interface; no existing data is deleted.
Simply de-select any of the features you don’t need:
- pipelines
- clusters
- load balancers
- firewalls
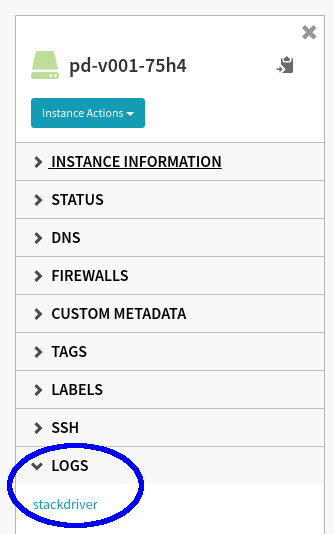
Add custom instance links
You can include custom links to the instance details panel, providing shortcuts to information related to the instance, like logs, health, and so on.
Note: Custom instance links don’t currently work for Kubernetes resources.
These links are resolved using the public IP address of the instance, if
available, or the private IP otherwise. The default port is 80; if you want to
use a different port, begin the path with :.
-
In the Links section, click Add Section.
-
Provide text for the new Section heading.
-
In the Links fields, type the text that you want to display, and the path to the link target.
You can reference these specific instance attributes by wrapping them in curly braces. For example, to include the region where the instance lives, for a GCE or AWS instance, use
{region}. These are for the path only, not the link display text.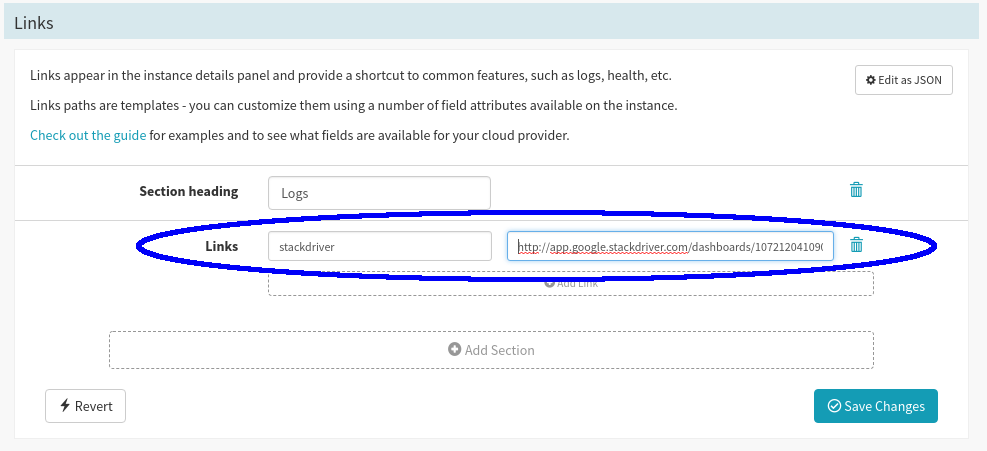
-
Click Add Link for each additional link you want displayed in this section.
-
Click Add Section for any additional sections.
-
Click Revert to clear your work in progress.
This does not remove any saved custom instance links.
-
Click Save Changes when you’re finished.
Note that you can set default links across all applications, as described here .
Refresh caches
Spinnaker keeps a local cache of resources. This section of application configuration merely gives you a way to refresh those caches.
Designate a traffic-guard cluster
A traffic guard is a cluster which you have designated as always having at least one active instance.
With traffic guard enabled, if a user or process tries to delete, disable, or resize the server group, Spinnaker will verify the operation will not leave the cluster with no active instances, and fail the operation if it would.
-
In the Traffic Guards section, click Add Traffic Guard.
-
Set the following values:
| Field | Required? | Description | | Account | Yes | The account for which you’re setting up the traffic guard| | Region | Yes | The applicable region from the list, or
*for all| | Stack | No | The stack to which to apply this traffic guard. Leave blank to apply the guard only to a cluster that has no stack.| | Detail | No | The detail string necessary to identify this cluster via the application-stack-detail naming convention| -
Click Save Changes to apply your new traffic guard, or changes to an existing one.