Safe Deployments
Overview
In this codelab, you will improve a deployment process by adding safeguards to your deployments.
This codelab is a continuation of the Kubernetes: code to prod codelab. It assumes you have an application set up and ready to deploy.
Setup
Please follow the steps in the Kubernetes Source to Prod guide to create a deployed Spinnaker cluster.
Making manual operations safer
Using the Rollback action
The rollback action automates the process of restoring to the previous good known server group. This feature enhances a traditionally manual operation by ensuring that the restored cluster is taking traffic before disabling the current server group.
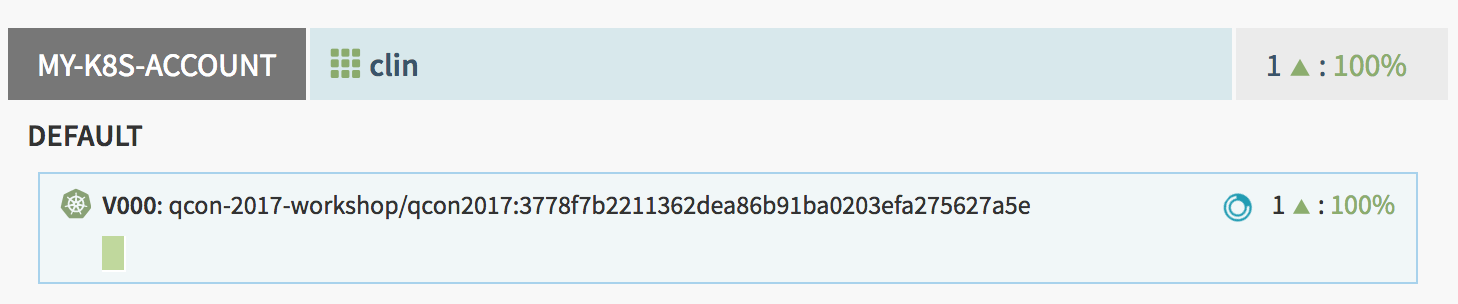
Go to the clusters screen for your application and make sure you have at least one cluster with one server group with an attached load balancer.
If you don’t have an existing server group, click on Create Server Group, select your deployment details (pick an image name and load balancer) and click on CREATE .
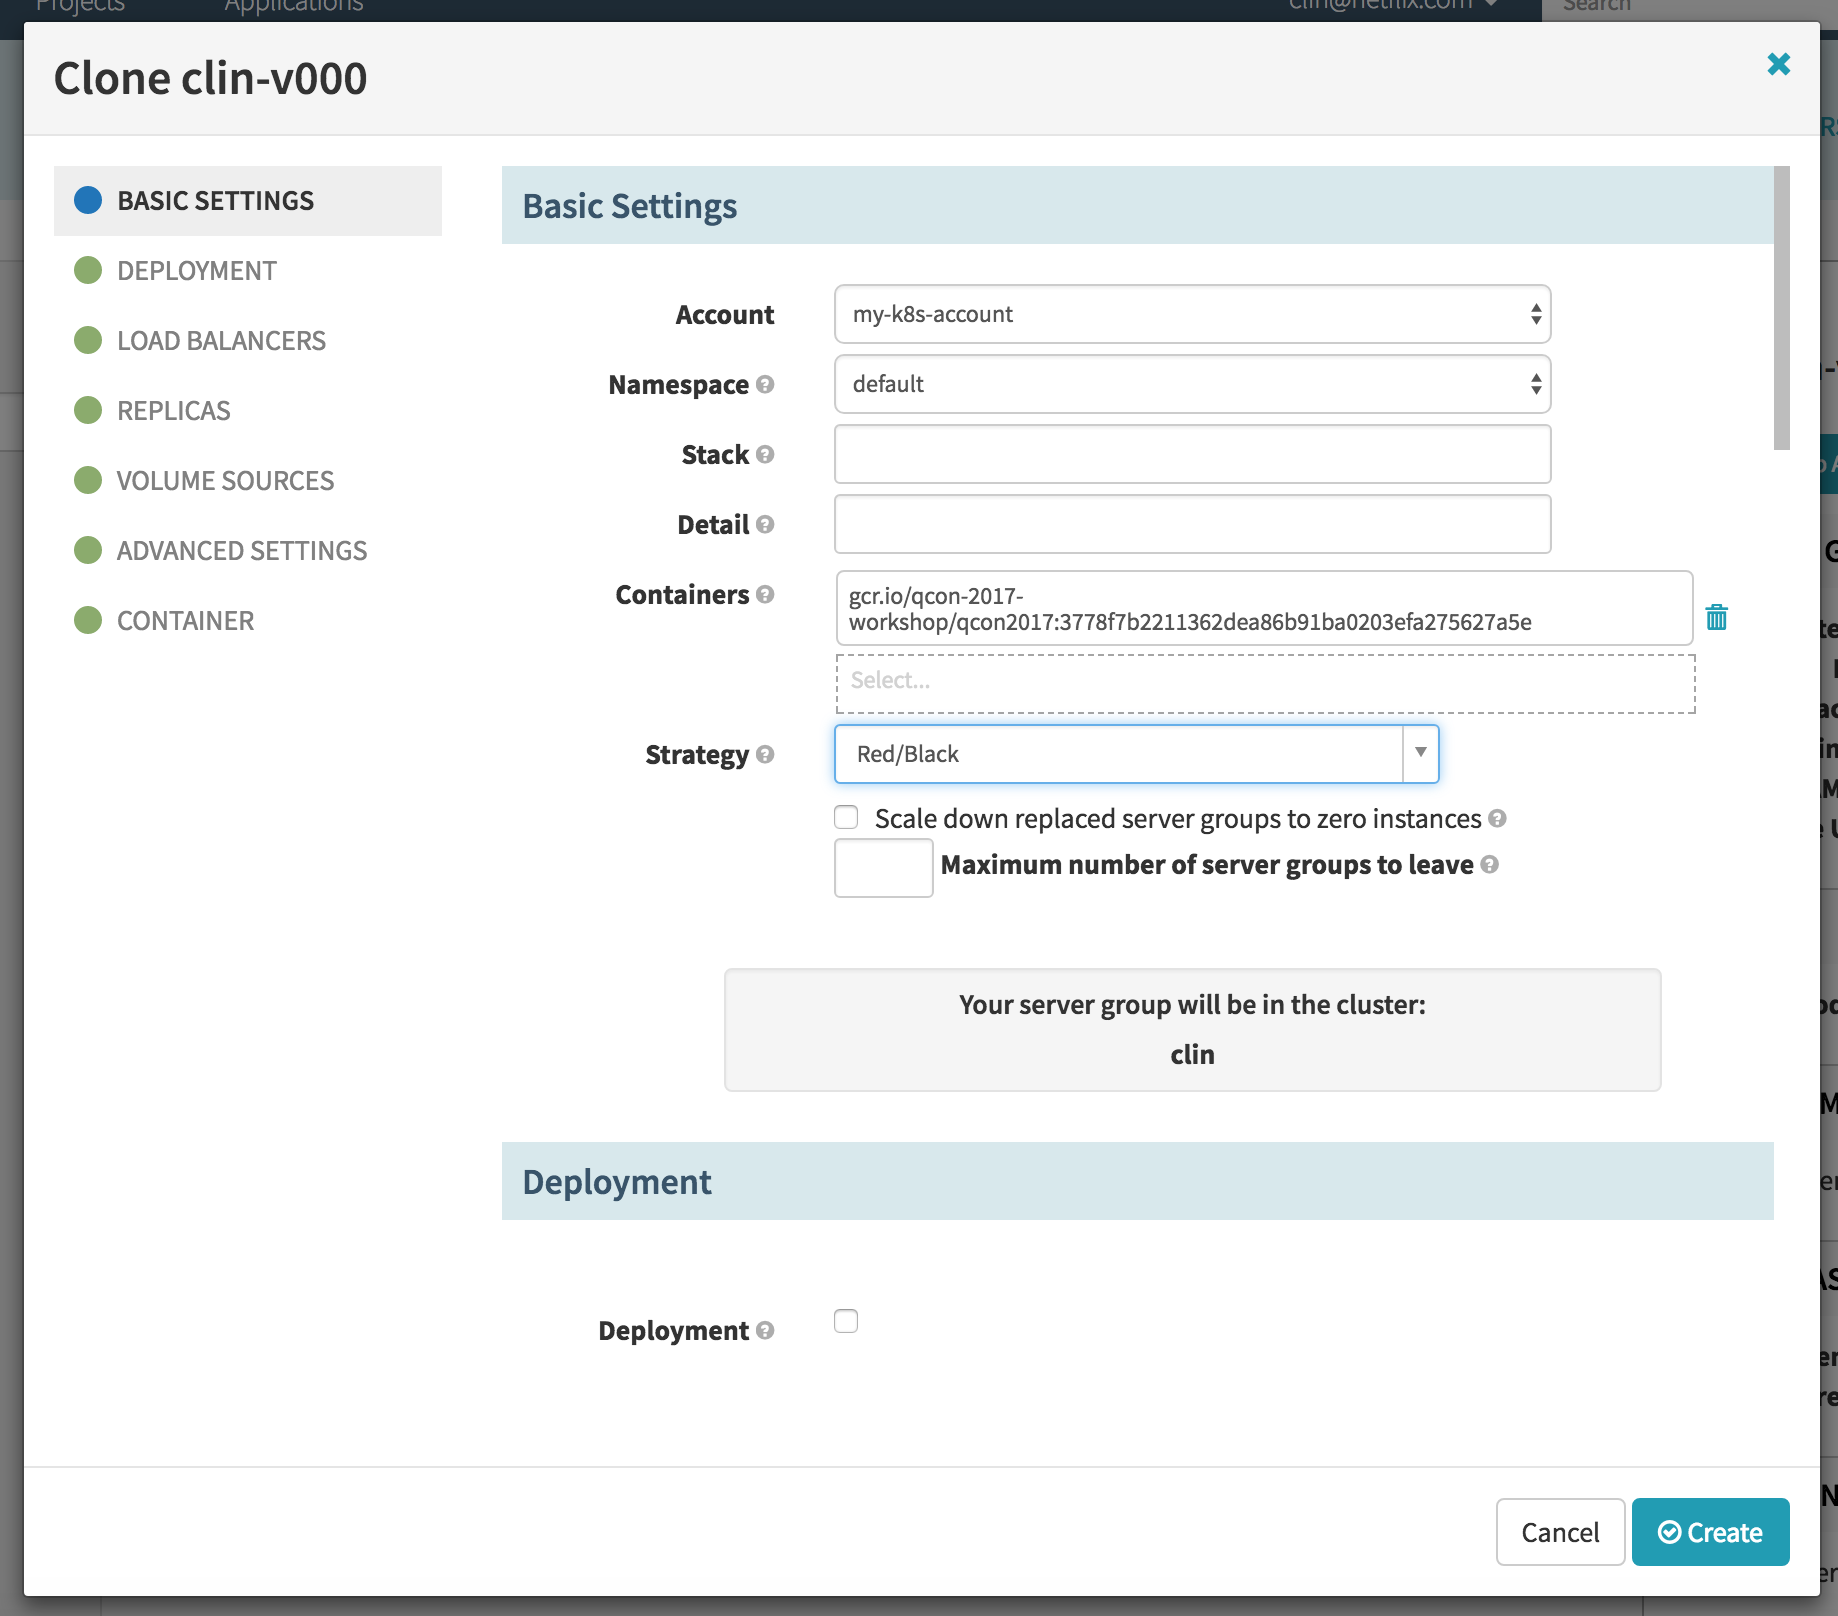
Clone this server group:
- Select the server group
- Click on actions, then select clone server group in the dropdown.
- In the new dialog, select Red/Black push (or Blue/Green push) as the strategy. (Note: Blue/Green replaces Red/Black in Spinnaker v1.30+.)
- Click CREATE.
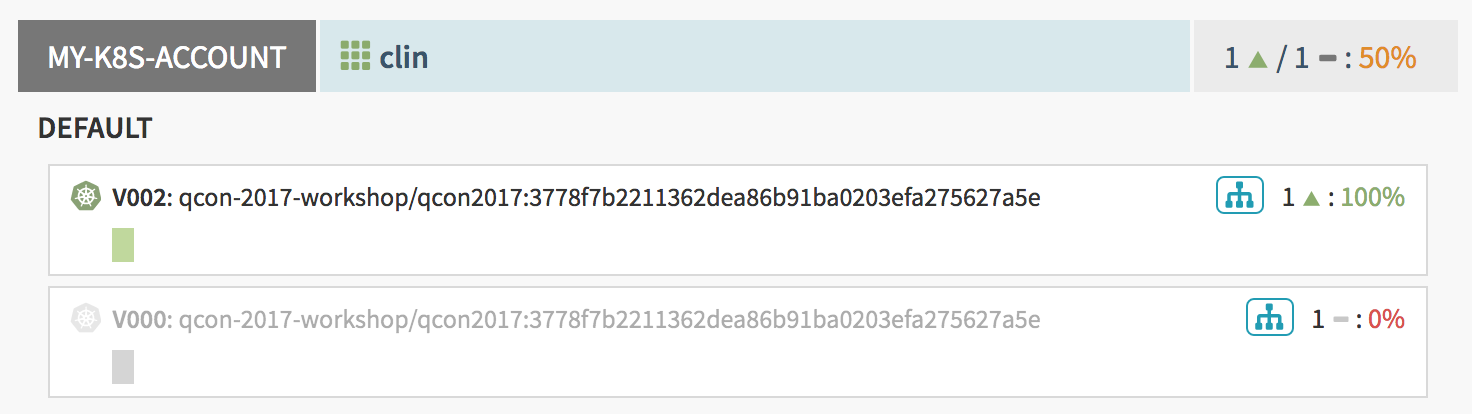
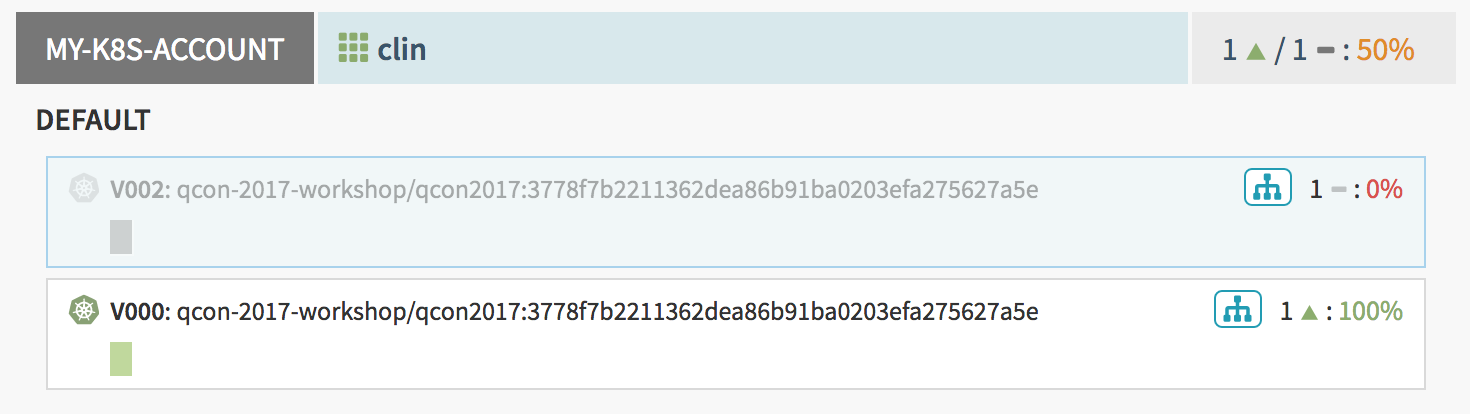
Wait for the task to finish. You should now have at least two server groups in your cluster, with the previous one disabled and the new one enabled.
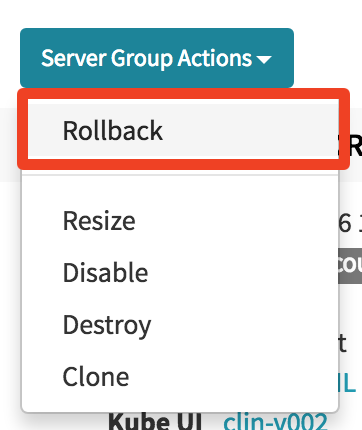
Rollback the deployment:
- Select the new server group
- Click on actions, then select rollback in the dropdown.
- In the new dialog, select the previous server group from the dropdown.
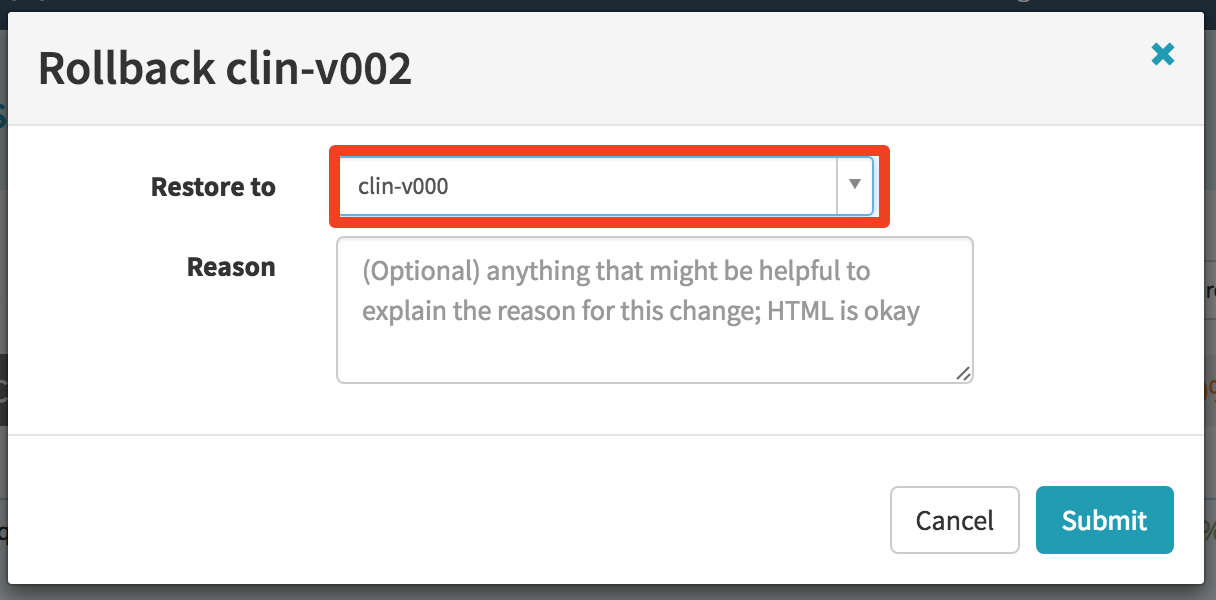
- Click OK
You should see a task window and the deployment being rolled back safely and automatically. The previous server group should be eneabled and the current one disabled.
Making a deployment pipeline safer
Creating your deployment pipeline
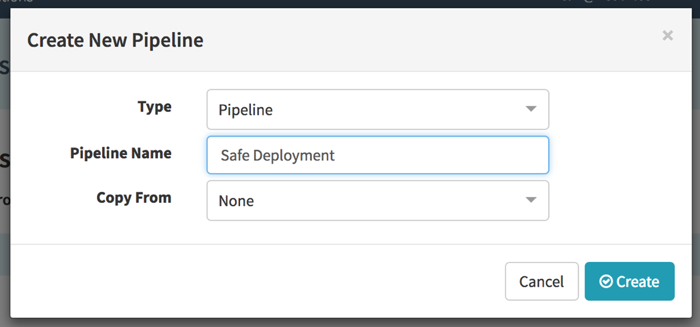
Go to the Pipelines screen and select Create New
Select Pipeline as the type and name it Safe Deployment
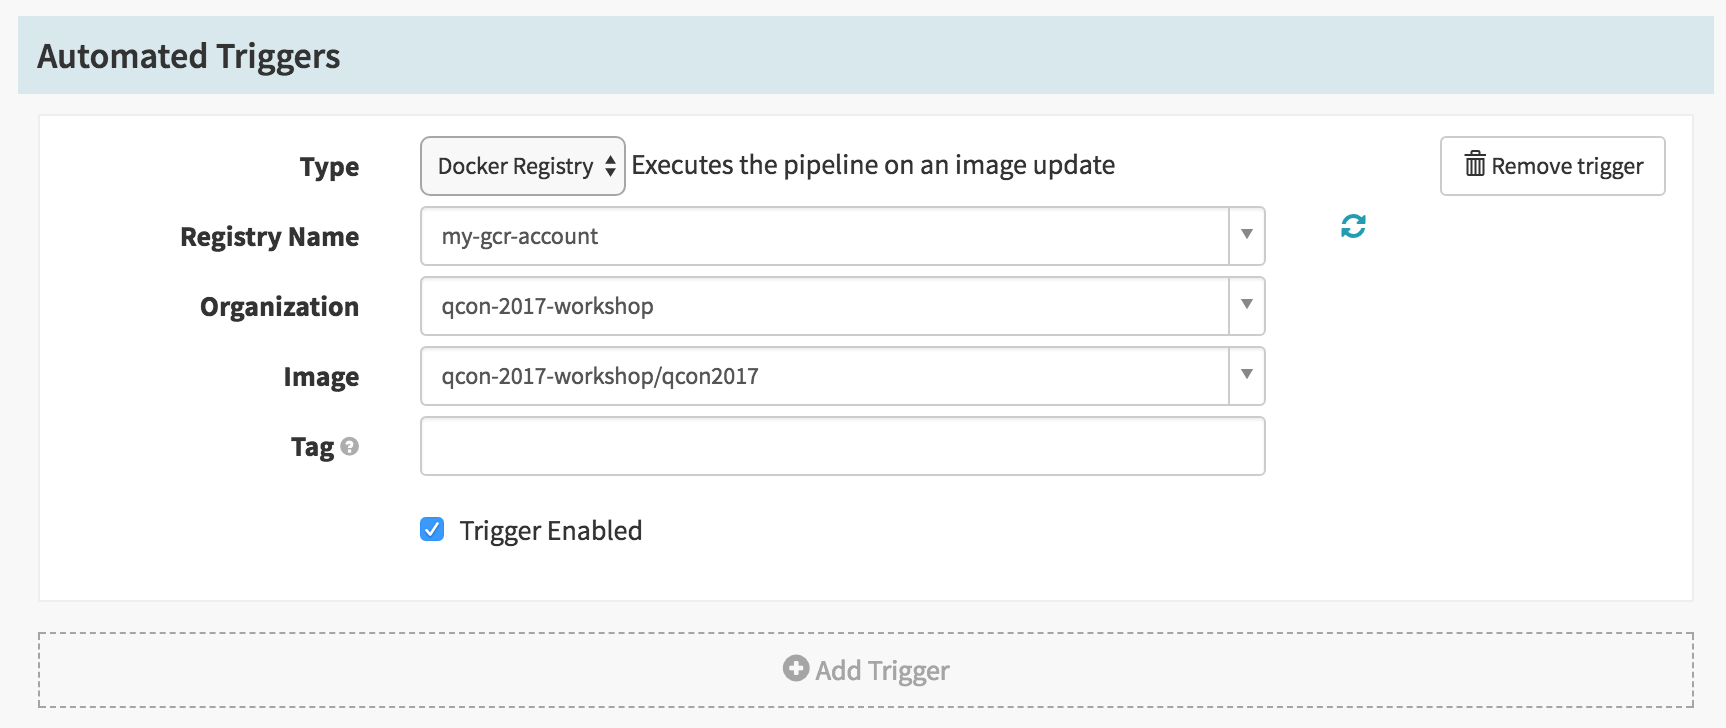
Under Configuration, add a Docker Registry trigger
Point it to your Docker registry and image
Add a new stage of type Deploy
Add a new cluster, select copy configuration from an existing template.
Select your cluster.
Click Use this template.
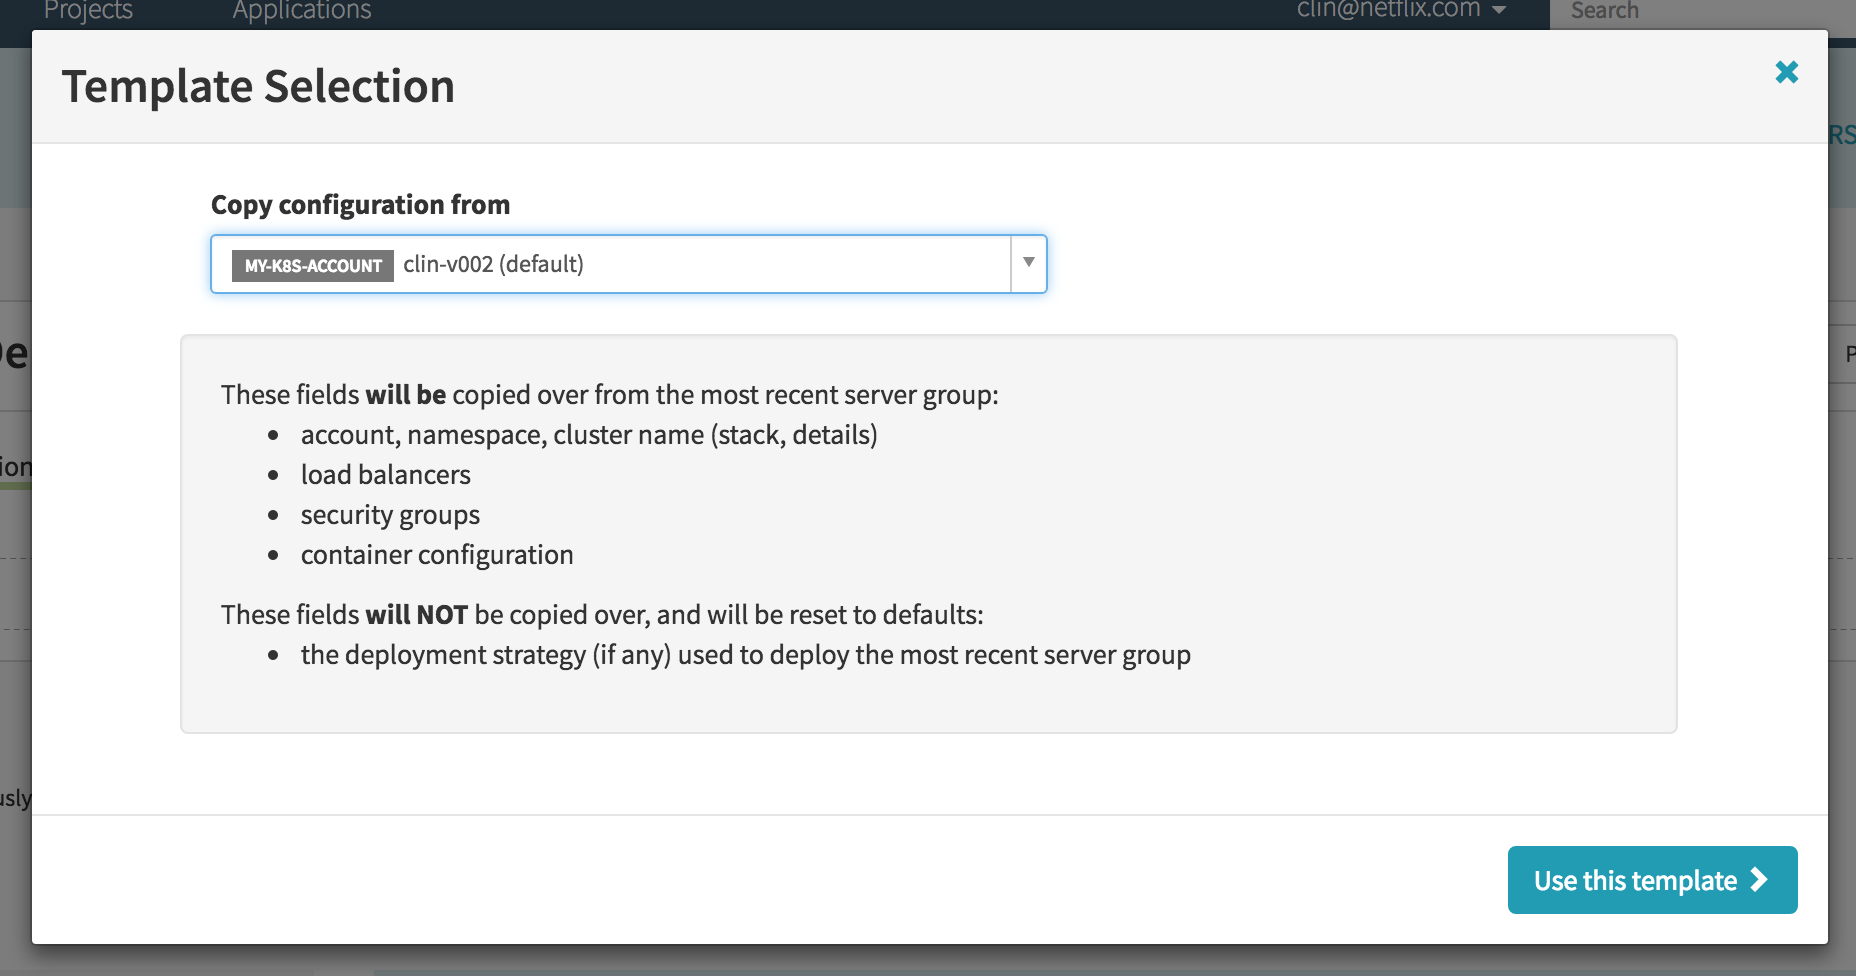
You should see the details for your cluster filled in.
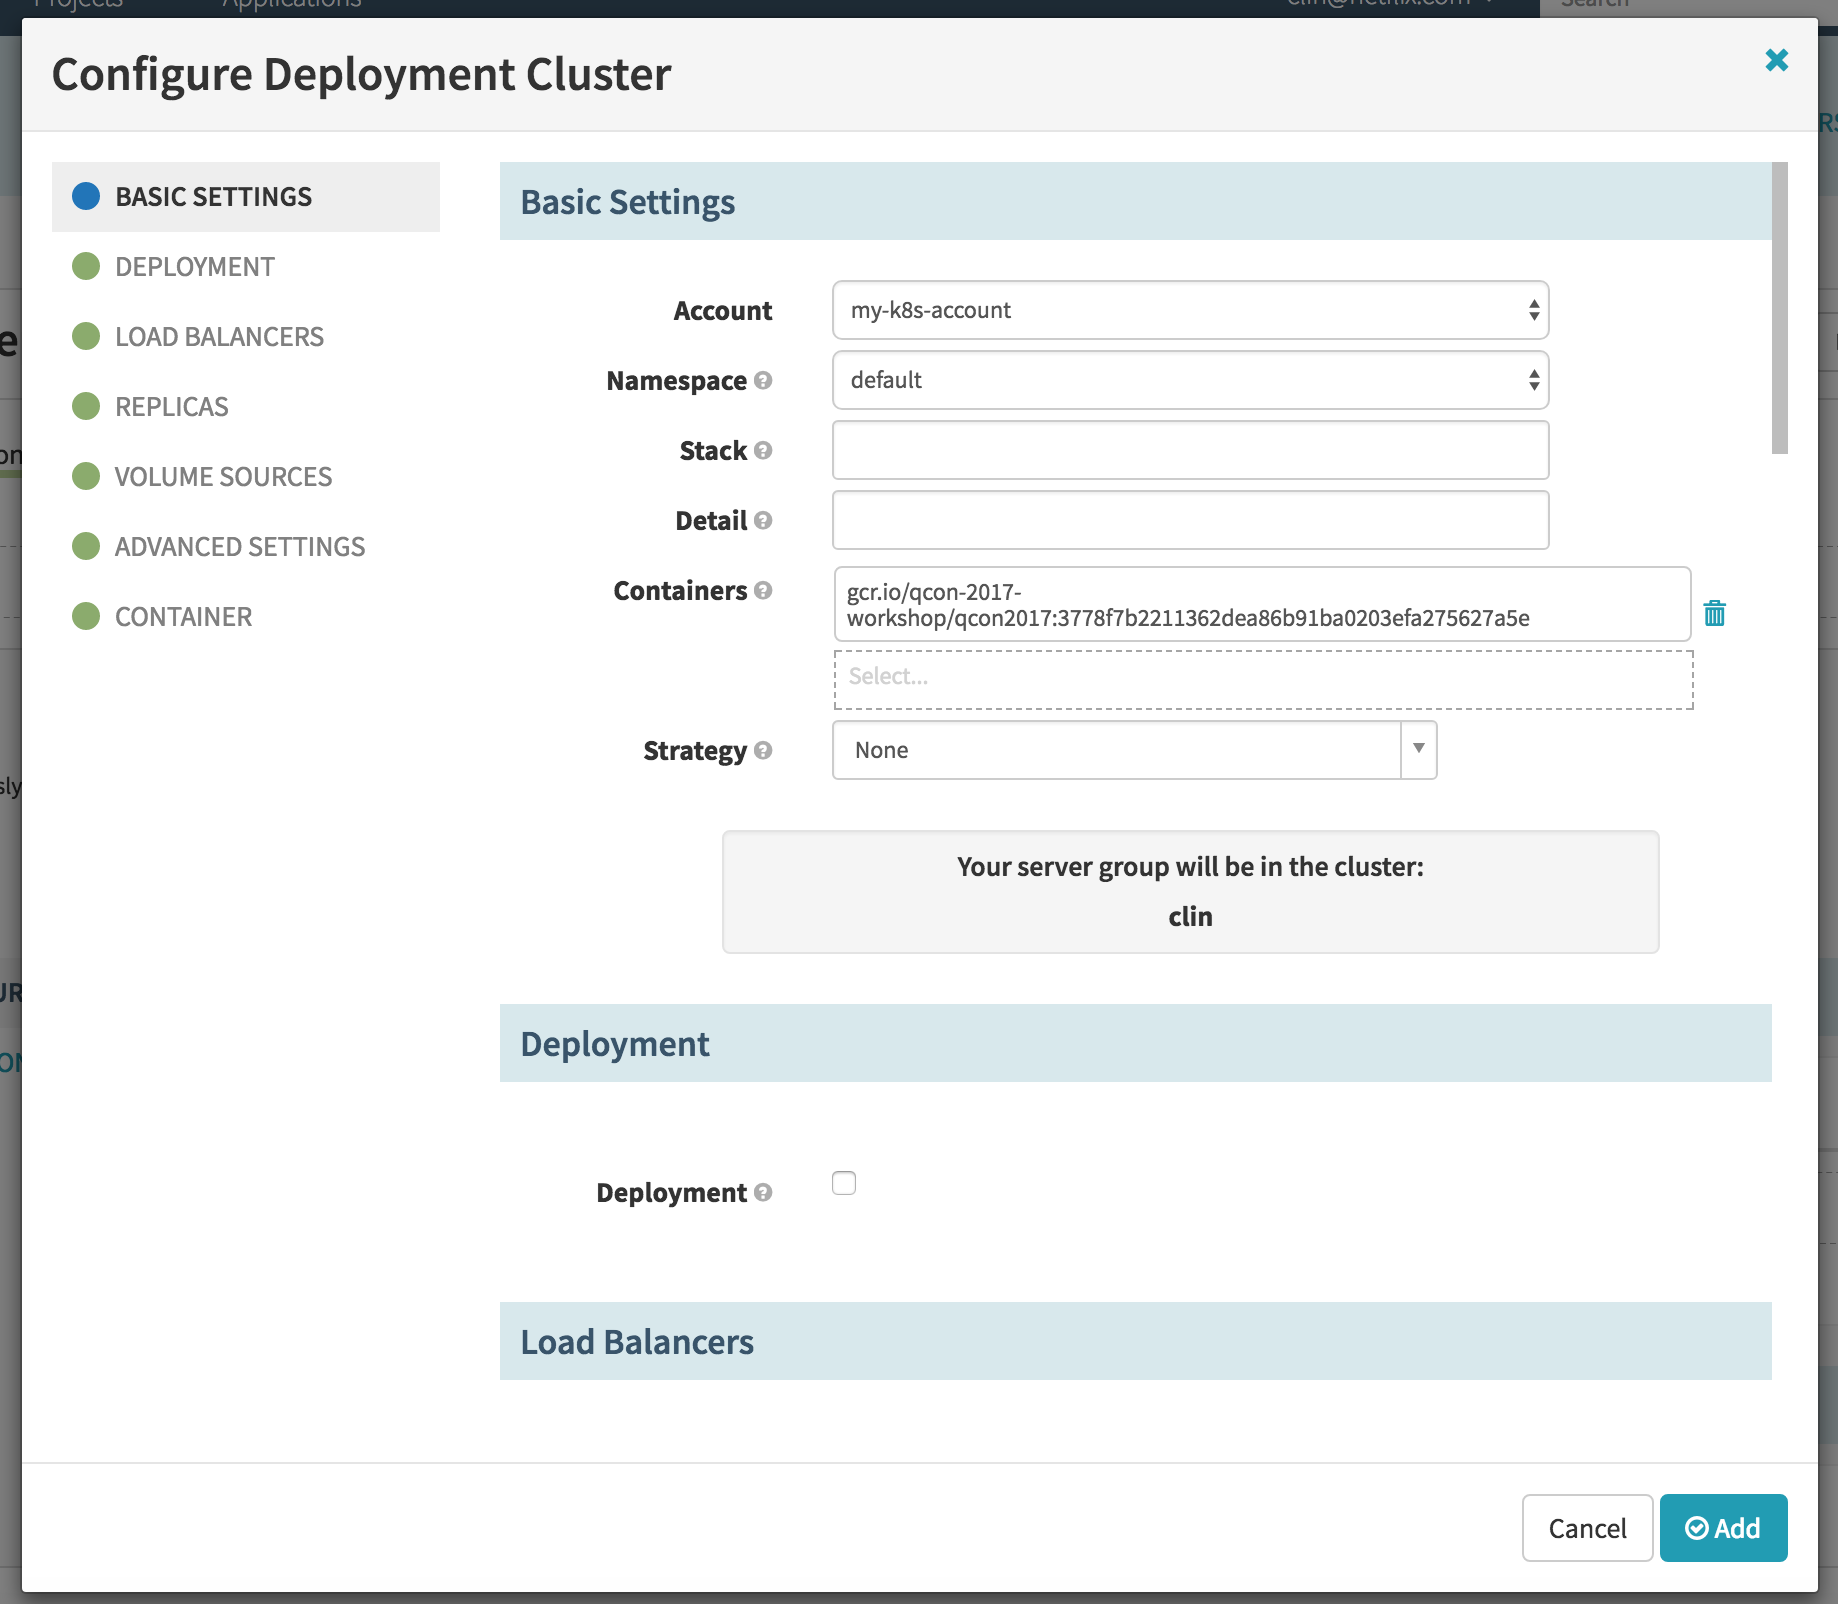
Select Add
Save the pipeline
Adding an execution window to deployment pipelines
Execution windows allow you to restrict the times of the day or week when deployments can happen. By using execution windows, you can ensure that deployments don’t interfere with times where your service is at peak demand. You can also use execution windows to make sure that there is always someone in the office ready to manually intervene or rollback your pipeline.
Let’s modify our existing pipeline to add a deployment window.
Navigate to the deploy stage of your pipeline.
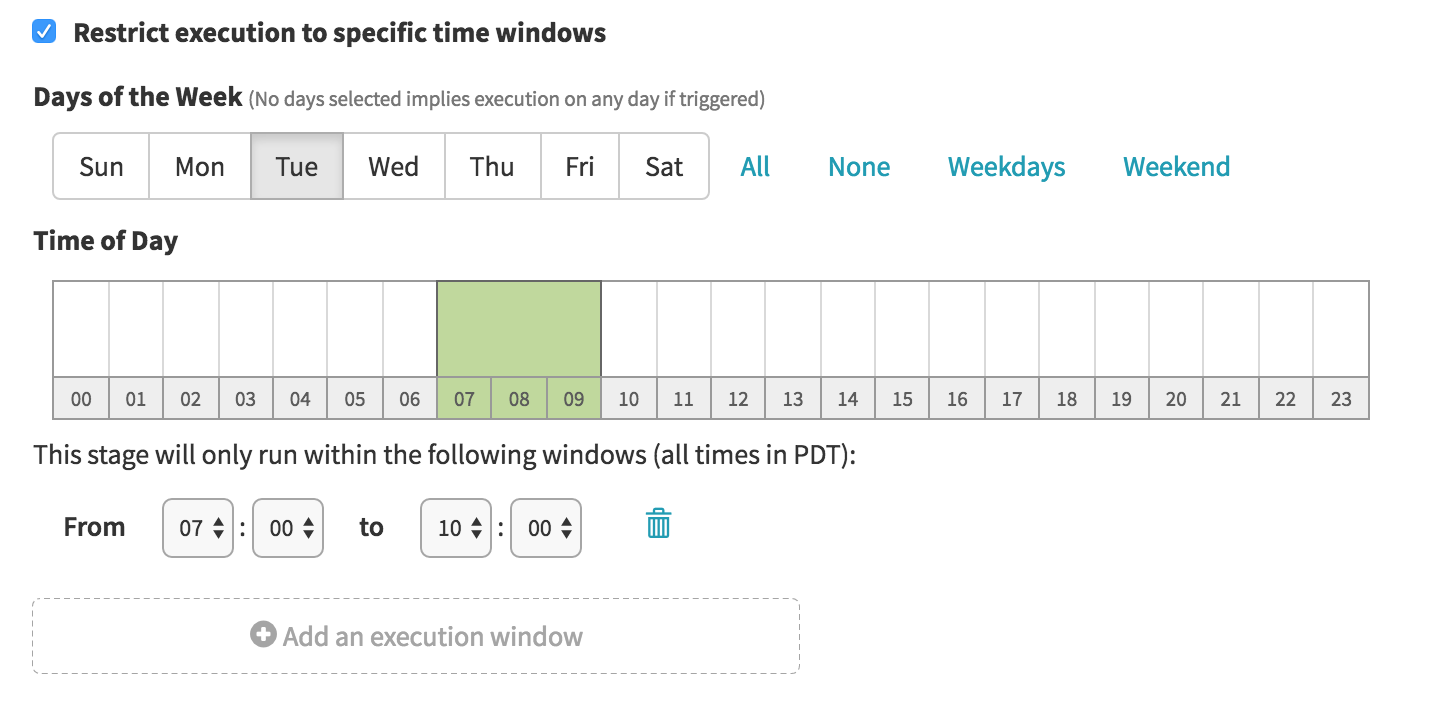
Check the Restrict execution to specific time windows checkbox
Click on Add an execution window
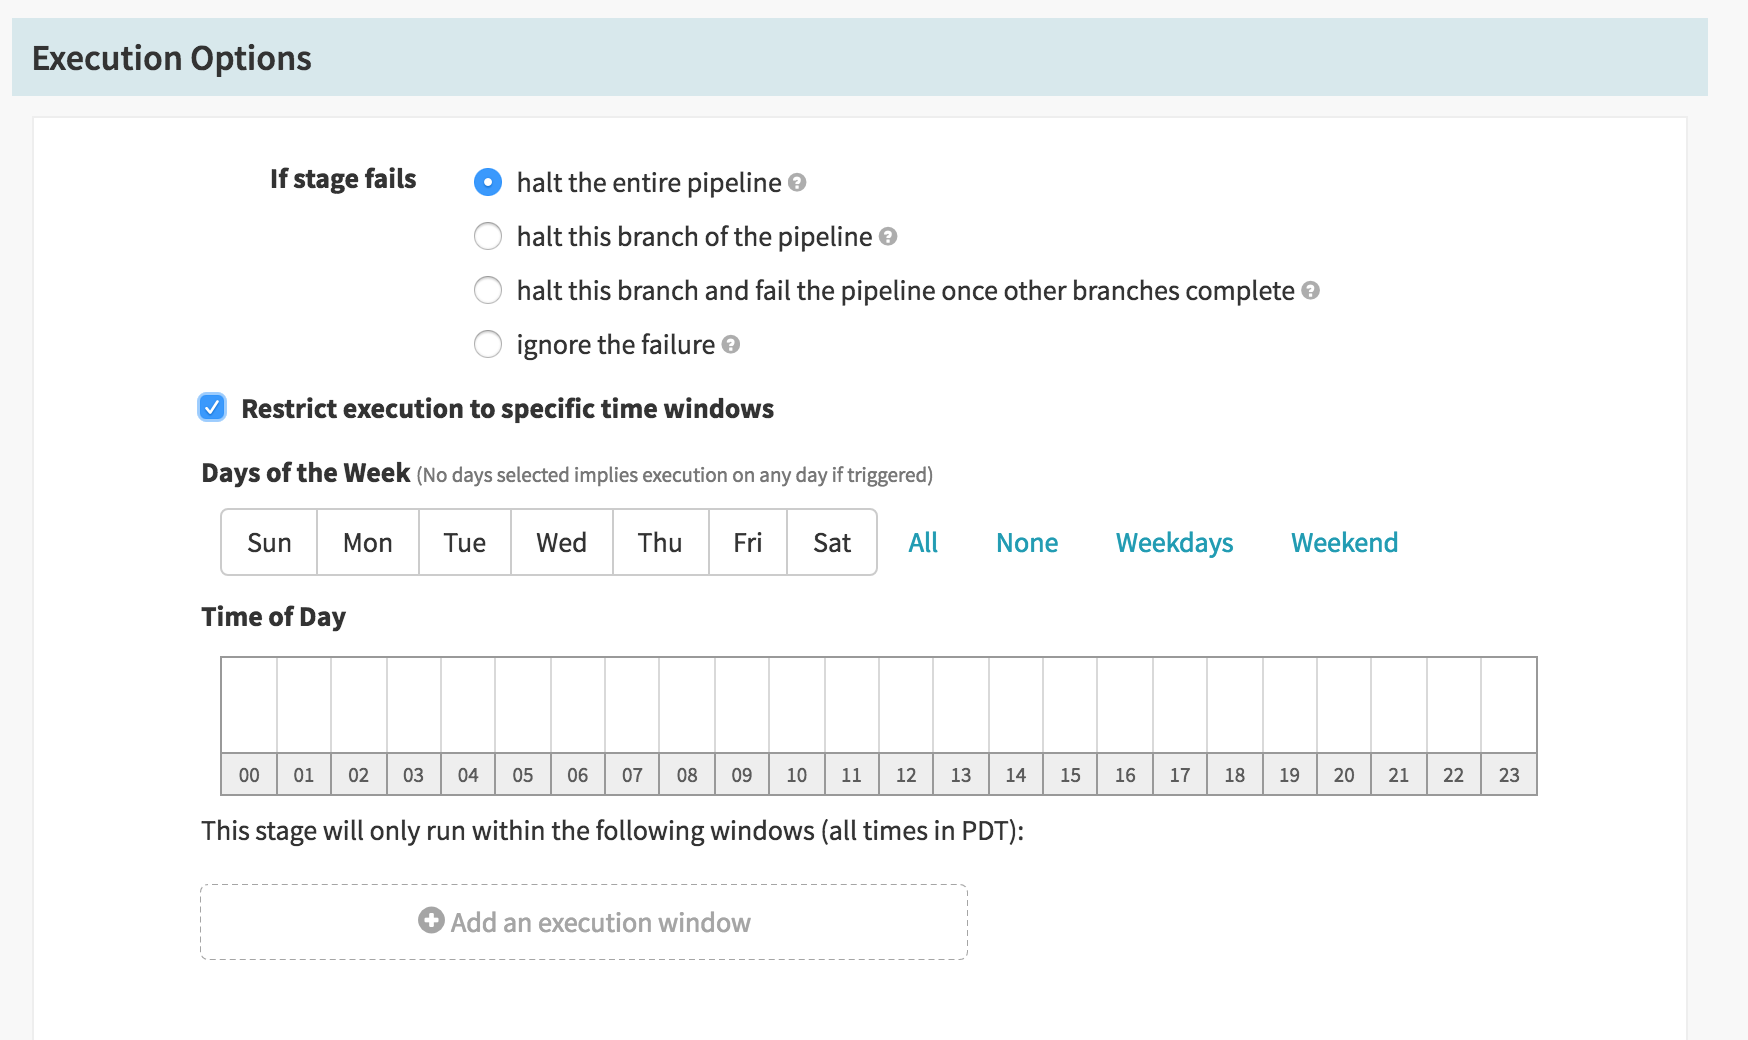
Enter a start time and end time that will block the deployment if deployed right now.
Save the pipeline
Go to the pipeline screen by clicking on the back arrow next to the pipeline name
Click on Start Manual Execution for your pipeline.
You will see a warning that your deploy stage is waiting for an execution window.
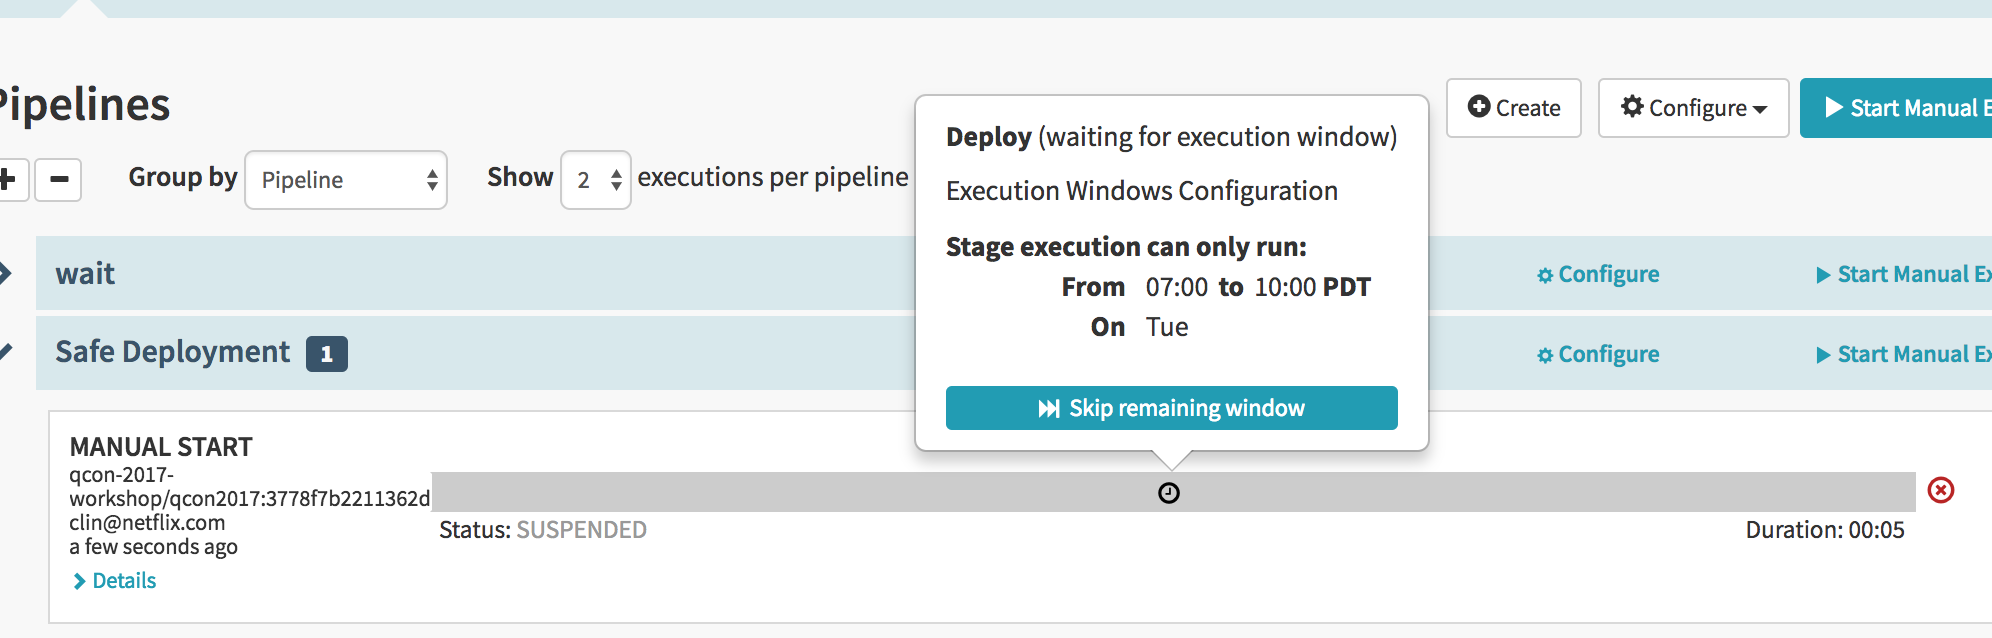
You can click on Skip Execution Window to start the stage right away.
Go back and modify the execution window so your stage falls within the current window.
Execute your pipeline again. You should see your deployment continue without waiting.
Adding a Manual Judgment to deployment pipelines
Manual Judgments serve as a gate for your pipeline. You can add manual judment stages to interrupt the pipeline execution to run a manual check. This is great for teams that have a manual or out-of-band QA process.
Let’s modify our pipeline by adding a manual judgment stage.
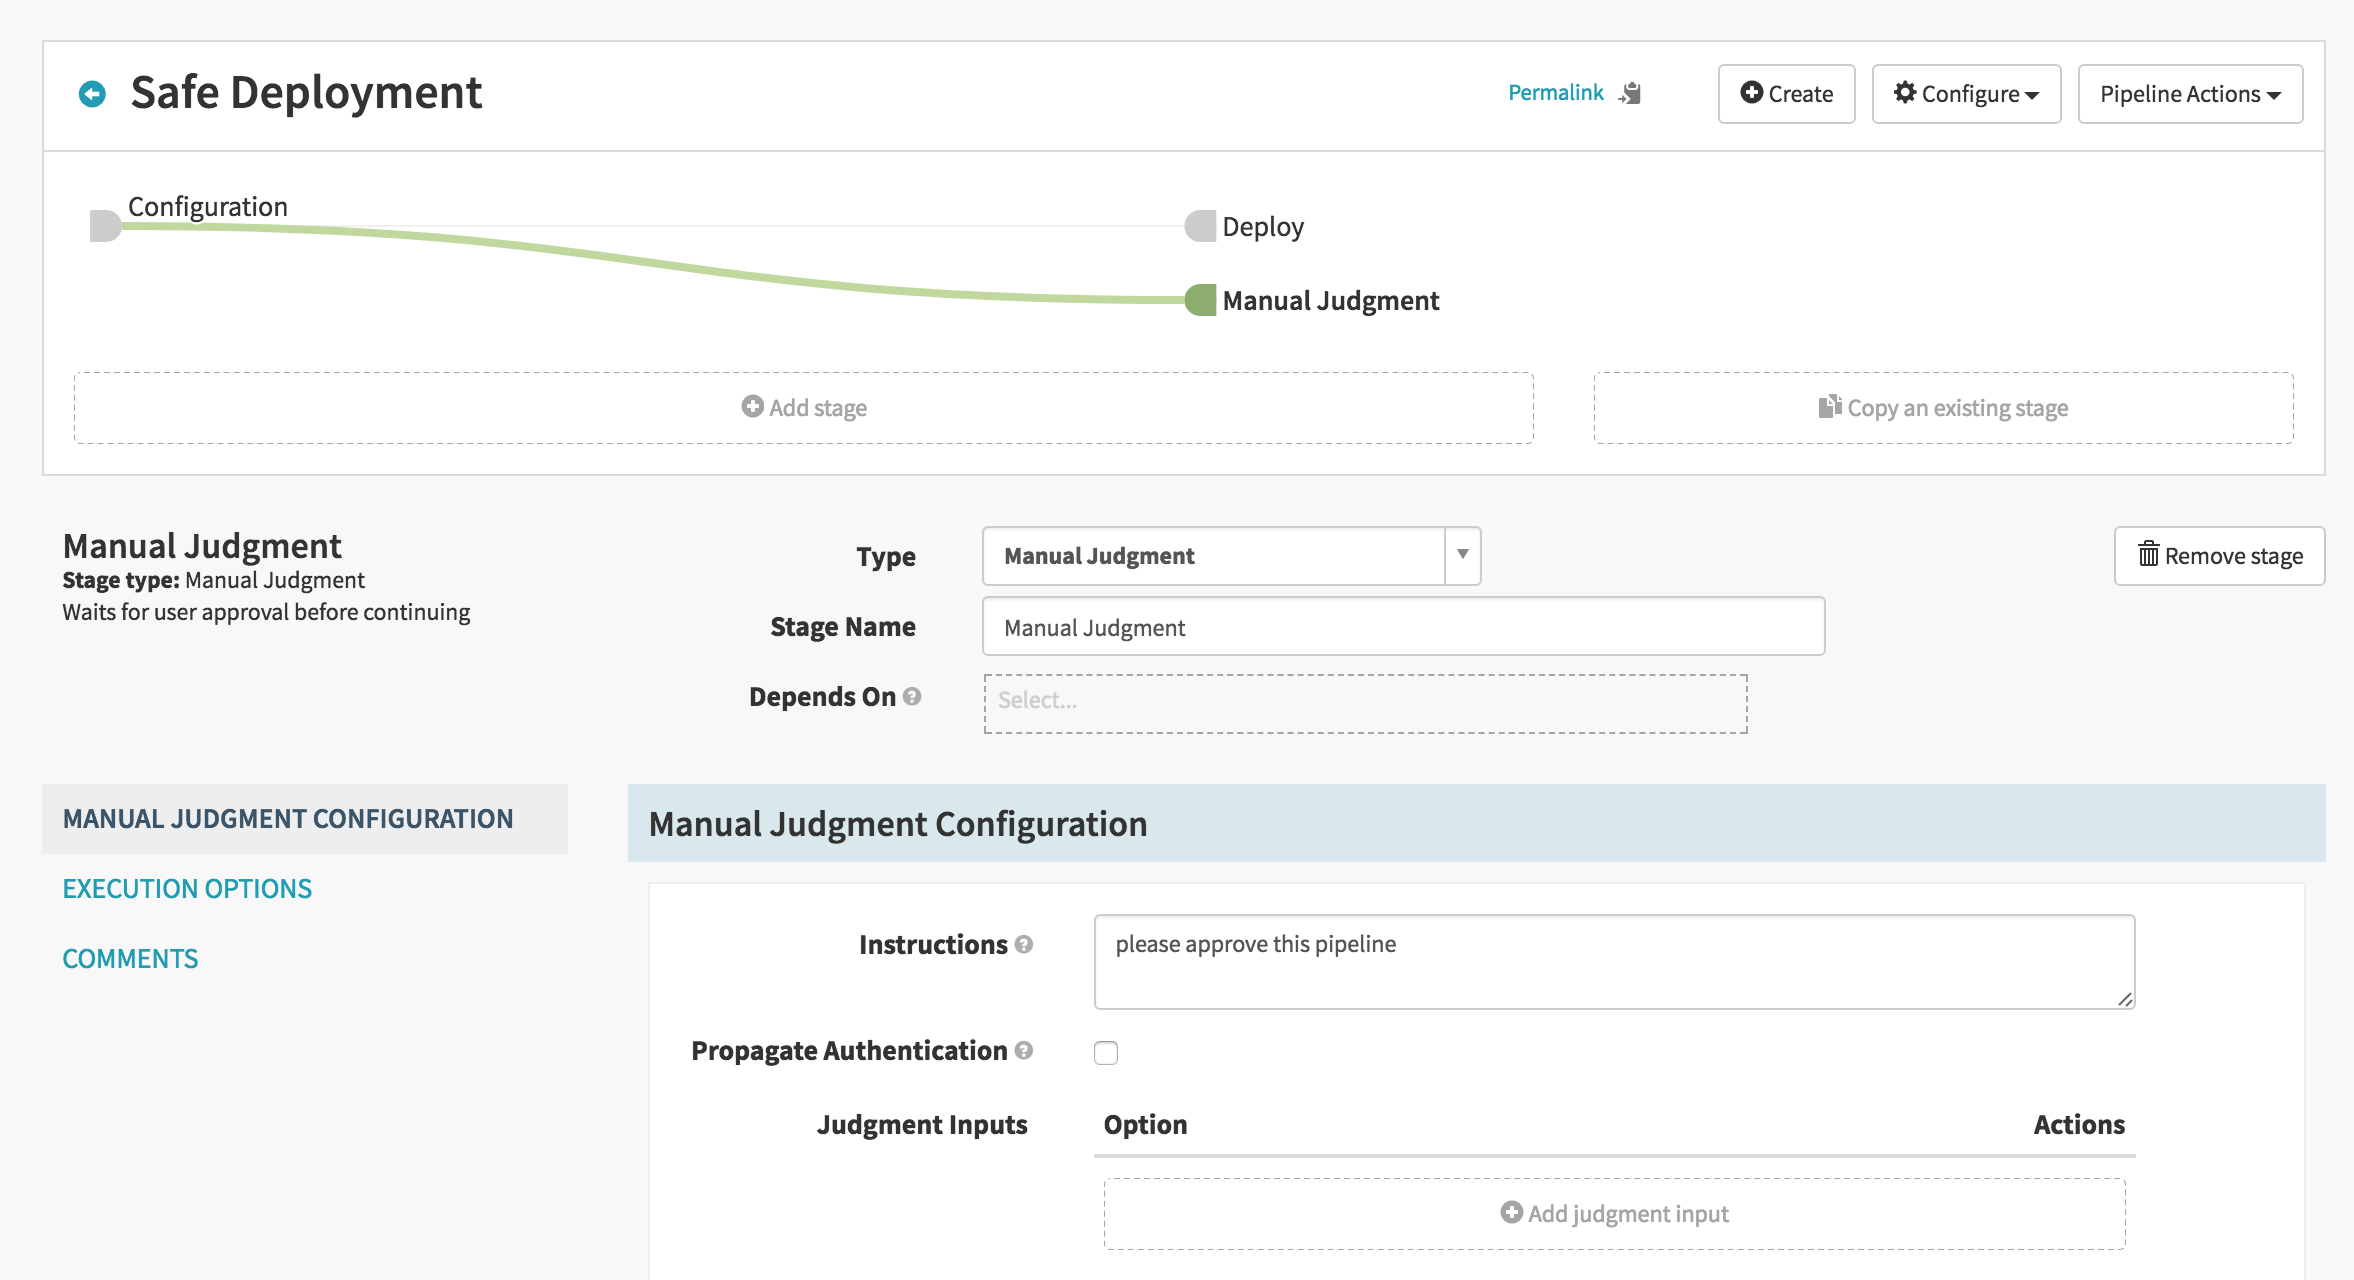
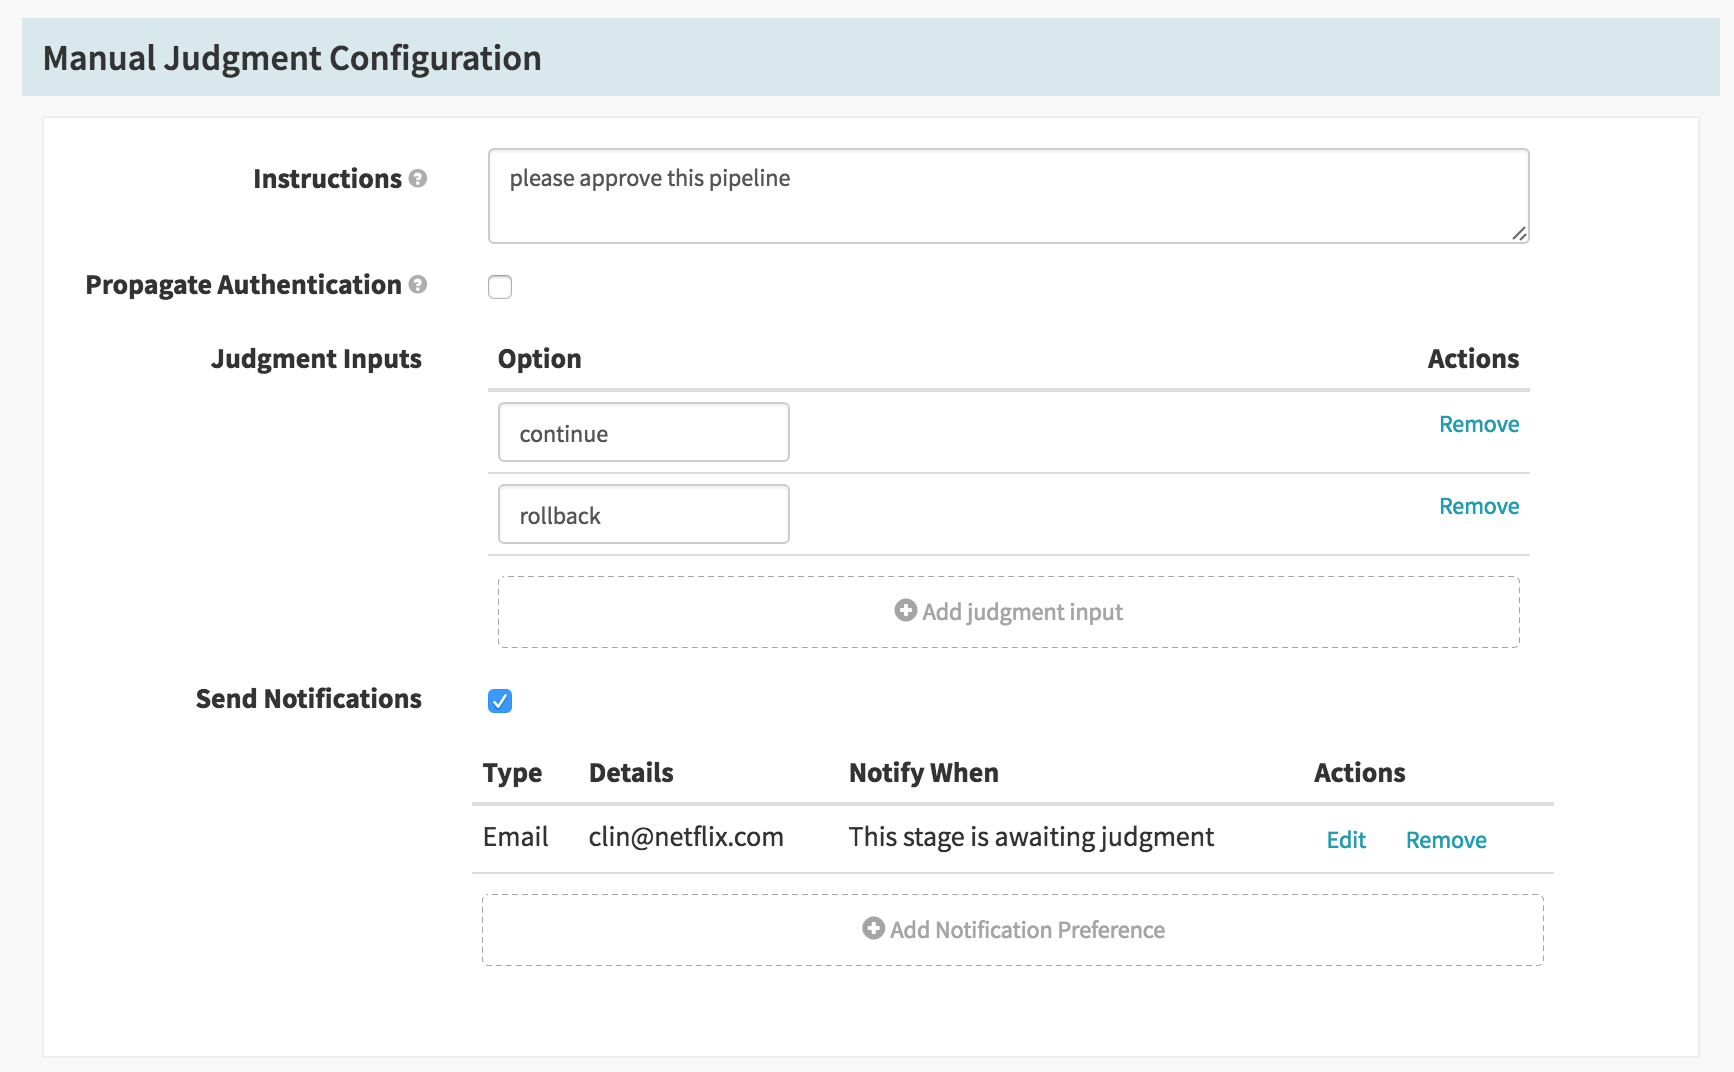
Click on Configuration and select Add new stage
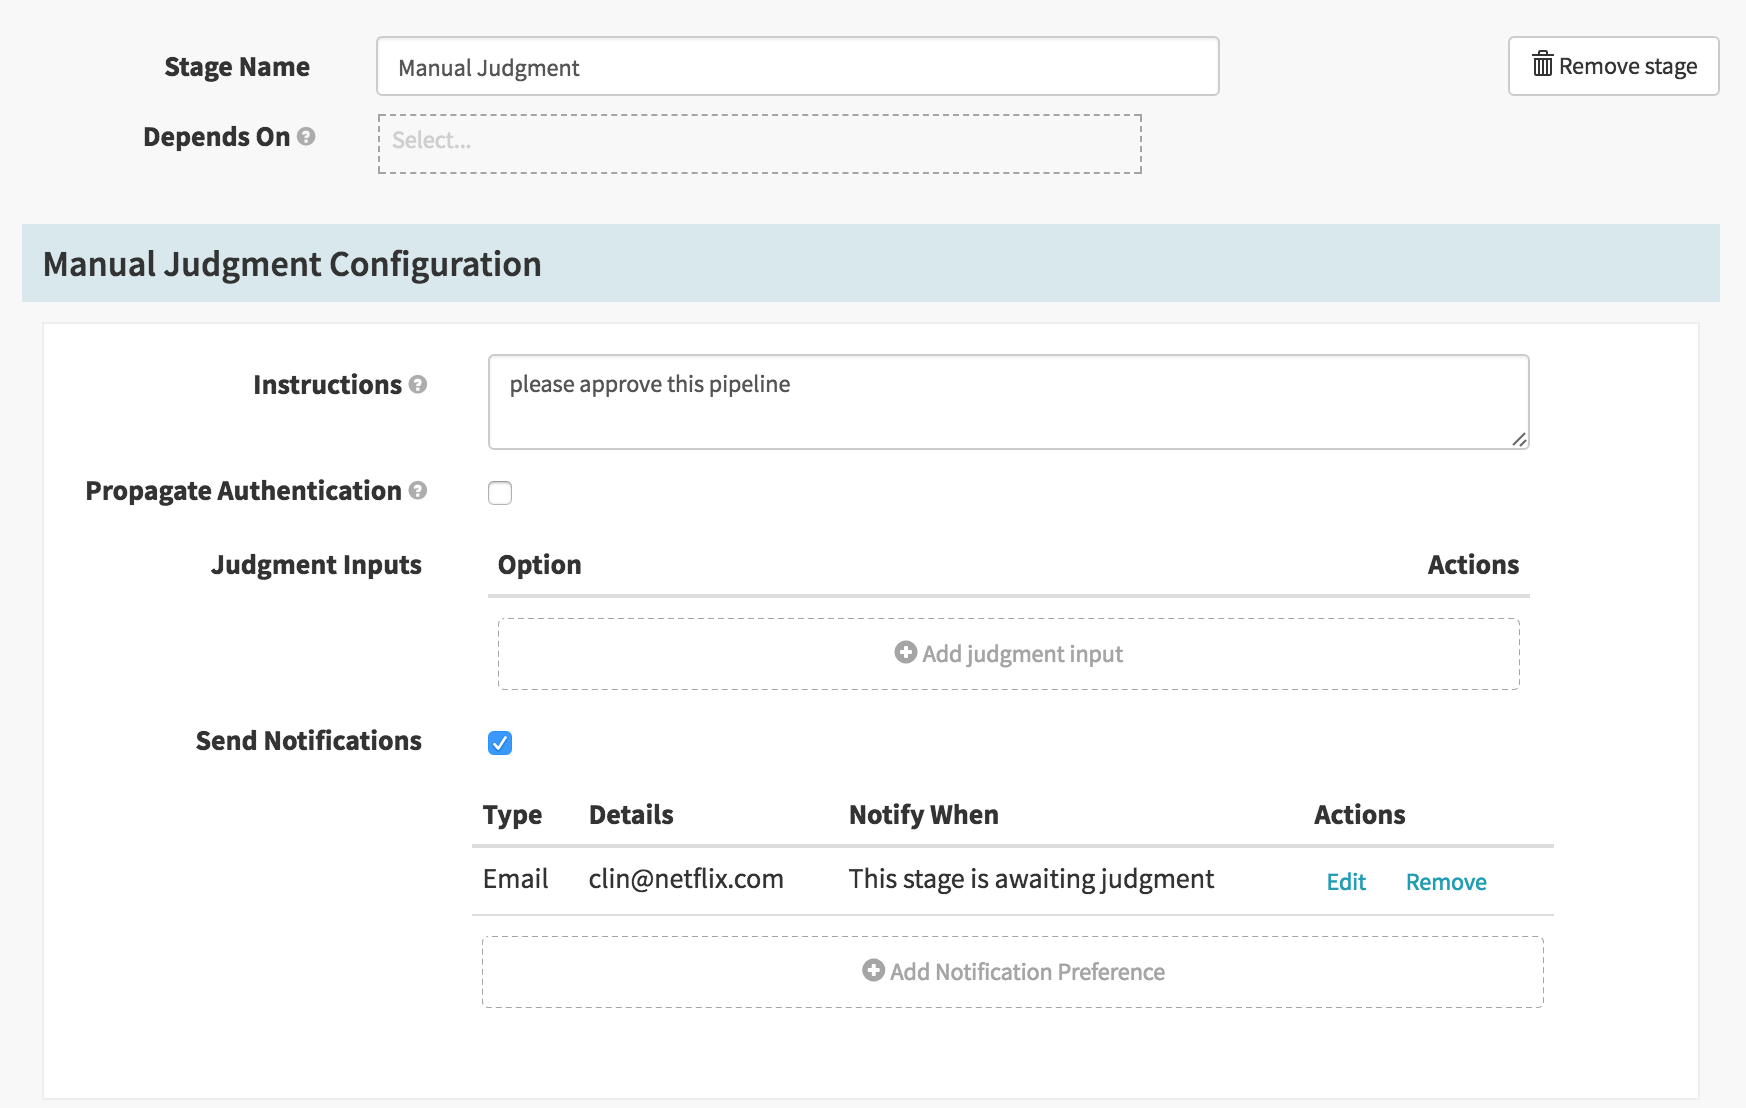
Enter “please approve this pipeline” in the instructions
Click on Add Notification Preference.
In the popup dialog:
- select type Email
- Enter your email address
- Select to notify when This stage is awaiting judgment.
Click Update
Go to your deploy stage
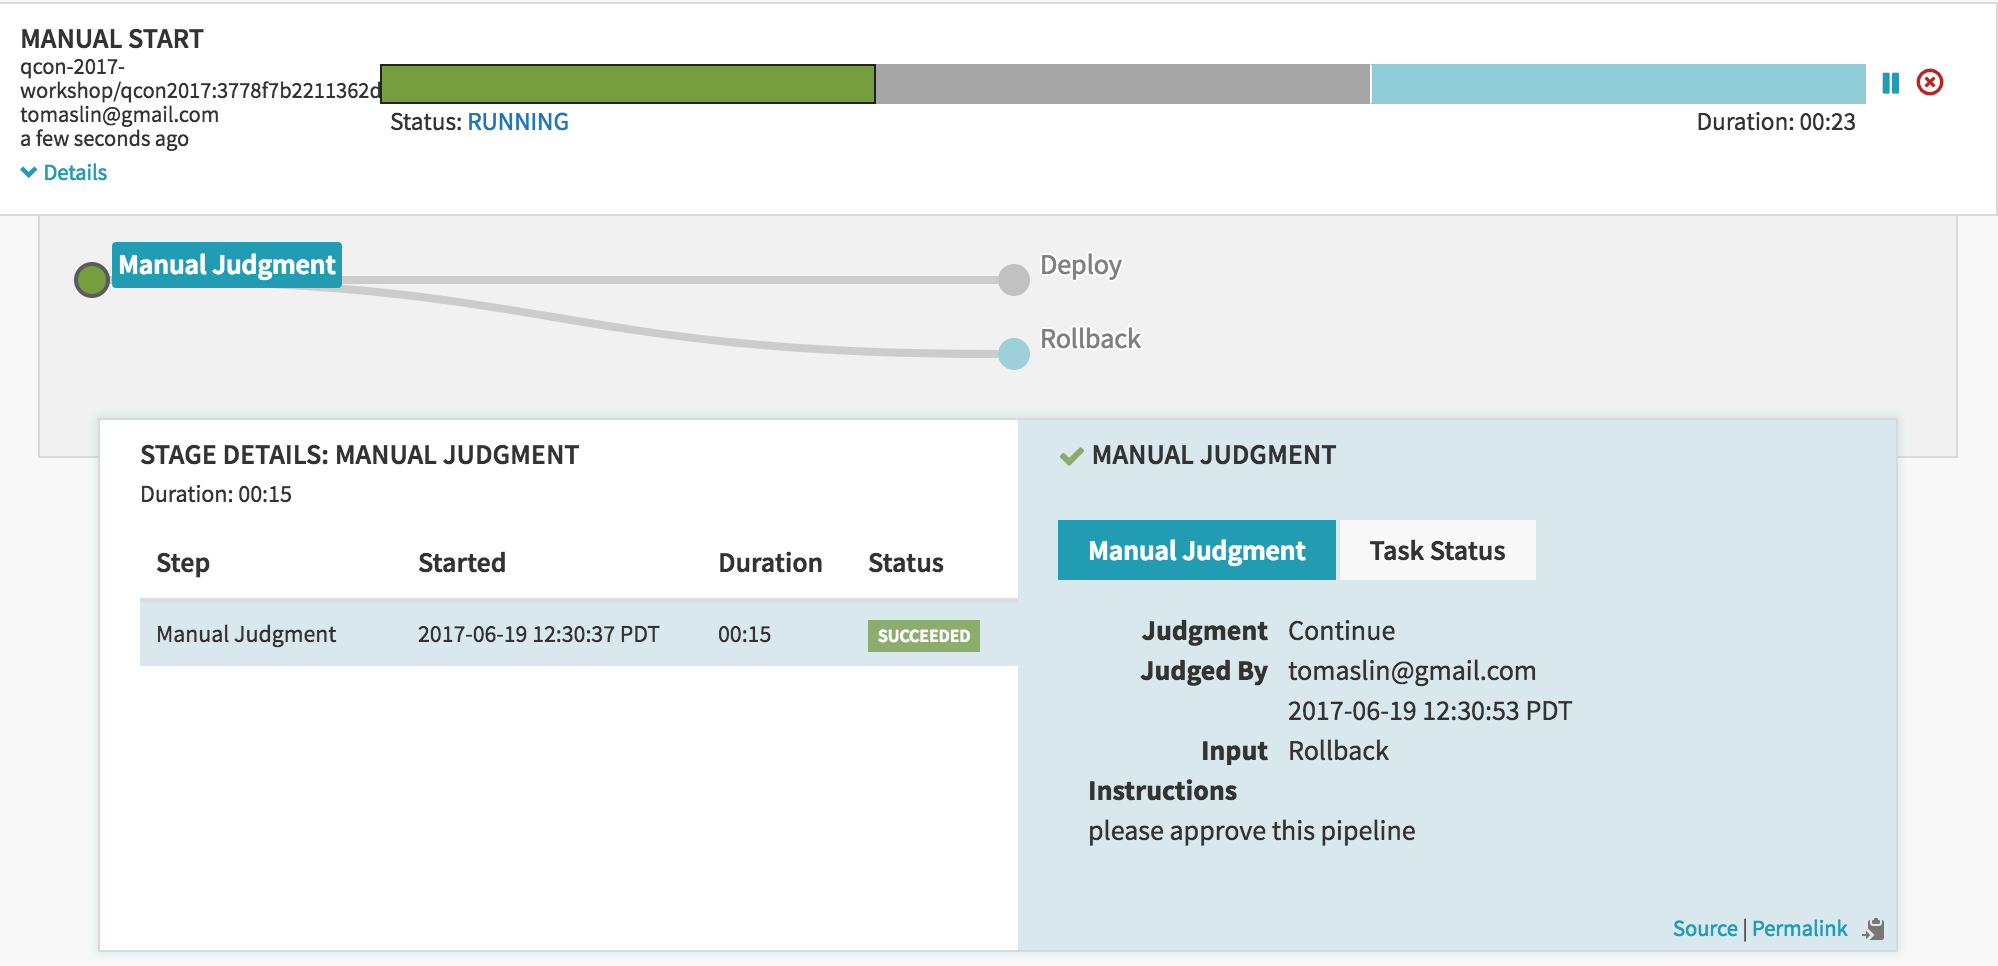
Select Manual Judgment in the Depends On field
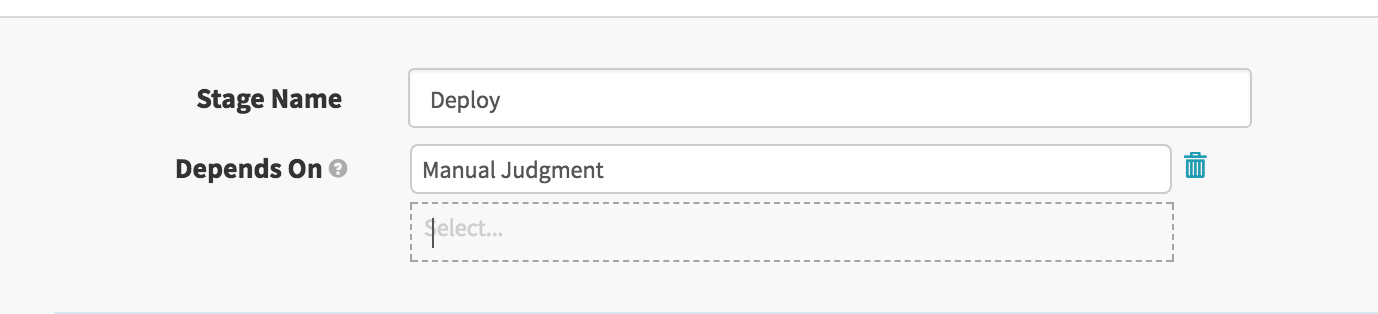
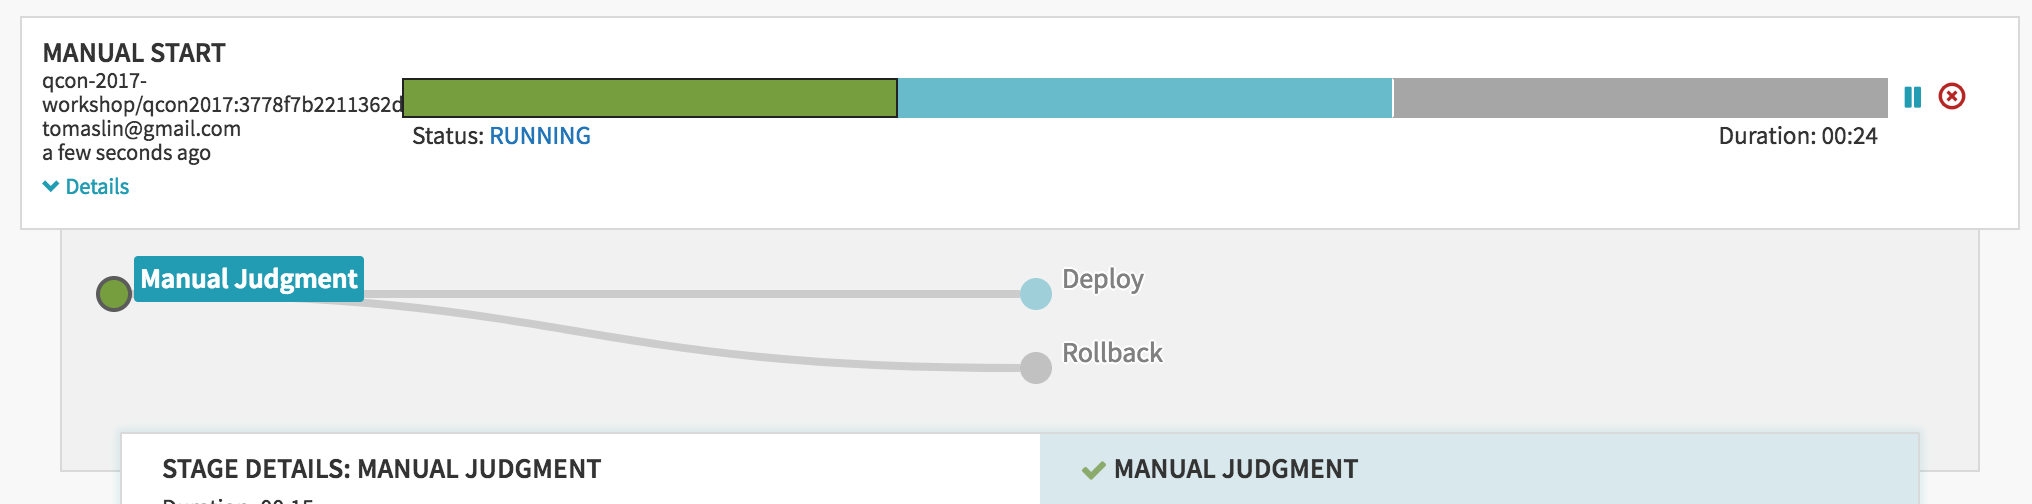
Your pipeline view should look like this.

Save this pipeline and run it.
Check your email. You should see one that says that your pipeline is awaiting judgment.

Click on the link in your email. You should see the manual judgment awaiting approval.
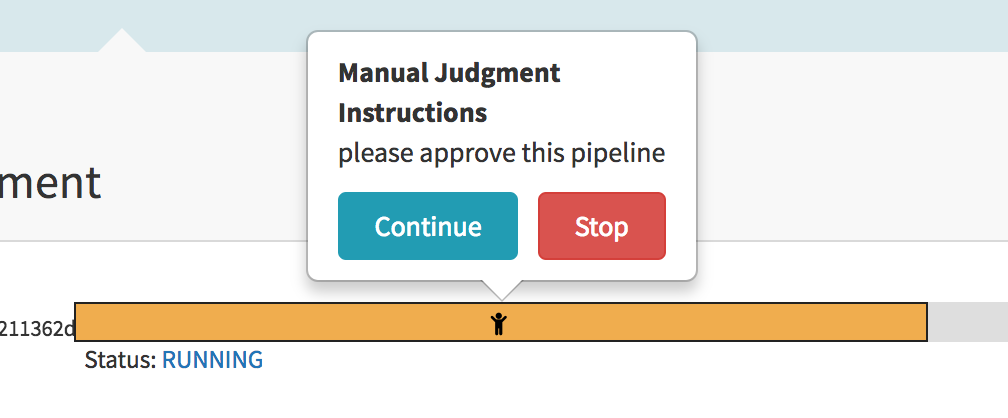
Click on Continue
Your pipeline should run now.
Changing pipeline behavior based on selected judgment
Manual Judgments can also be used to run a rollback task based on some input.
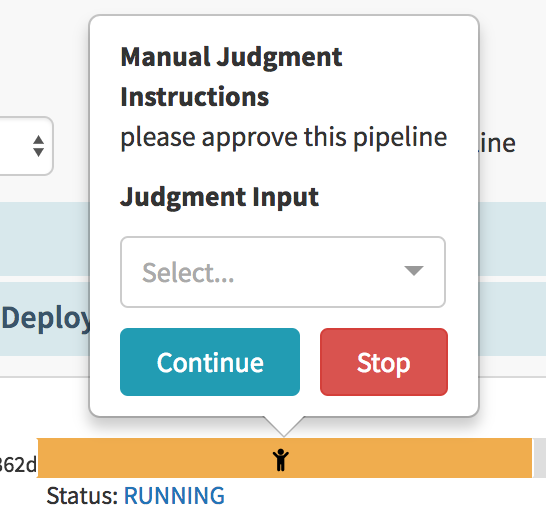
Go to your Manual Judgement stage and type in “continue” as an input option.
Click on Add Judgment Input and type in “rollback.”
Add a new stage called Rollback of type Wait
In the new stage, check the Conditional on Expression checkbox and enter ${ #judgment("Manual Judgment").equals("rollback")}. In this step, we’re telling Spinnaker to only run this stage if the rollback option was selected.

Select the deploy stage, check the Conditional on Expression checkbox and enter ${ #judgment("Manual Judgment").equals("continue")}.
Save your pipeline and run it.
In the manual judgment stage, select rollback as your input.
You should see that the deploy stage is skipped while the rollback stage runs.
Run your pipeline again, this time selecting continue as your input.
The rollback stage should not run
Creating an automatic rollback pipeline
You can also create a pipeline to run in case a deployment fails.
For this exercise, we’re going to create a pipeline that will trigger if a deployment pipeline fails.
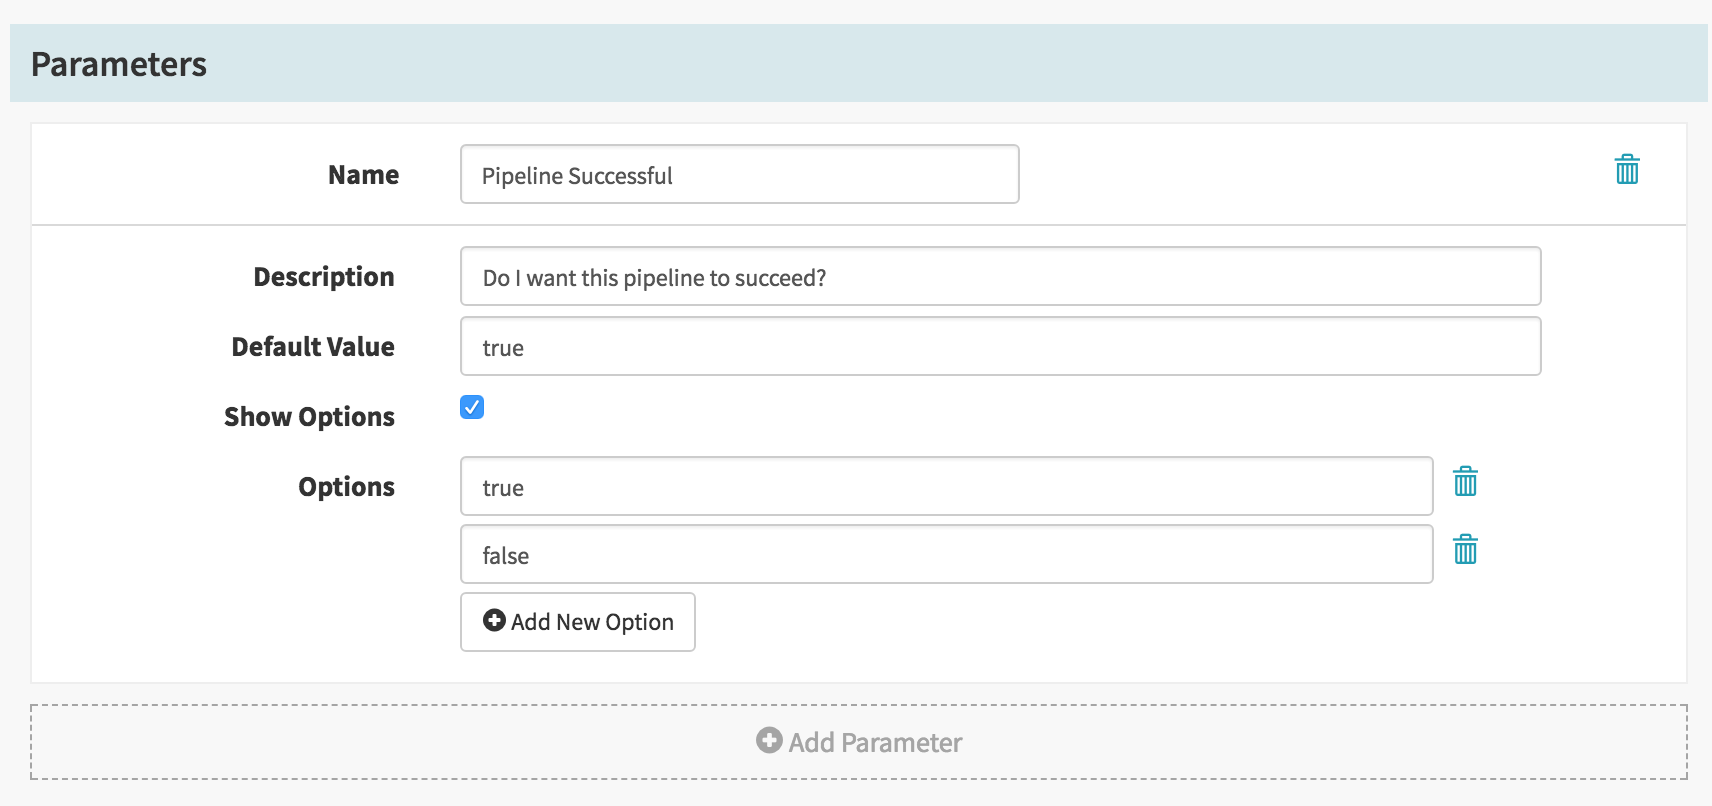
We’re going to make a parent pipeline that will allow us to decide its success status based on a parameter.
Create a new pipeline called Parent Pipeline
- Click
Show Options - Enter
trueas an option - Click on Add New Option
- Enter
falseas another option.
Add a new stage of type Check Preconditions.
Add a new Precondition:
- Set Check to Expression
- Enter
${ parameters["Pipeline Successful"].equals("true") }as the expression.
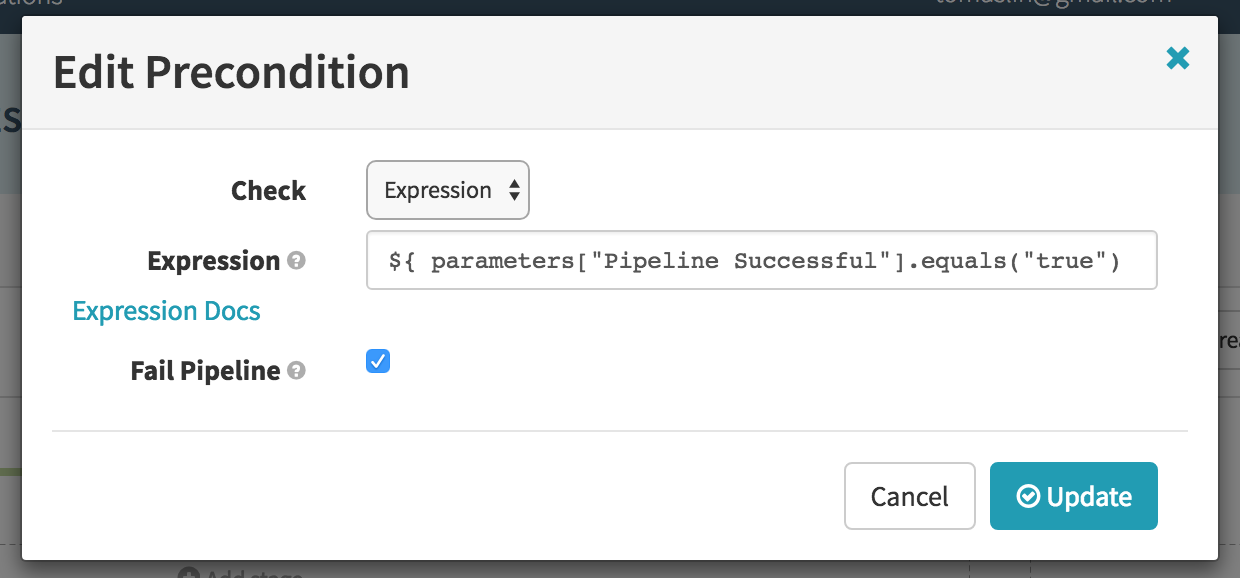
- Click Update
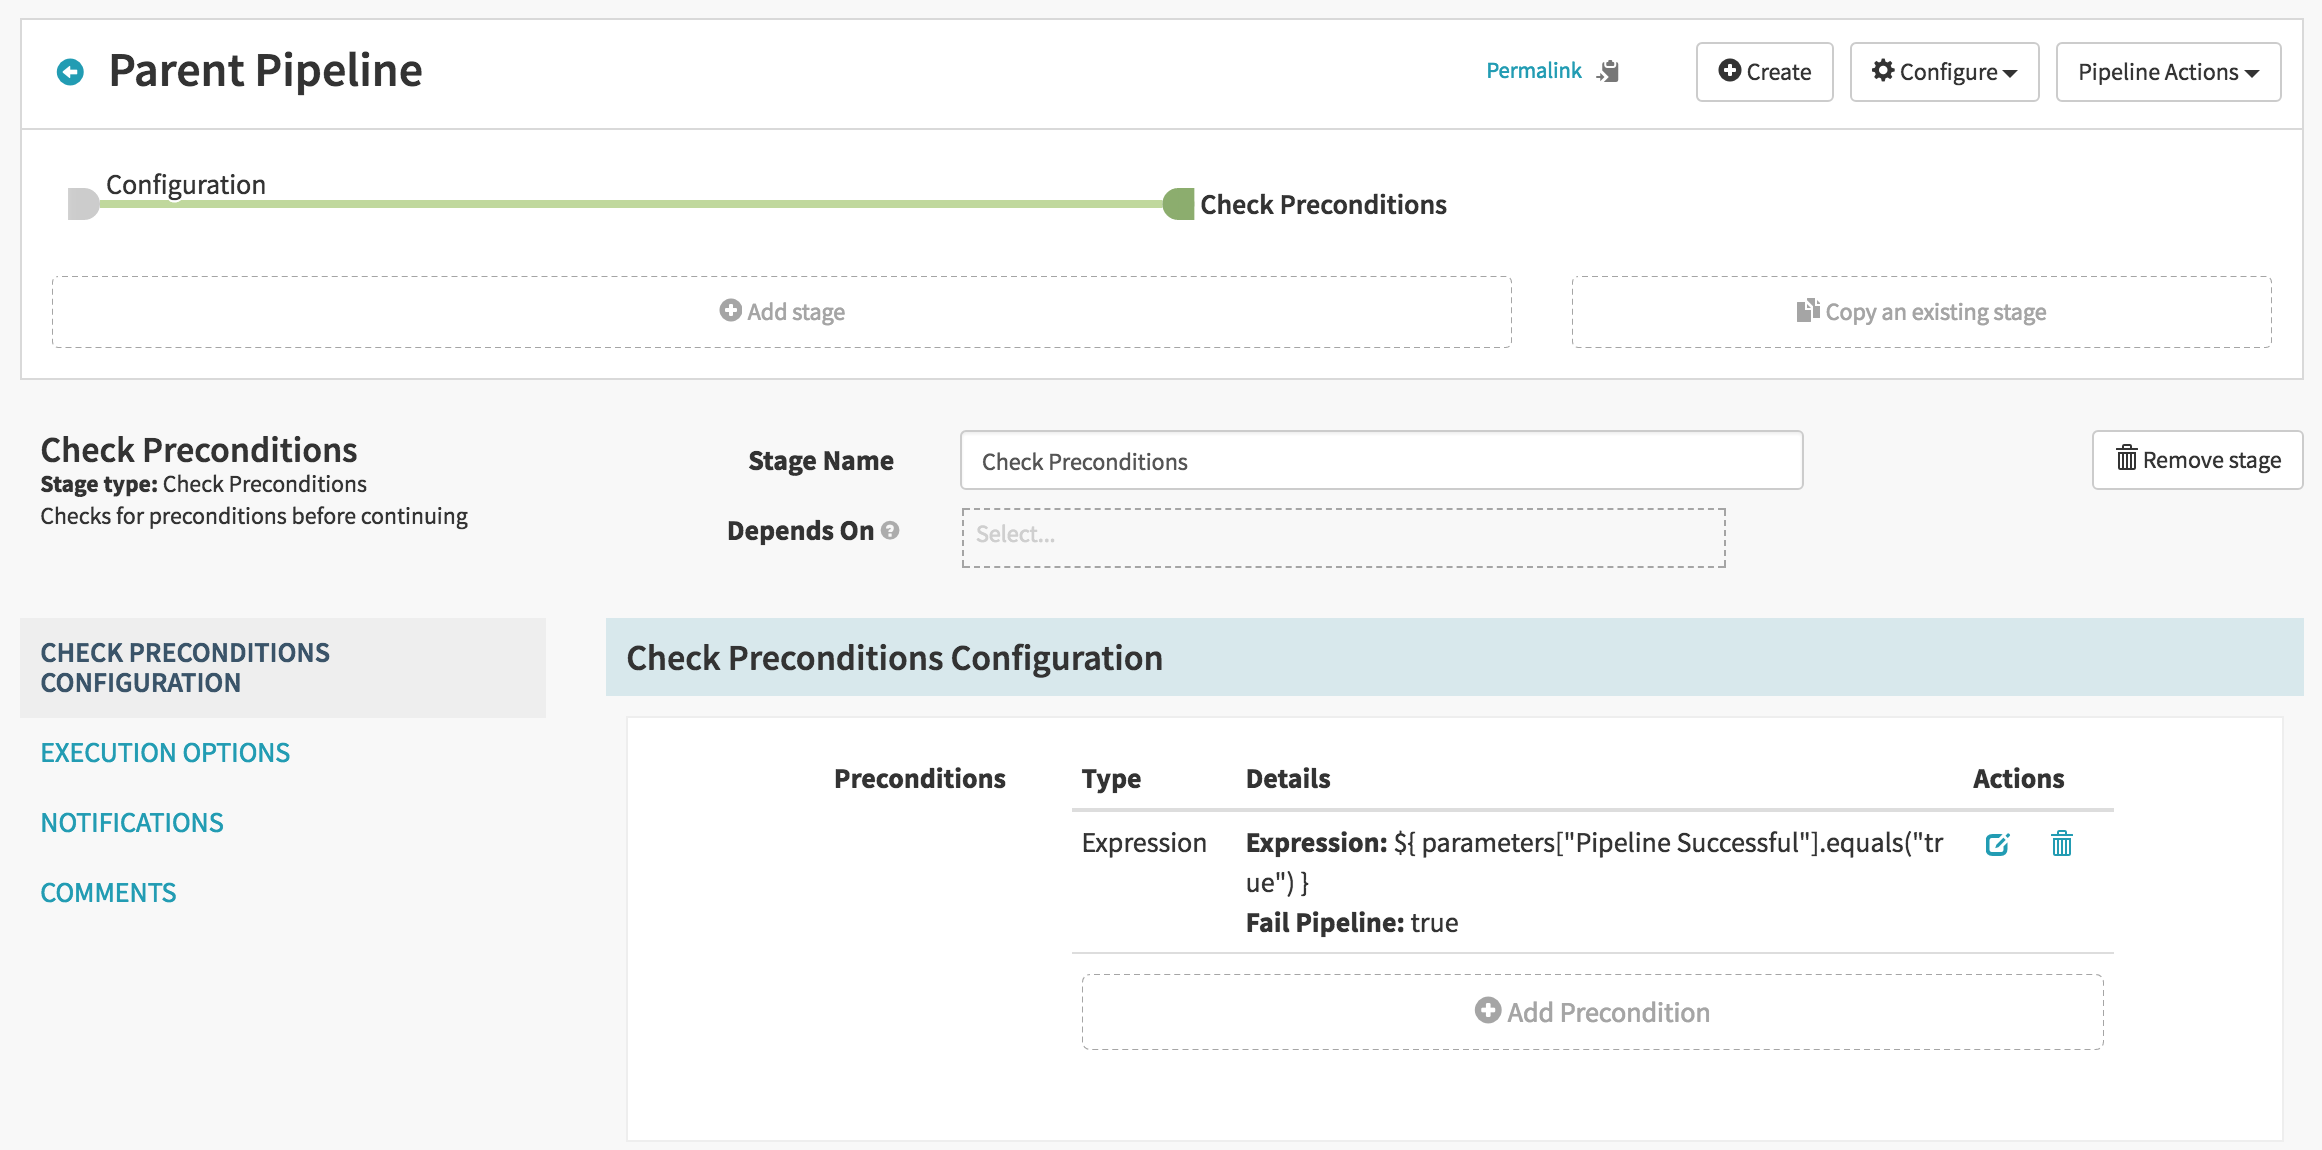
Save your pipeline
Create a rollback pipeline
Create a new pipeline called ‘Child Pipeline’
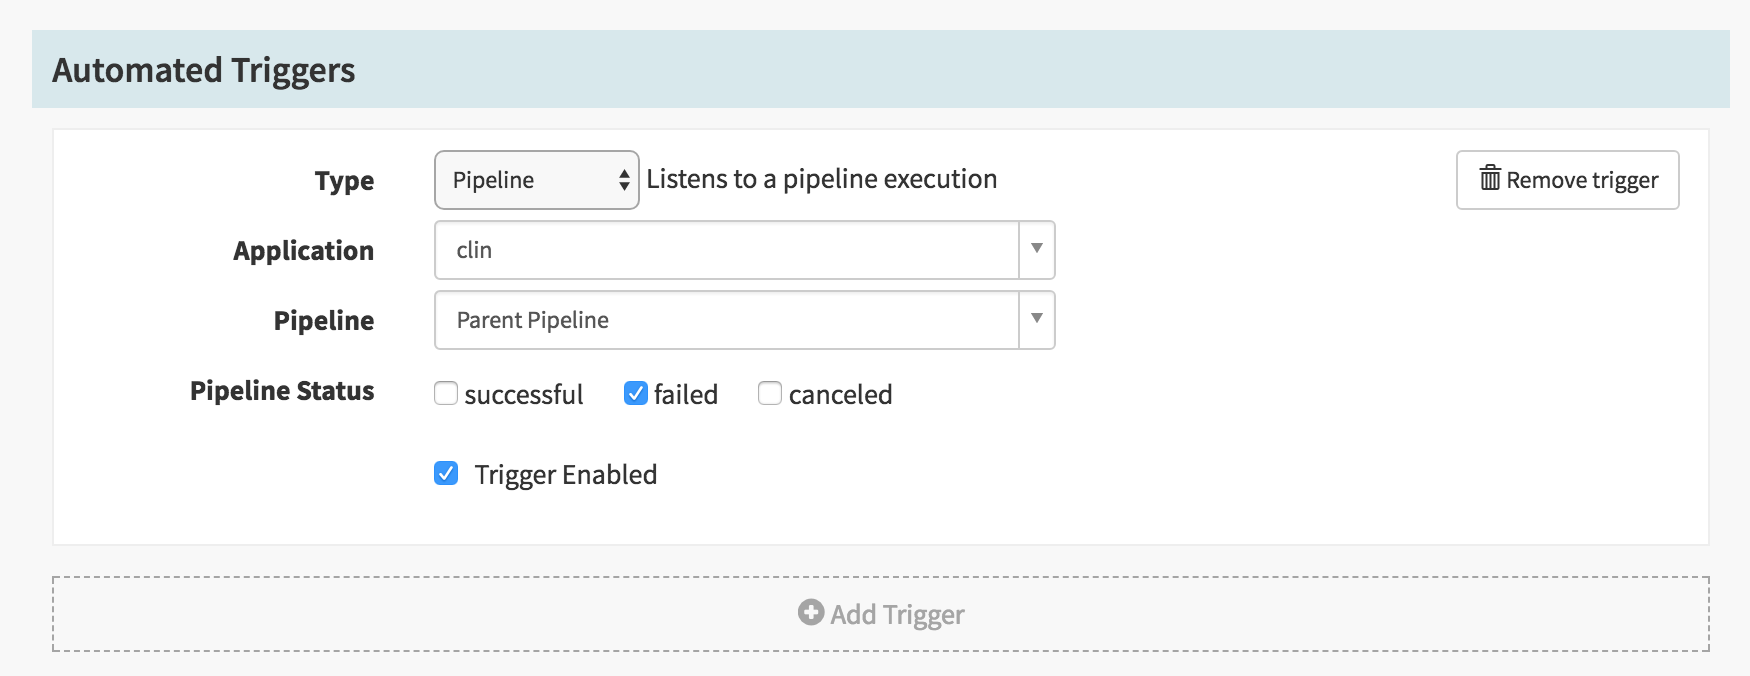
Under Configuration, add a new automated trigger of type Pipeline
- Set your application to be the same as your parent pipeline
- Set pipeline name to be Parent Pipeline
- Click on Pipeline Status
failed
Add a new stage of type Wait
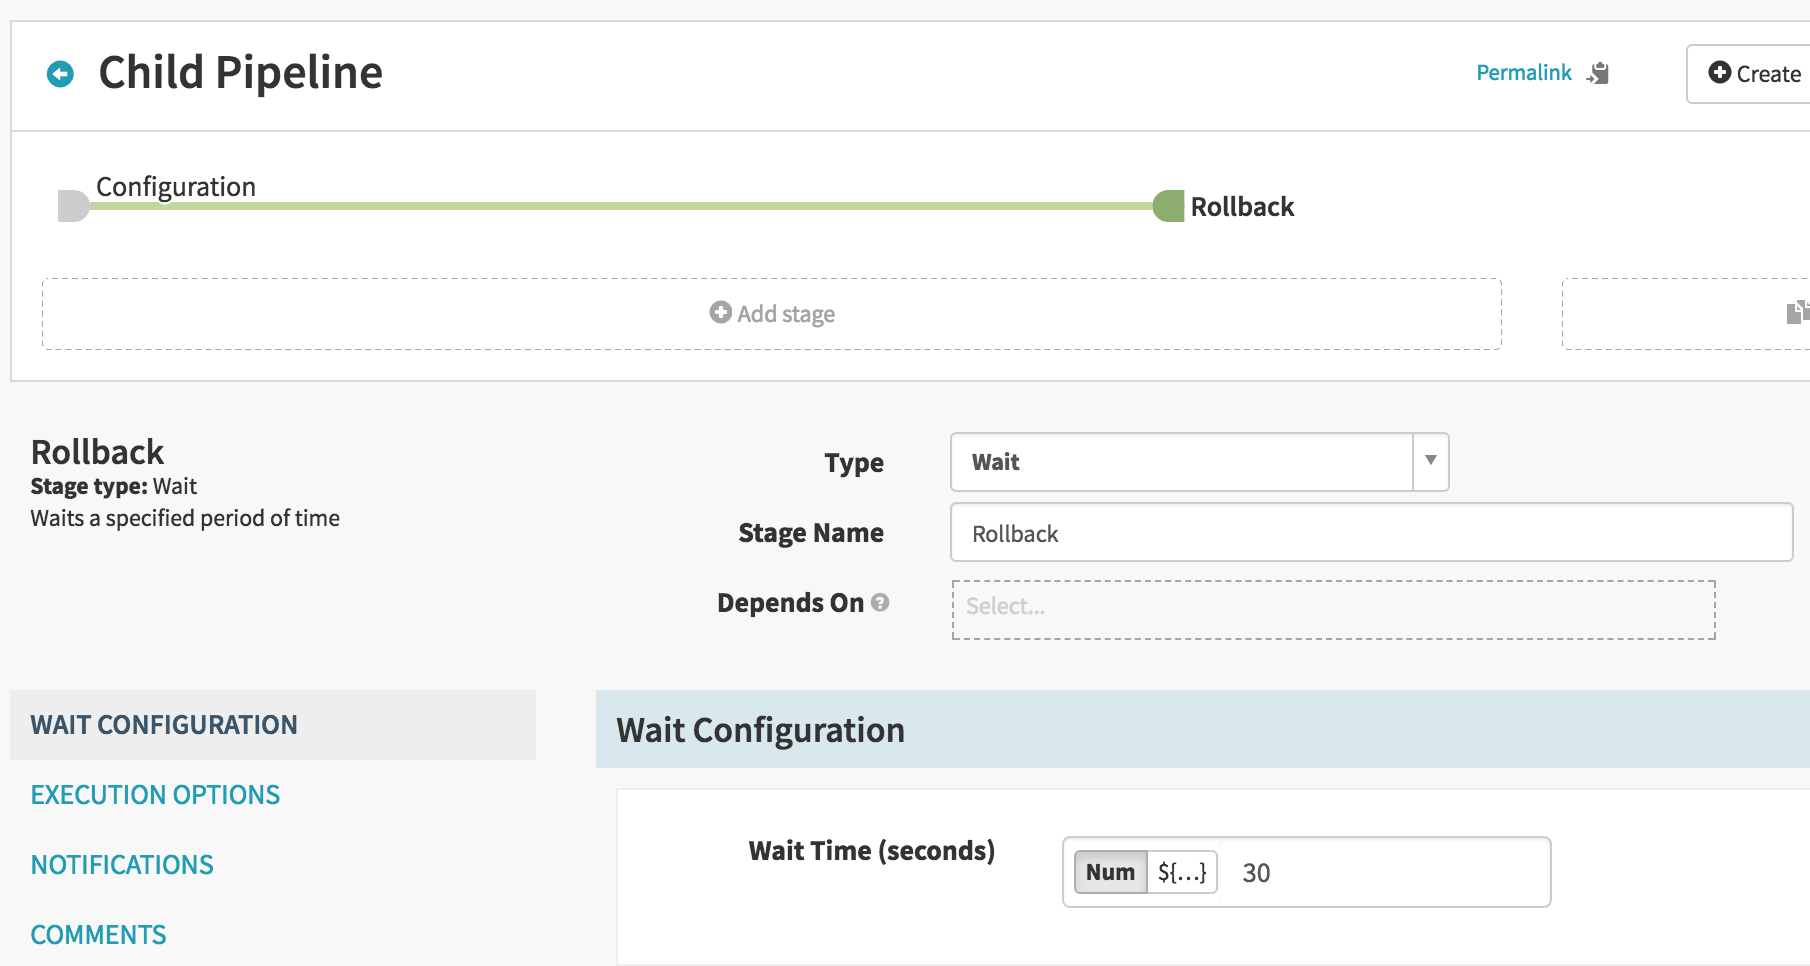
Save your child pipeline
Test your rollback pipeline
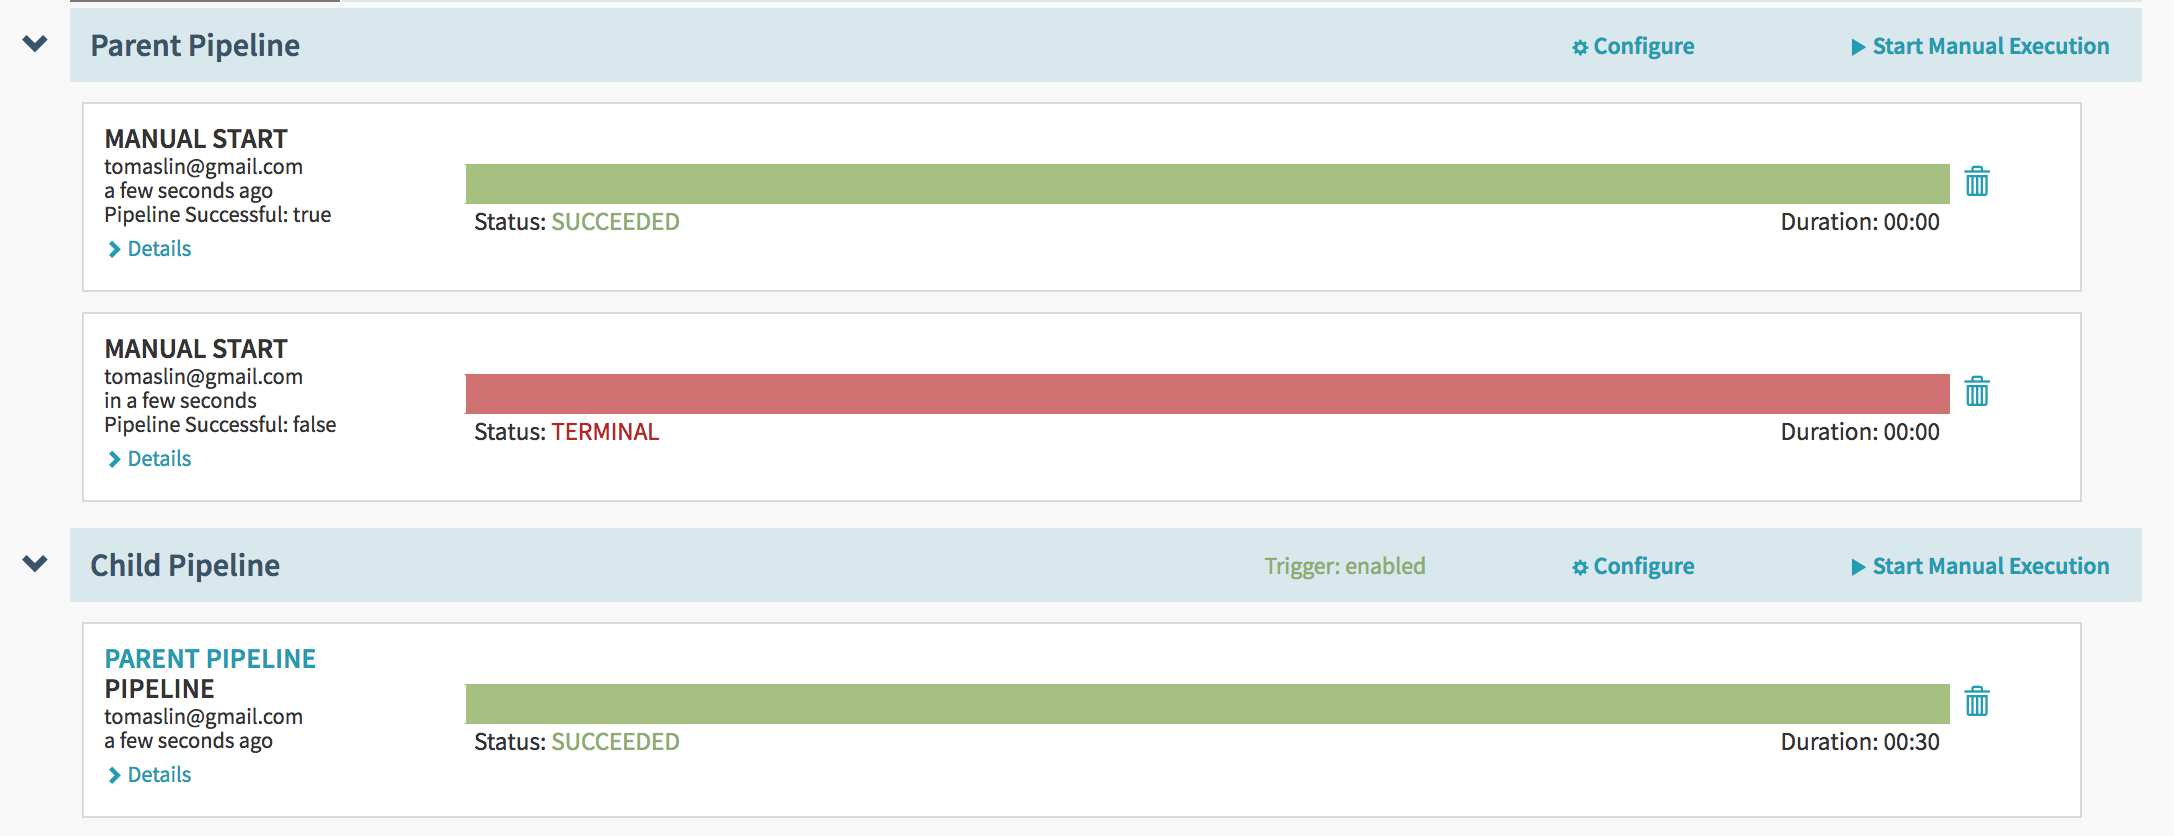
Go to the pipelines screen and select Start Manual Execution on your Parent Pipeline
In the popup dialog, select false as the choice for Pipeline Successful

You should see the pipeline fail, and the Child Pipeline run the rollback
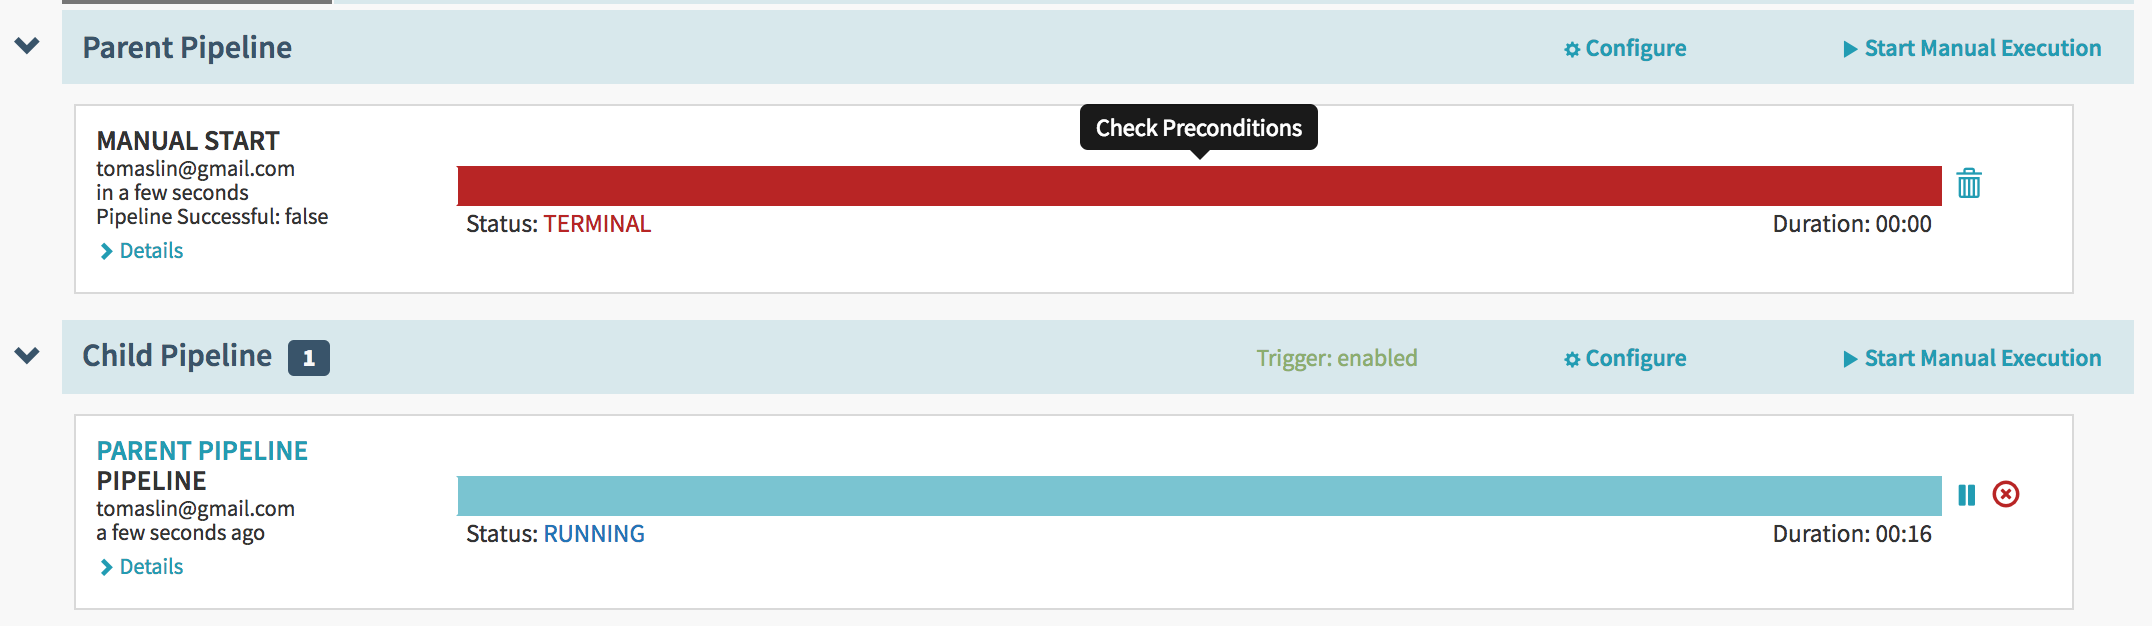
If you click on the Parent Pipeline link in the child pipeline, it should take you the the failed execution.
Now run the Parent Pipeline again, this time selecting true.
The child pipeline should not run
Learn more
Hopefully this codelab has given you a taste of the built-in mechanisms for safe deployment in Spinnaker. An almost complete list of safe deployment features in Spinnaker can be found in this blog post .