Continuous Delivery to Kubernetes on Oracle
In this codelab you will configure a Spinnaker pipeline to deploy an application from Kubernetes manifest files targeting Kubernetes on Oracle Cloud Infrastructure Container Engine (OKE).
Prerequisites
Before we begin, we need to do the following:
Configure Kubernetes
If you don’t already have a cluster for this purpose, you can follow this tutorial until a Kubernetes cluster on OKE is created.
Create a compute instance
Create a compute instance on Oracle Cloud Infrastructure (OCI) to host Spinnaker by following these instructions . Spinnaker supports Ubuntu 18.04 or higher.
Install and configure Spinnaker
SSH onto the compute instance you previously created. IP is its public ip address.
ssh ubuntu@IP
-
Set up Oracle Object Storage as your Spinnaker storage by following these steps: Adding Oracle Object Storage to Spinnaker .
-
Set up your Kubernetes Cloud provider by following these steps: Setting up OKE .
-
Install spinnaker per using a debian installation
Accessing Spinnaker
By default, the Spinnaker UI runs on port 9000. You can use an SSH tunnel to access this from your workstation.
ssh -A -L 9000:localhost:9000 -L 8084:localhost:8084 ubuntu@IP
Now Spinnaker UI is available at http://localhost:9000 .
1: Create a Spinnaker application
In this exercise, you’ll set up a pipeline to deploy a tomcat8 from Kubernetes manifest file to OKE.
Navigate to Spinnaker at http://localhost:9000 .
From the Spinnaker home page, create a new Spinnaker Application by clicking on the Actions drop down at the upper right and clicking on Create Application.
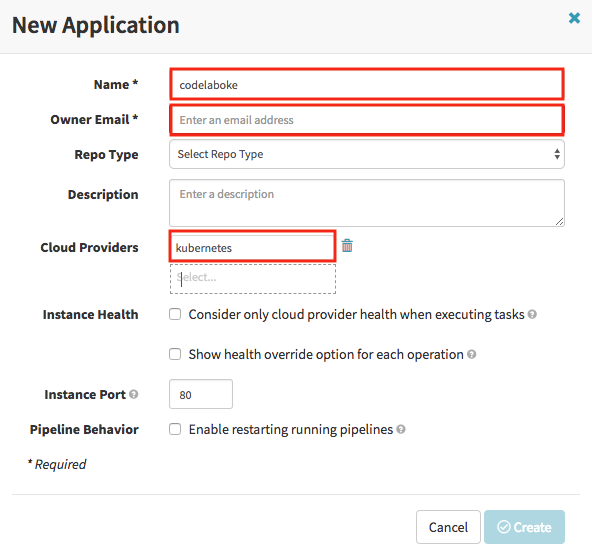
In the New Application dialog:
- Enter “codelaboke” for Name.
- Enter your email for Owner Email.
- Add “kubernetes” to Cloud Providers.
- Click the Create button.
2: Create a load balancer
Navigate to the “Load Balancers” tab and click the Create Load Balancer button, enter the following yaml in the Manifest:
kind: Service
apiVersion: v1
metadata:
  name: codelaboke-test-lb
  annotations:
    service.beta.kubernetes.io/oci-load-balancer-shape: 400Mbps
spec:
  type: LoadBalancer
  selector:
    load-balancer-codelaboke-test-lb: 'true'
  ports:
  - protocol: TCP
    port: 80
    targetPort: 8080
The service annotation “service.beta.kubernetes.io/oci-load-balancer-shape” determines the load balancer’s total pre-provisioned maximum capacity (bandwidth) for ingress plus egress traffic. Available shapes include 100Mbps, 400Mbps, and 8000Mbps.
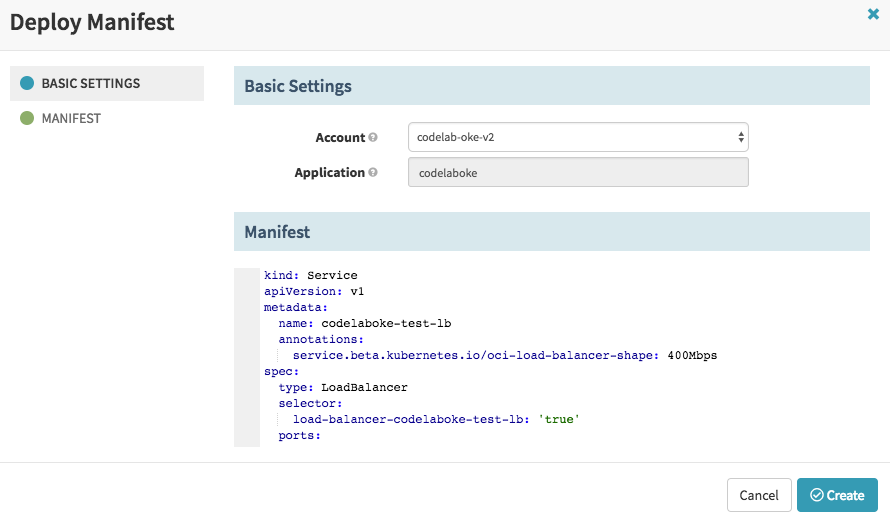
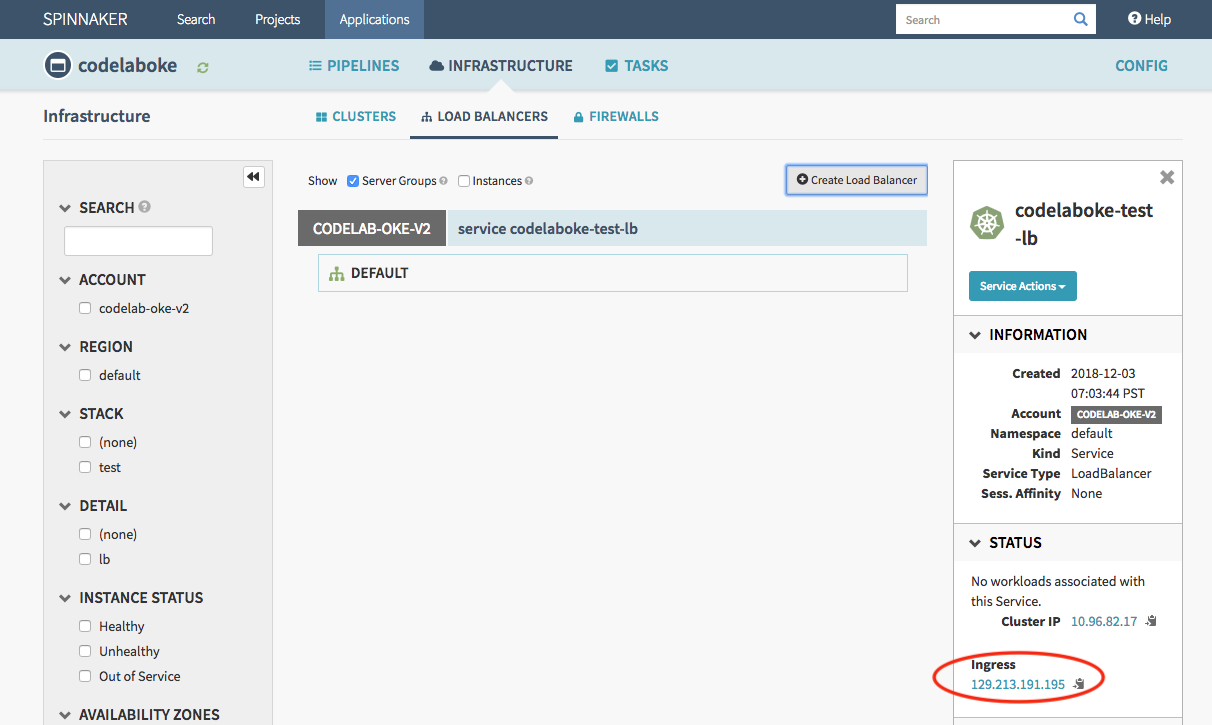
Click Create. This will create the load balancer shown below.
3: Create a “Deploy to Test” pipeline
Create the pipeline
Create a new pipeline by navigating to the PIPELINES tab and clicking the New button
- Name the pipeline “Deploy to Test”.
- Click the Create button.
Set up Deploy stage
There are multiple ways to deploy Kubernetes manifests using the Kubernetes provider. More details can be found in this Deploying Kubernetes Manifests guide.
It is preferred to use artifacts as manifests. However, in this tutorial, the manifest is supplied statically to a pipeline as text for simplicity.
- Click Add stage.
- Select “Deploy (Manifest)” in the Type drop down.
- In the Deploy (Manifest) Configuration section, enter the following yaml as Text for Manifest Source.
apiVersion: apps/v1
kind: Deployment
metadata:
  name: codelaboke-test-cluster
spec:
  replicas: 3
  selector:
    matchLabels:
      codelaboke-test-cluster: 'true'
  template:
    metadata:
      labels:
        codelaboke-test-cluster: 'true'
        load-balancer-codelaboke-test-lb: 'true'
    spec:
      containers:
        - image:  tomcat:8.0
          name: tomcat8
          ports:
            - containerPort: 8080
          readinessProbe:
            httpGet:
              path: /
              port: 8080

- Save the pipeline.
4. Deploy
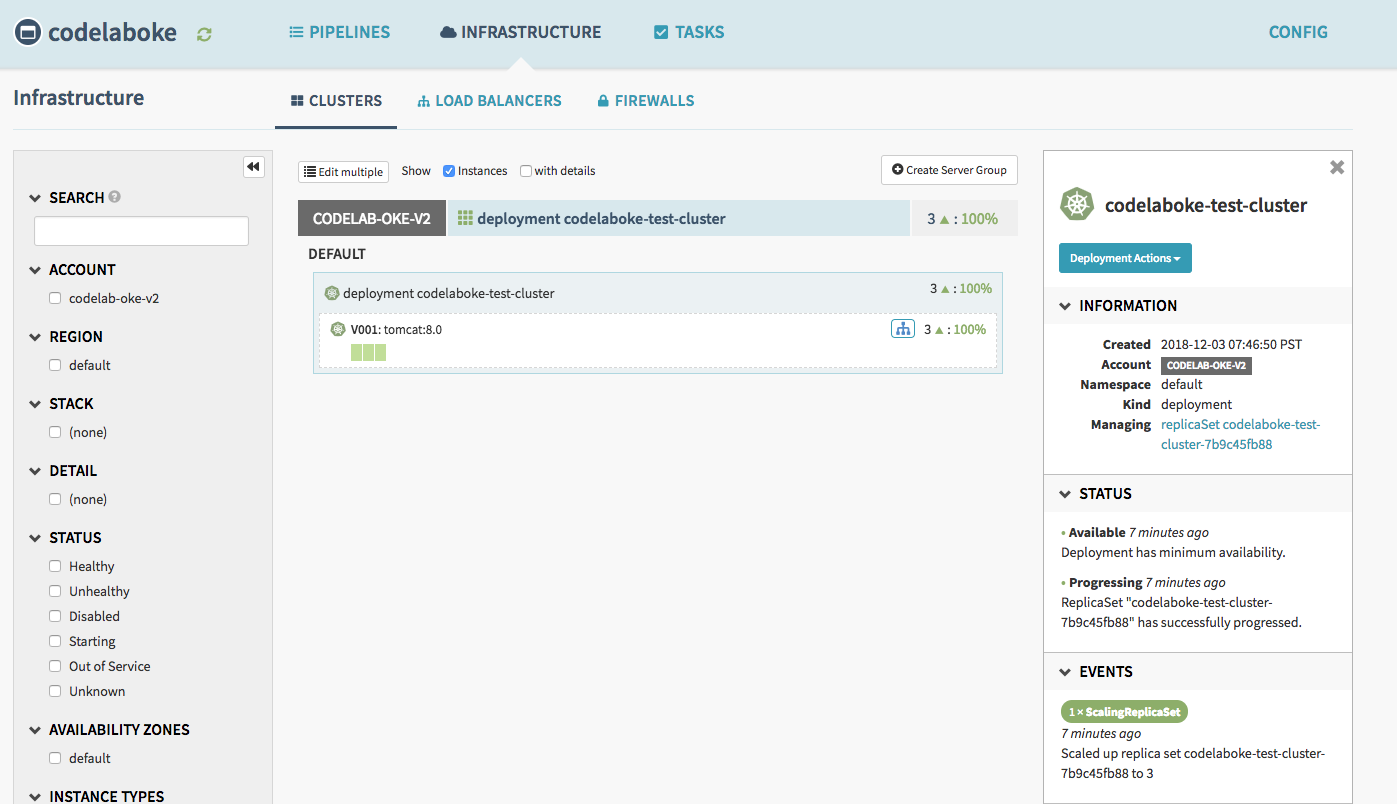
Run a “Start Manual Execution” in “Deploy to Test” to Test pipeline.
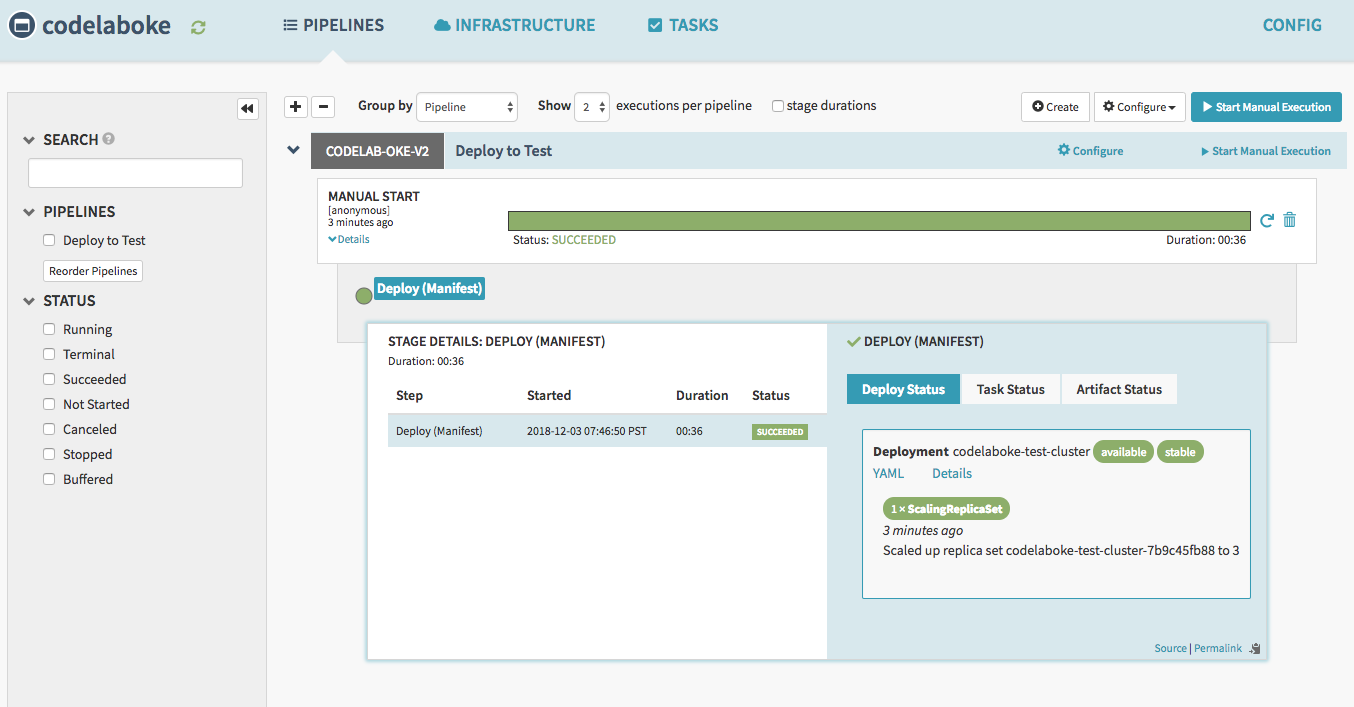
Navigate to the Clusters tab, and you will see this.
You can test the application by visiting the ingress ip address of the Load Balancer “codelaboke-test-lb”. In this example, the Load Balancer listens to HTTP on port 80.