DC/OS: Source to Prod
0. Setup
Prerequisites
- Github repository with the source code to deploy
- Enterprise DC/OS cluster (1.8 or greater)
- Marathon-lb is should be installed and running
- For the examples in this codelab we’ll say that it’s at
https://dcos.example.comso you should replace that with the URL to your cluster
- Jenkins instance
- This can be installed on your DC/OS cluster as a Mesosphere Universe package
Configure Spinnaker
clouddriver-local.yml
dcos:
  enabled: true
  clusters:
    - name: codelab-cluster
      dcosUrl: https://dcos.example.com
      insecureSkipTlsVerify: true
  accounts:
    - name: codelab-dcos-account
      dockerRegistries:
        - accountName: my-docker-registry
      clusters:
        - name: codelab-cluster
          uid: ${DCOS_USER}
          password: ${DCOS_PASSWORD}
dockerRegistry:
  enabled: true
  accounts:
  - name: my-docker-registry
    address: https://index.docker.io
    repositories:
    - lwander/spin-kub-demo
    username: ${DOCKER_USER}
    password: ${DOCKER_PASSWORD}
Enable Docker
Set up the DC/OS provider
First, enable the provider:
hal config provider dcos enable
Next we need to add our DC/OS cluster:
hal config provider dcos cluster add codelab-cluster \
    --dcos-url $CLUSTER_URL \
    --skip-tls-verify # For simplicity we won't worry about the
    # certificate for the cluster but this would not be recommended
    # for a real deployment
Create a Spinnaker account that has credentials for the cluster.
hal config provider dcos account add codelab \
    --cluster codelab-cluster \
    --docker-registries my-docker-registry \
    --uid $DCOS_USER \
    --password $DCOS_PASSWORD
- Note: Make sure that your DC/OS user has permission to deploy applications under a
/codelabgroup in Marathon
And deploy the config with hal
sudo hal deploy apply
1. Create a Spinnaker application
Spinnaker applications are groups of resources managed by the underlying cloud provider, and are delineated by the naming convention <app name>-.
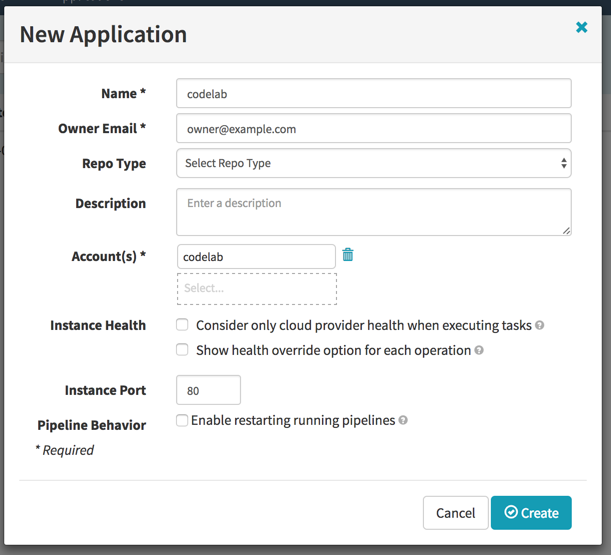
Under the Actions dropdown select Create Application and fill out the following dialog:
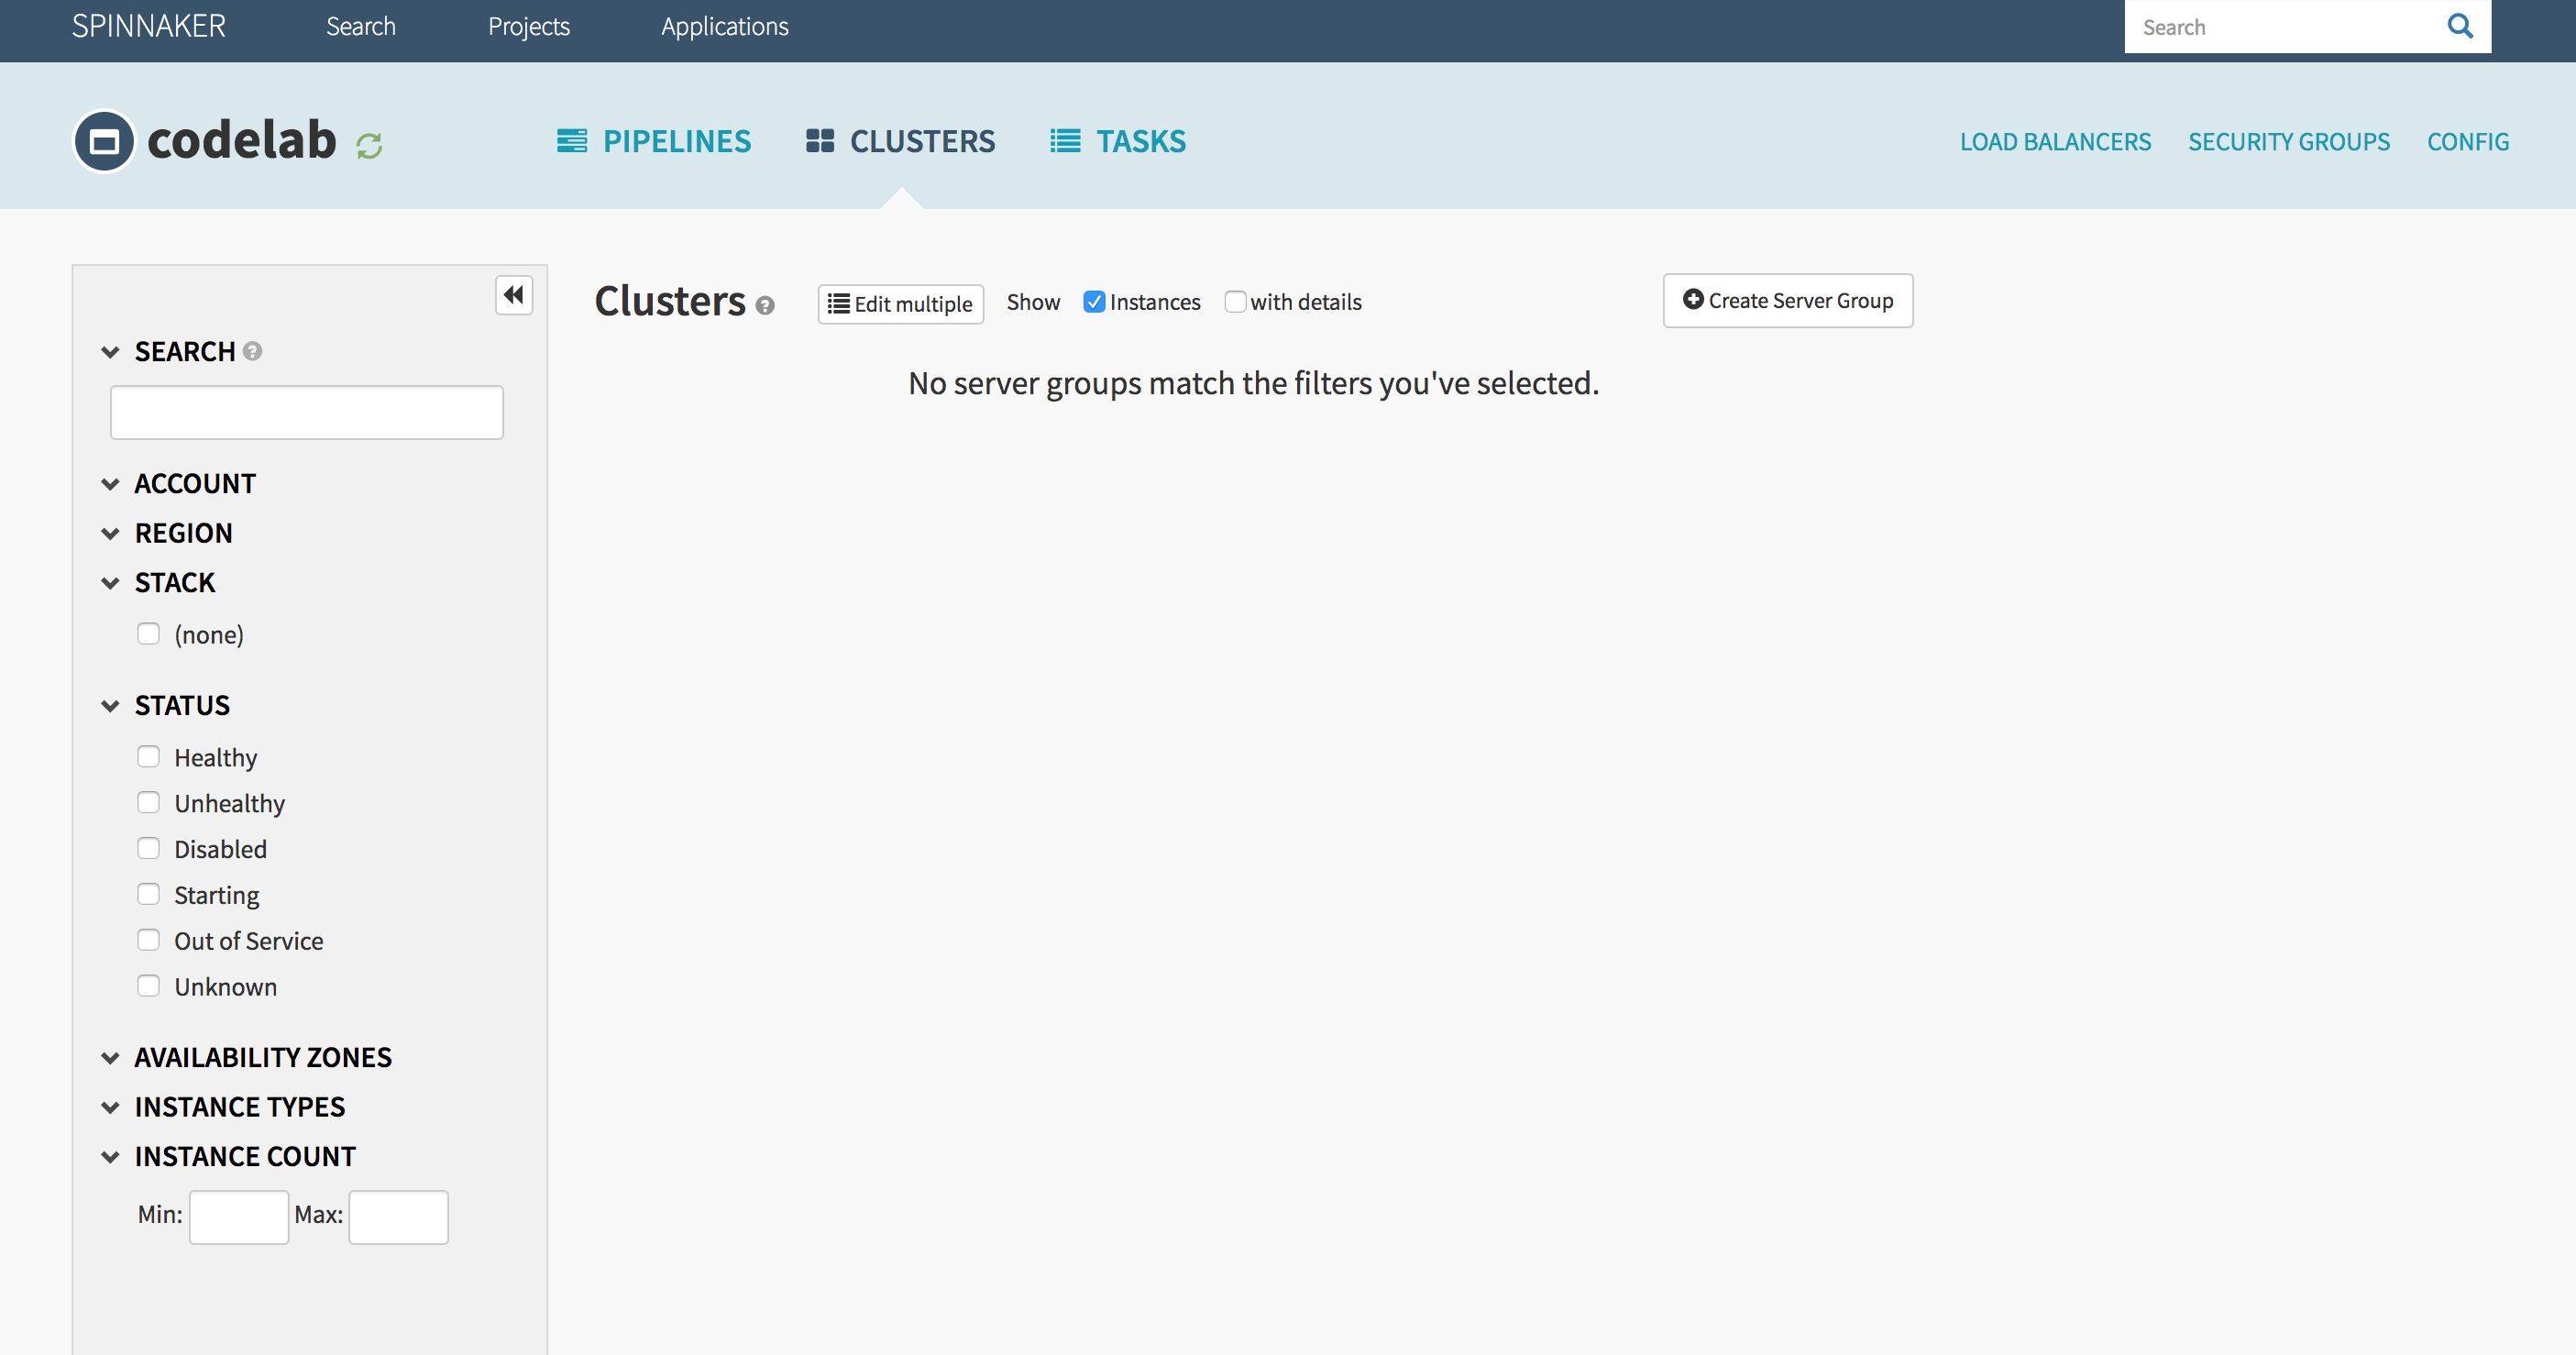
You’ll notice that you were dropped in this Clusters tab for your newly created application. In Spinnaker’s terminology a Cluster is a collection of Server Groups all running different versions of the same artifact (Docker Image). Furthermore, Server Groups are DC/OS Services
2. Create a demo server group
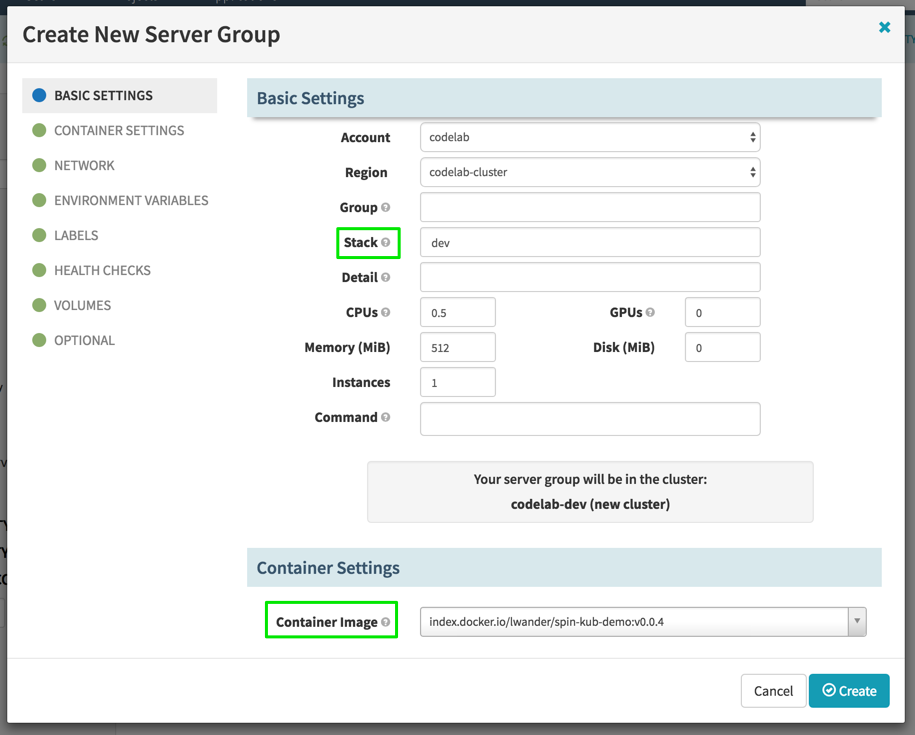
Next we will create a Server Group as a sanity check to make sure we have set up everything correctly so far. Before doing this, ensure you have at least 1 tag pushed to your Docker registry with the code you want to deploy. Now on the Clusters screen, select Create Server Group/Job, choose Server Group from the drop down and hit Next to see the following dialog:
![]()
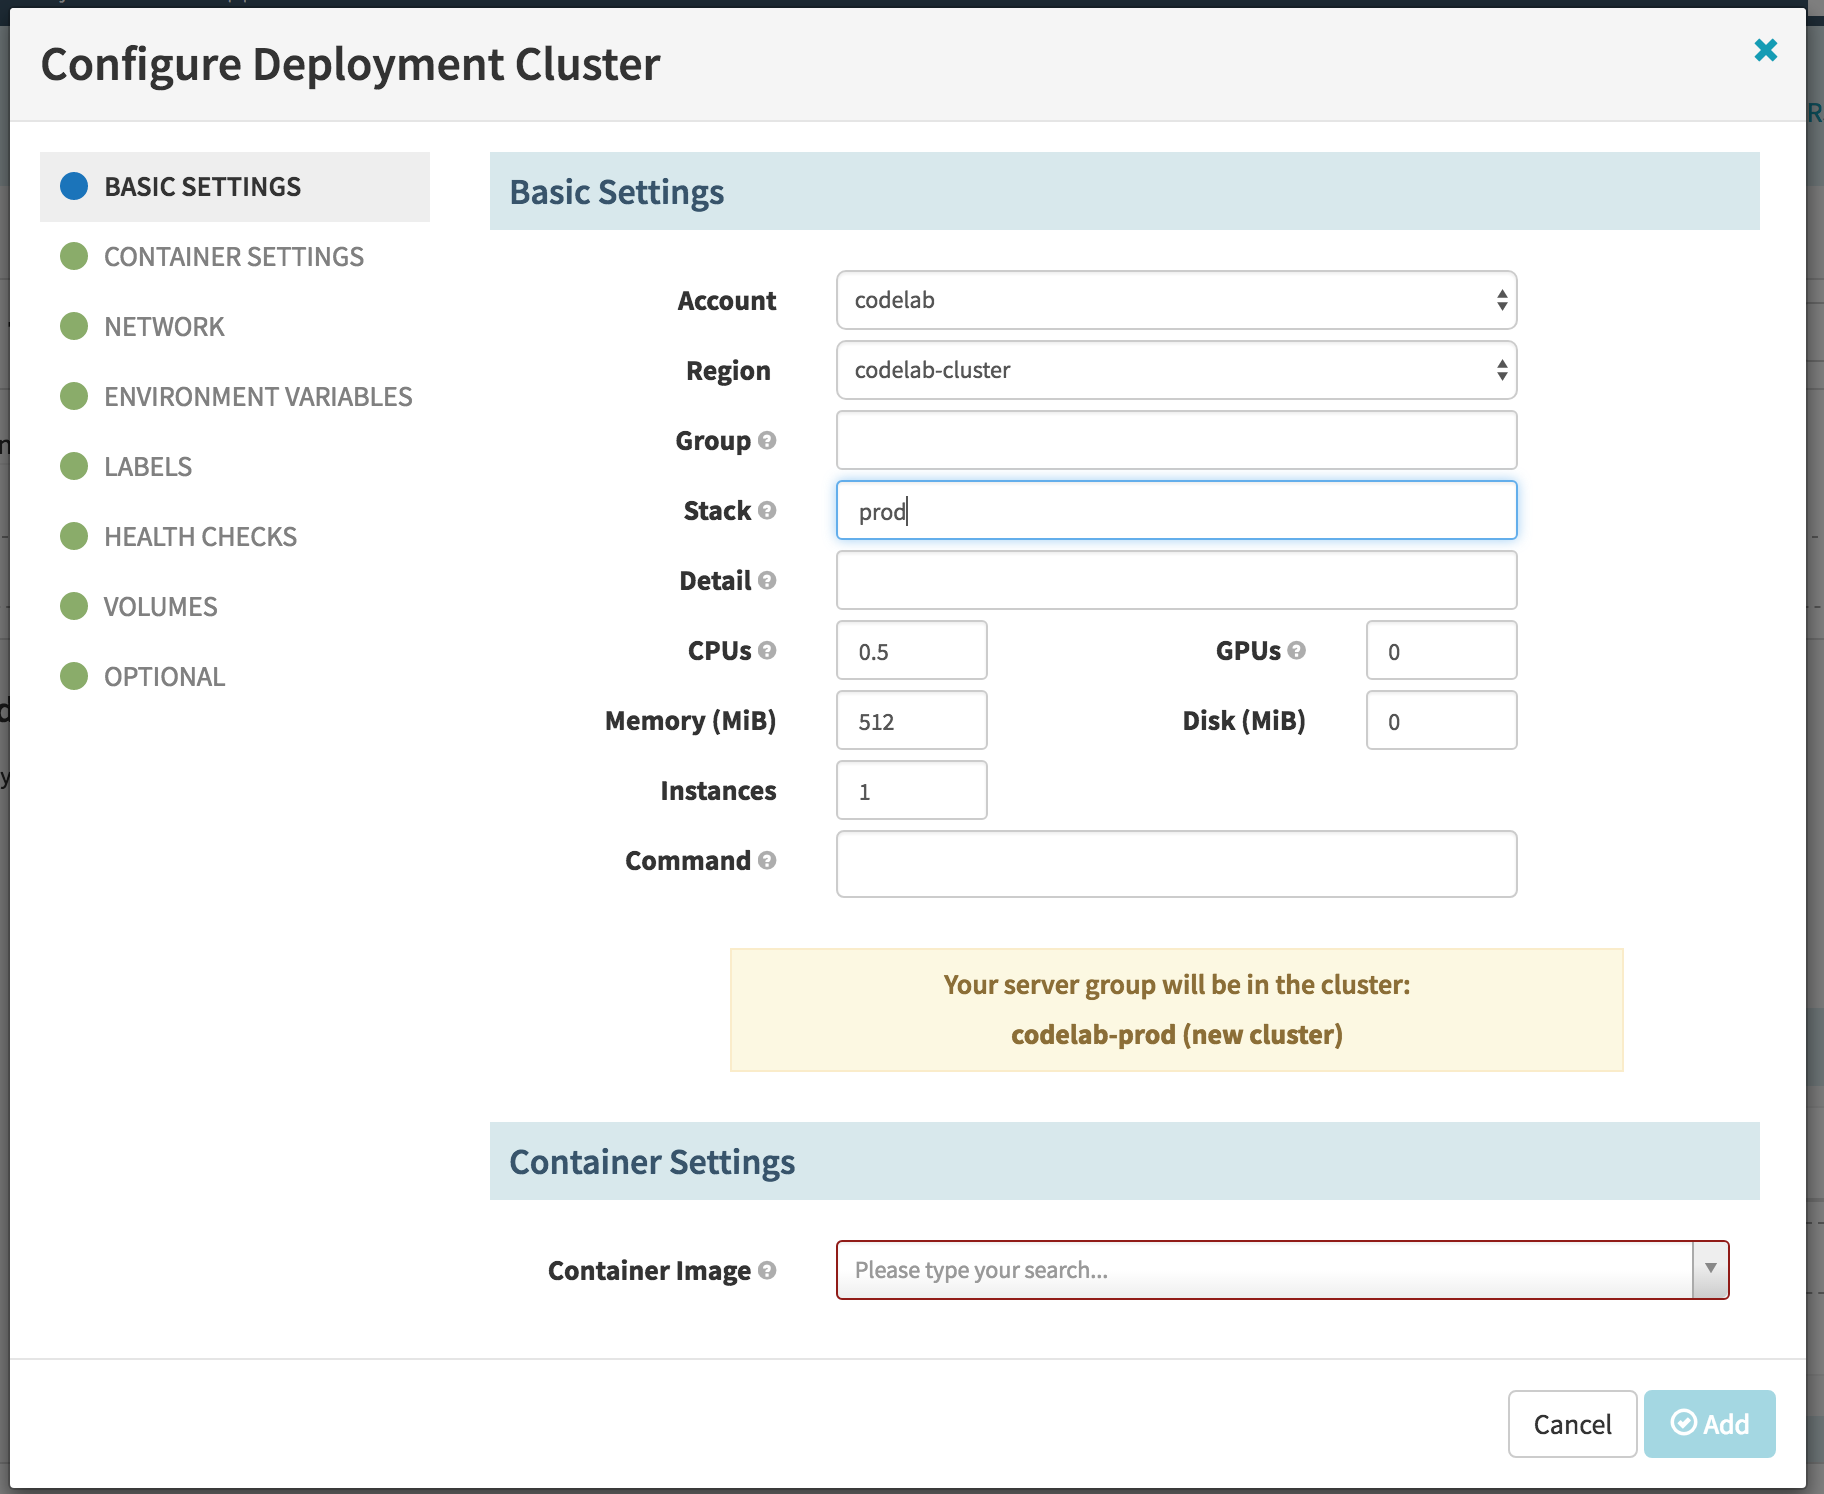
Fill out the basic settings and select your Docker image to use.
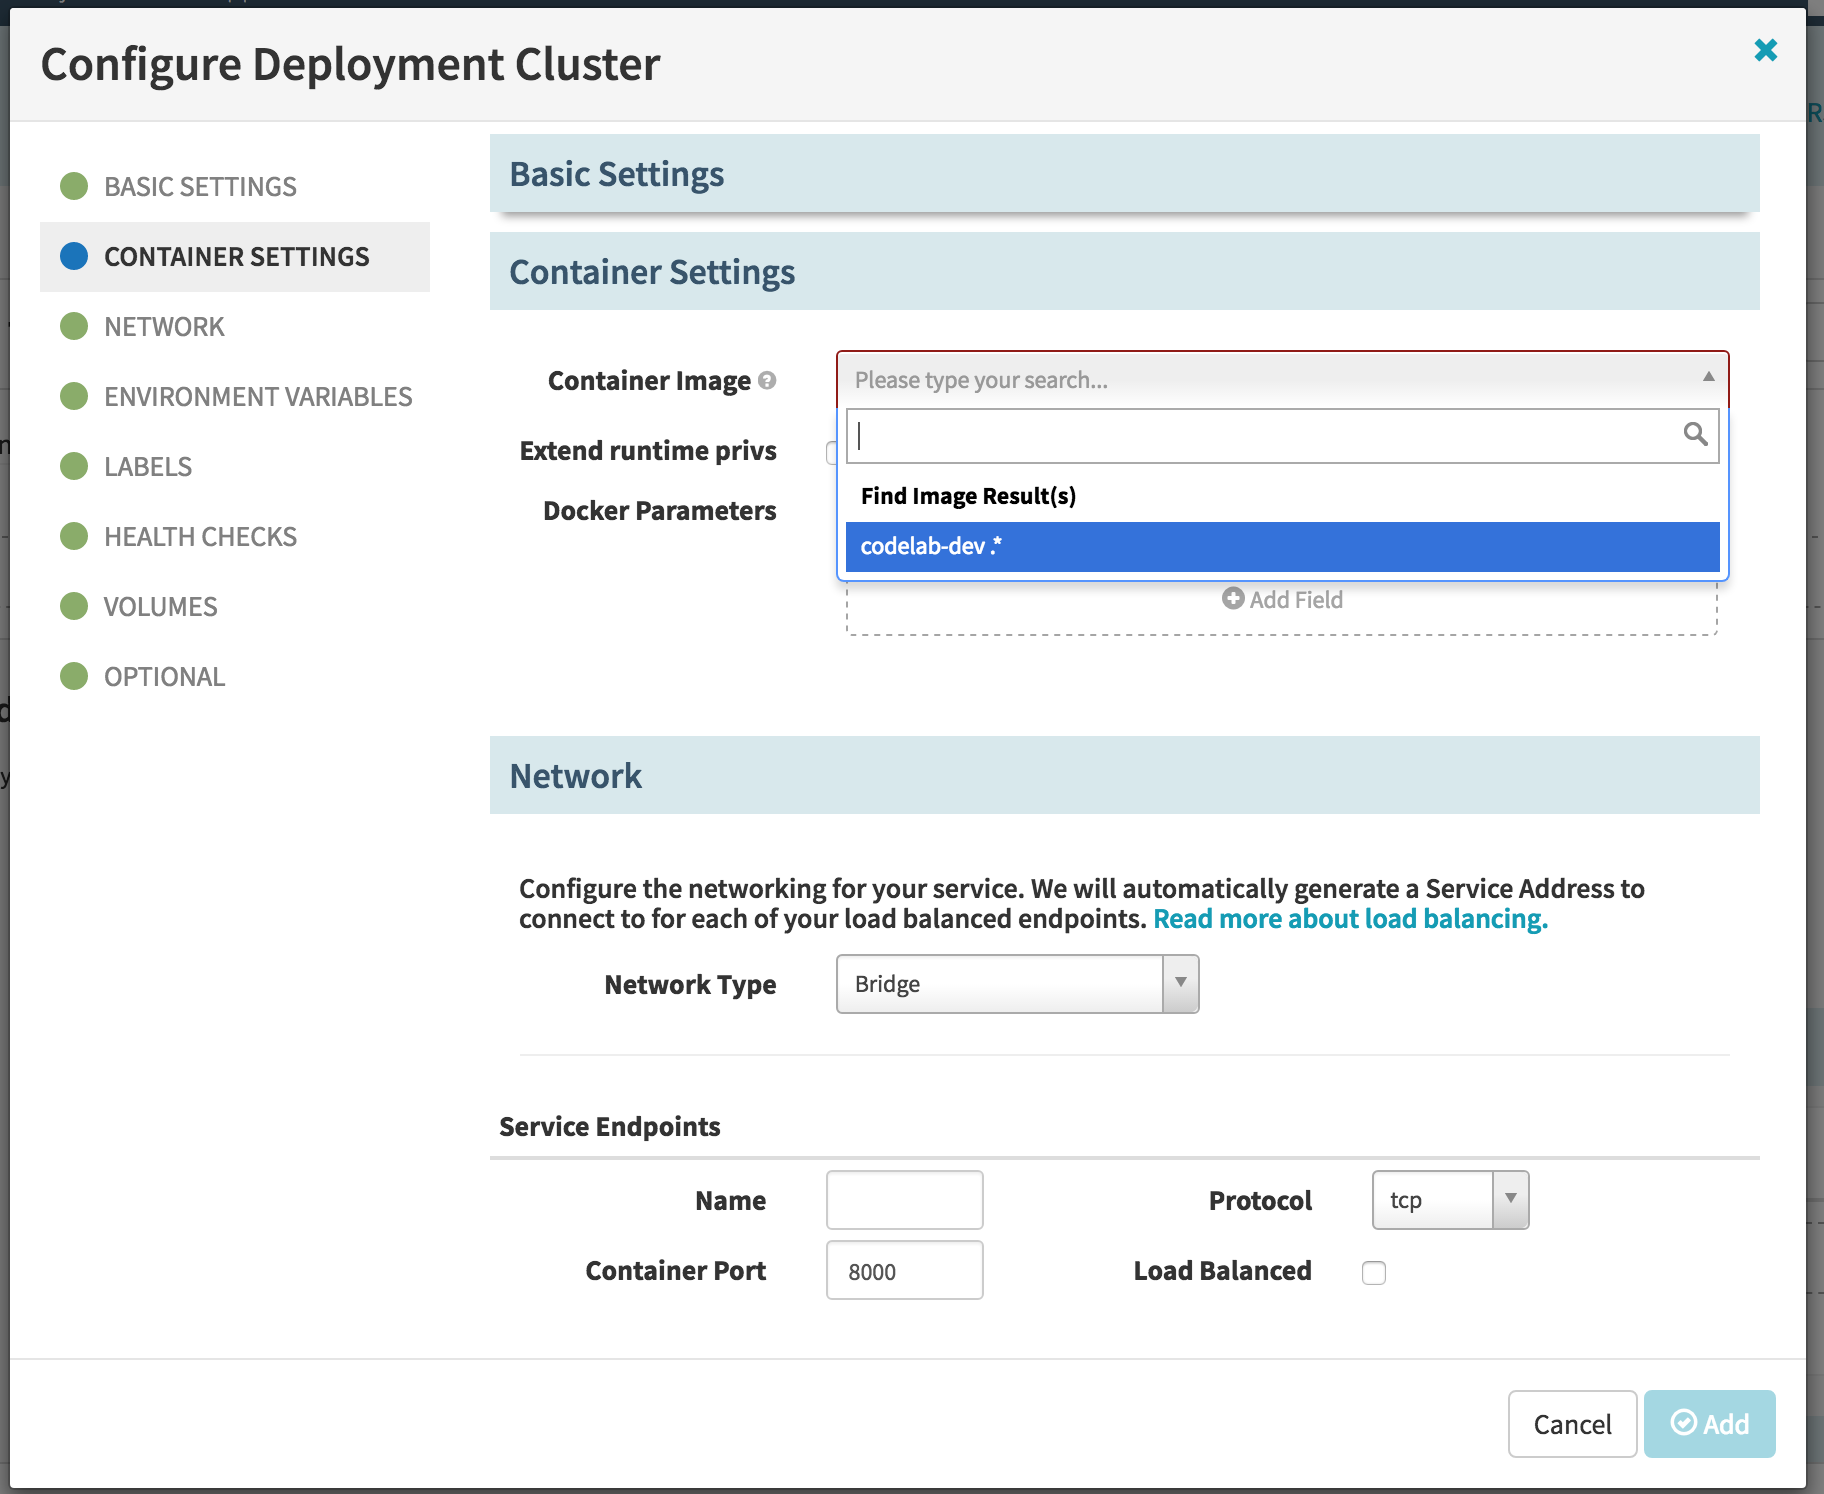
Select the Bridge network type and the port that the process in the container will listen on.

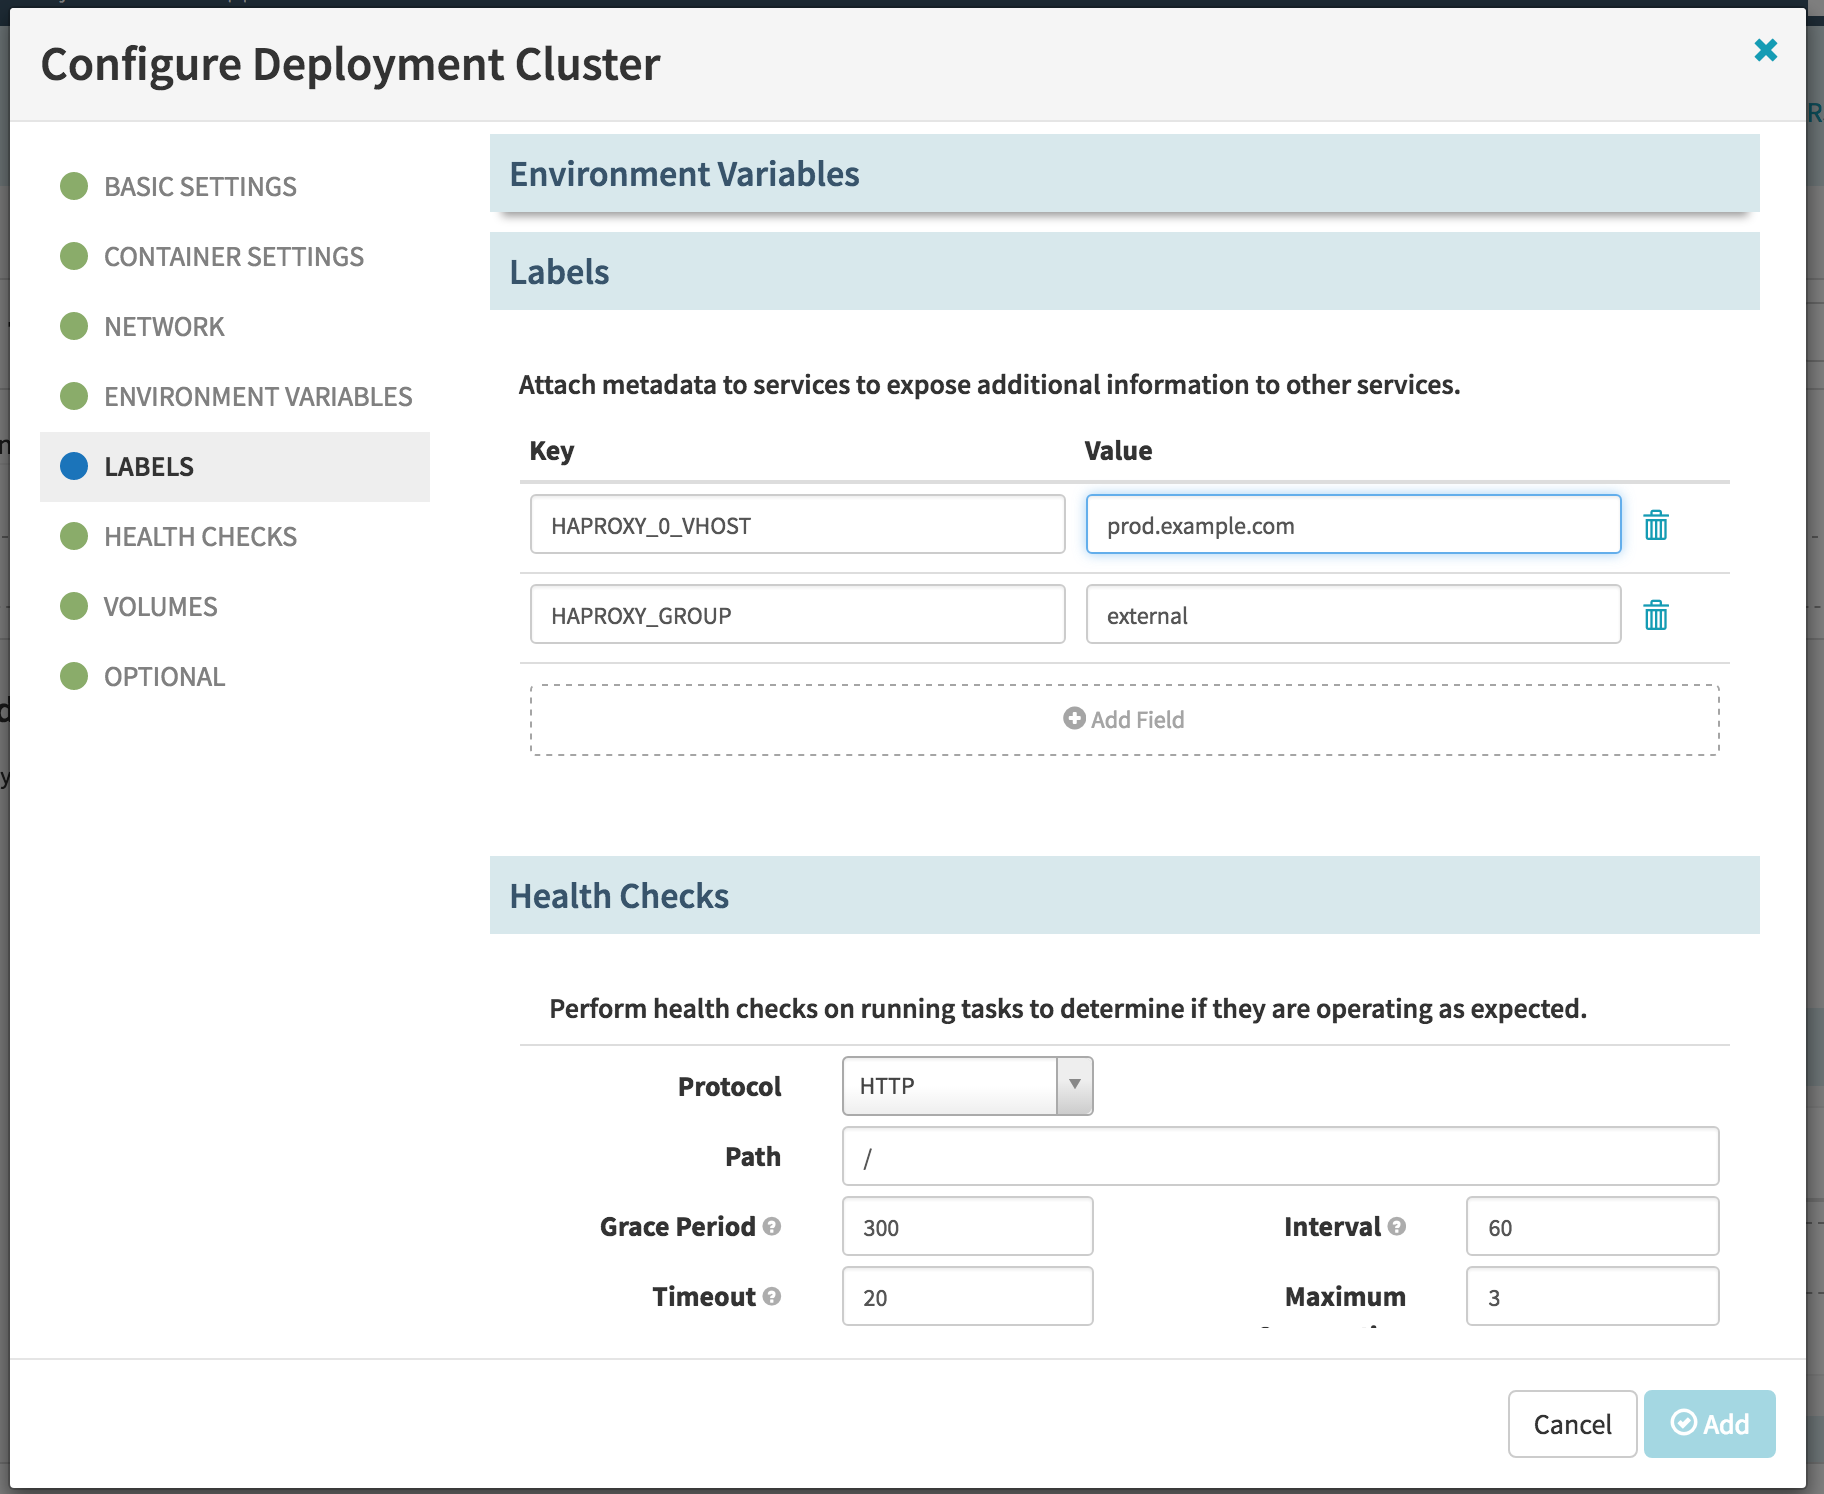
Add the labels that marathon-lb will use to route traffic to your instance.
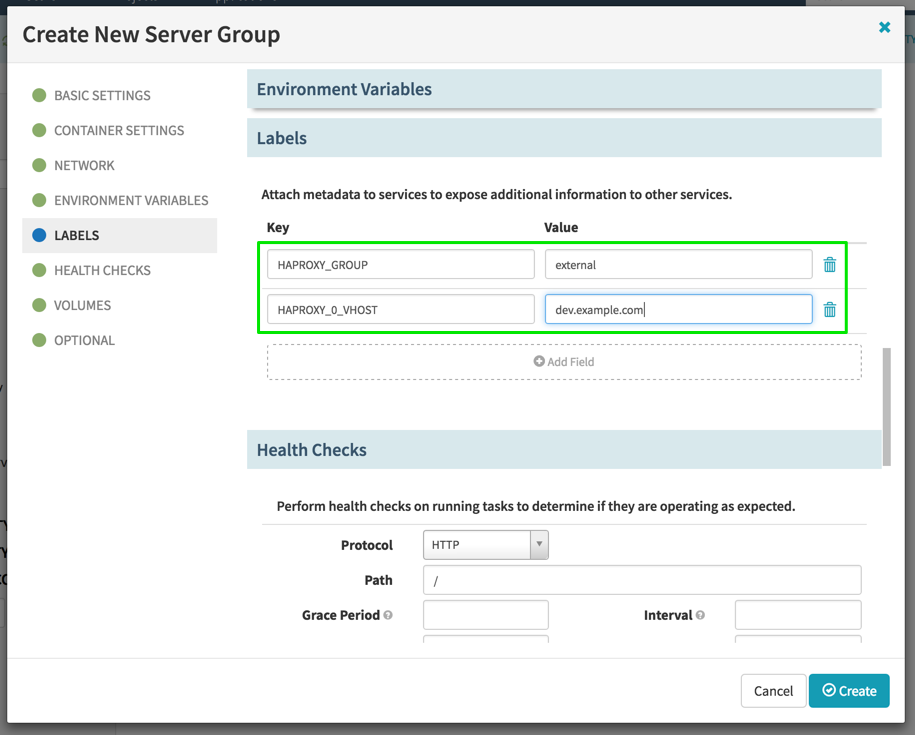
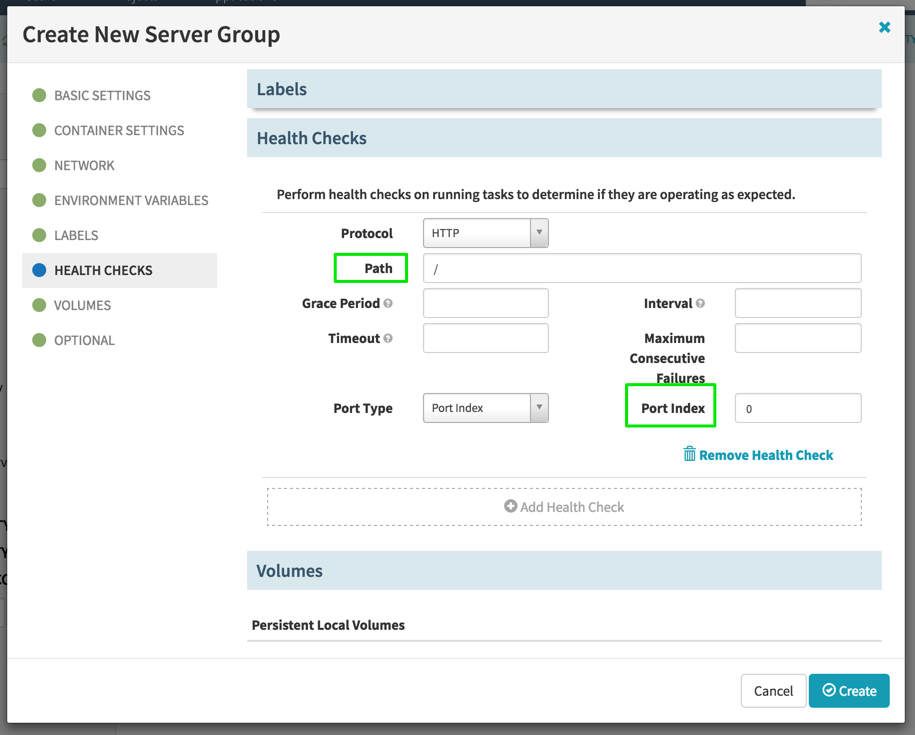
Finally, add a health check and then click Create.
Test that you can reach your service with the following command (where $VHOST is the HAPROXY_0_VHOST value from your server group)
curl --header "Host: dev.example.com" http://$PUBLIC_AGENT
3. Git to dev pipeline
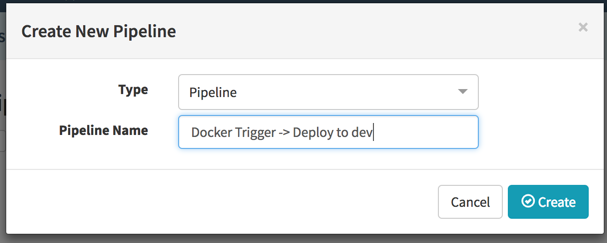
Now let’s automate the process of creating server groups associated with the dev stack. Navigate to the Pipelines tab, select Configure > Create New… and then fill out the resulting dialog as follows:
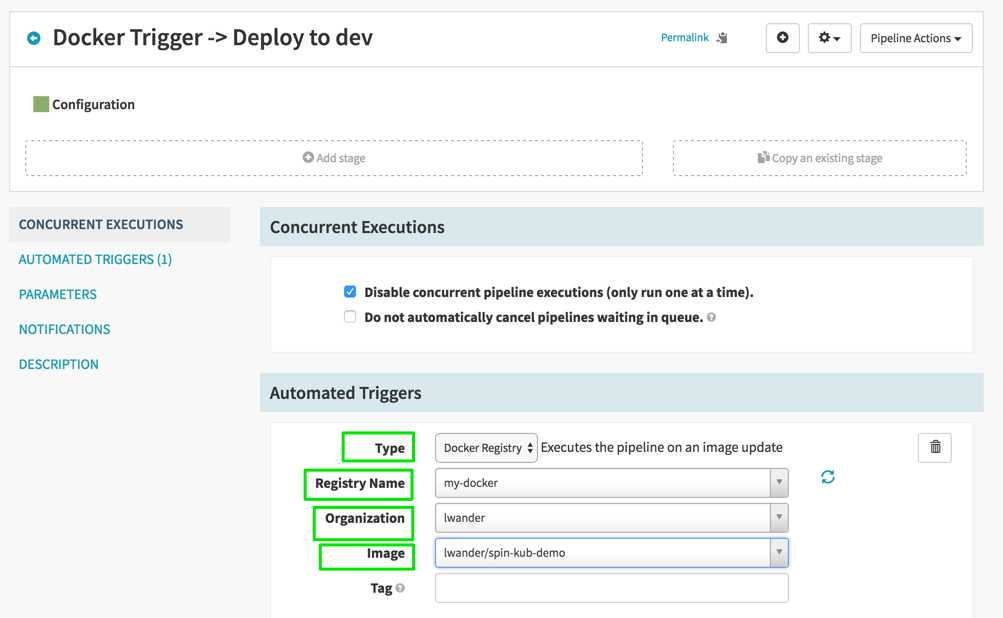
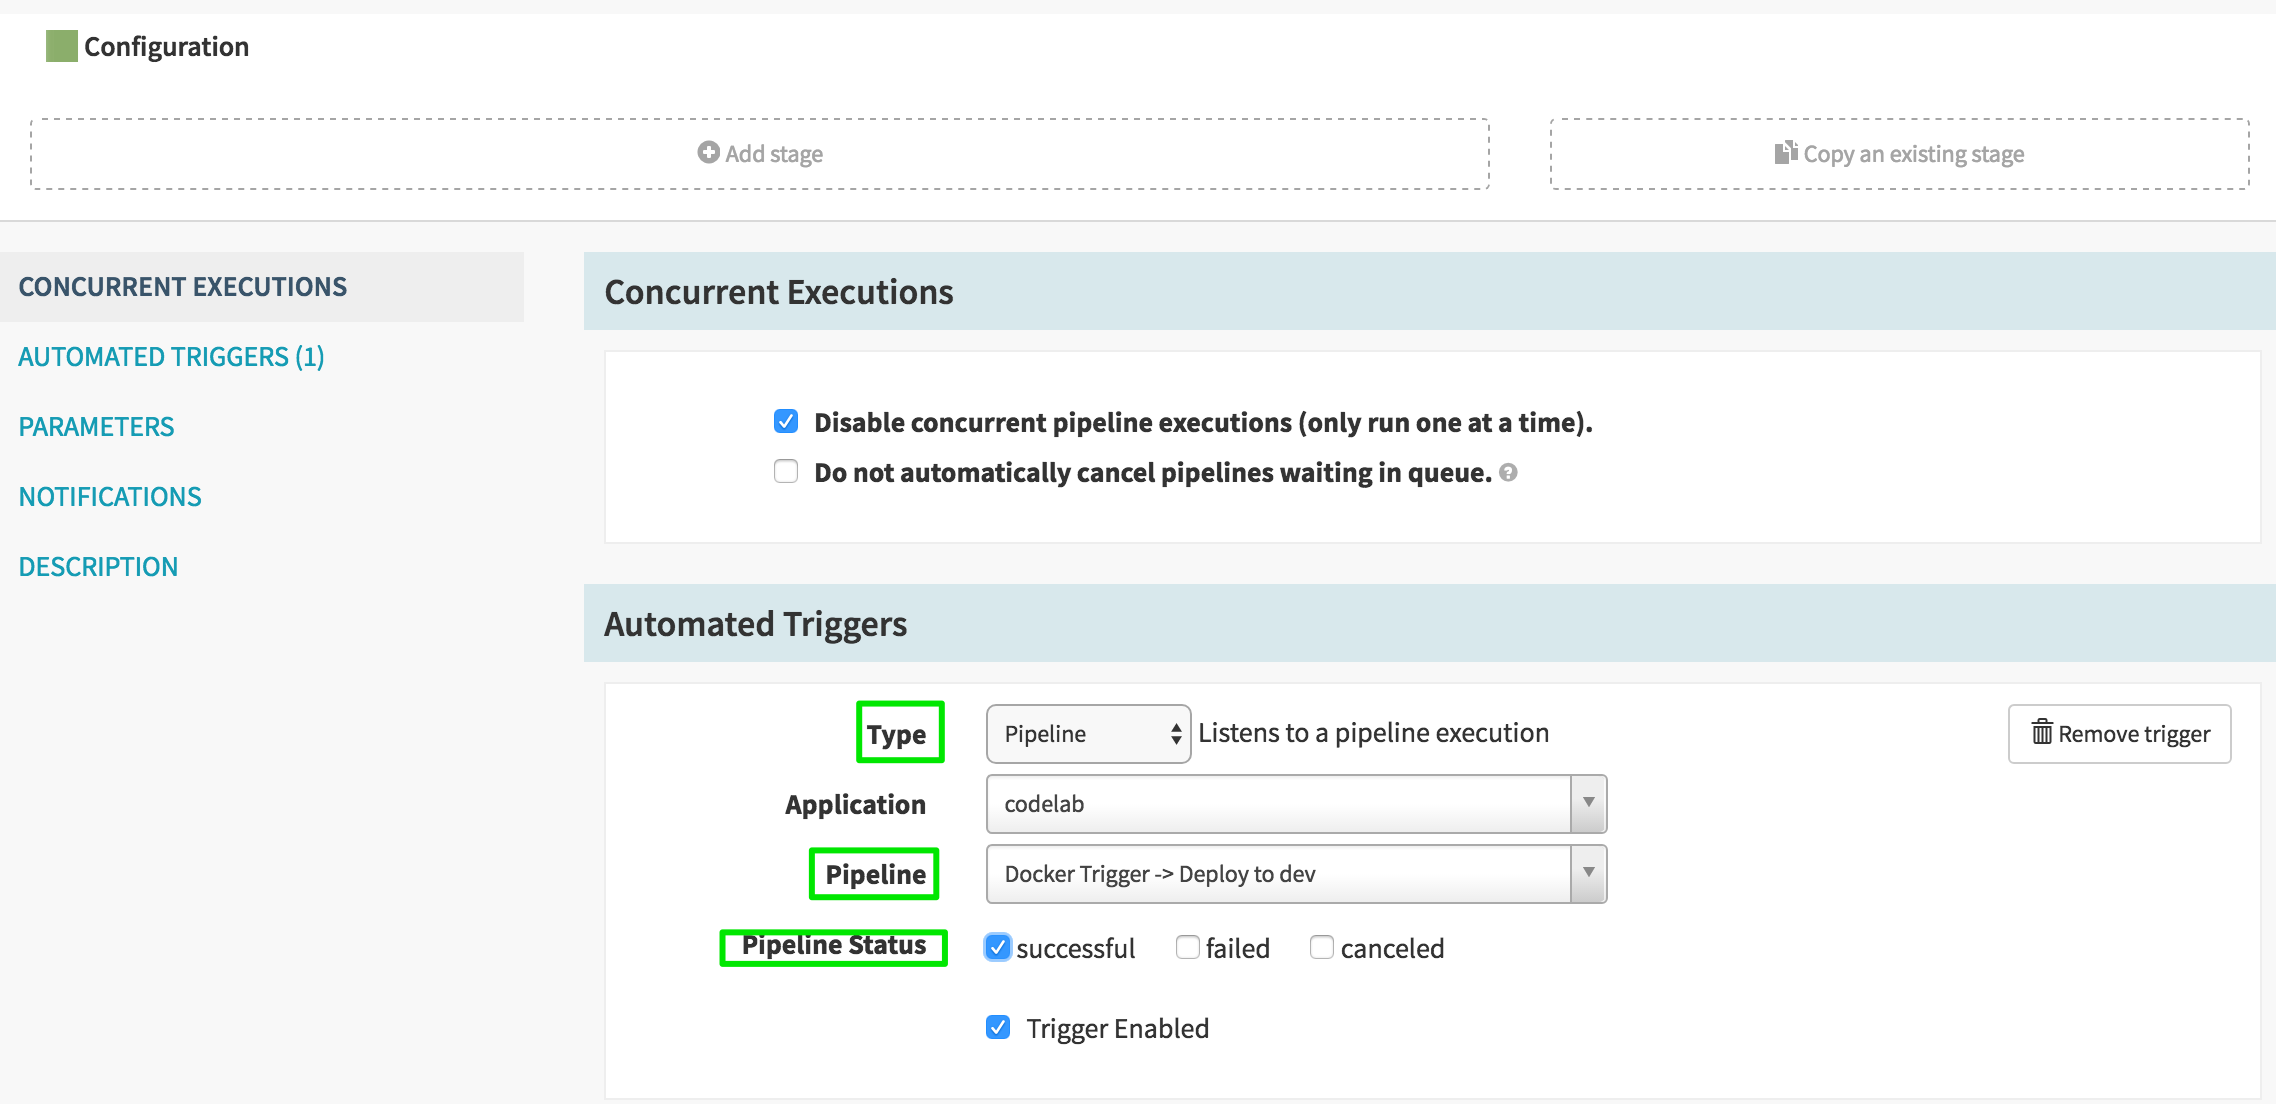
In the resulting page, select Add Trigger, and fill the form out as follows:
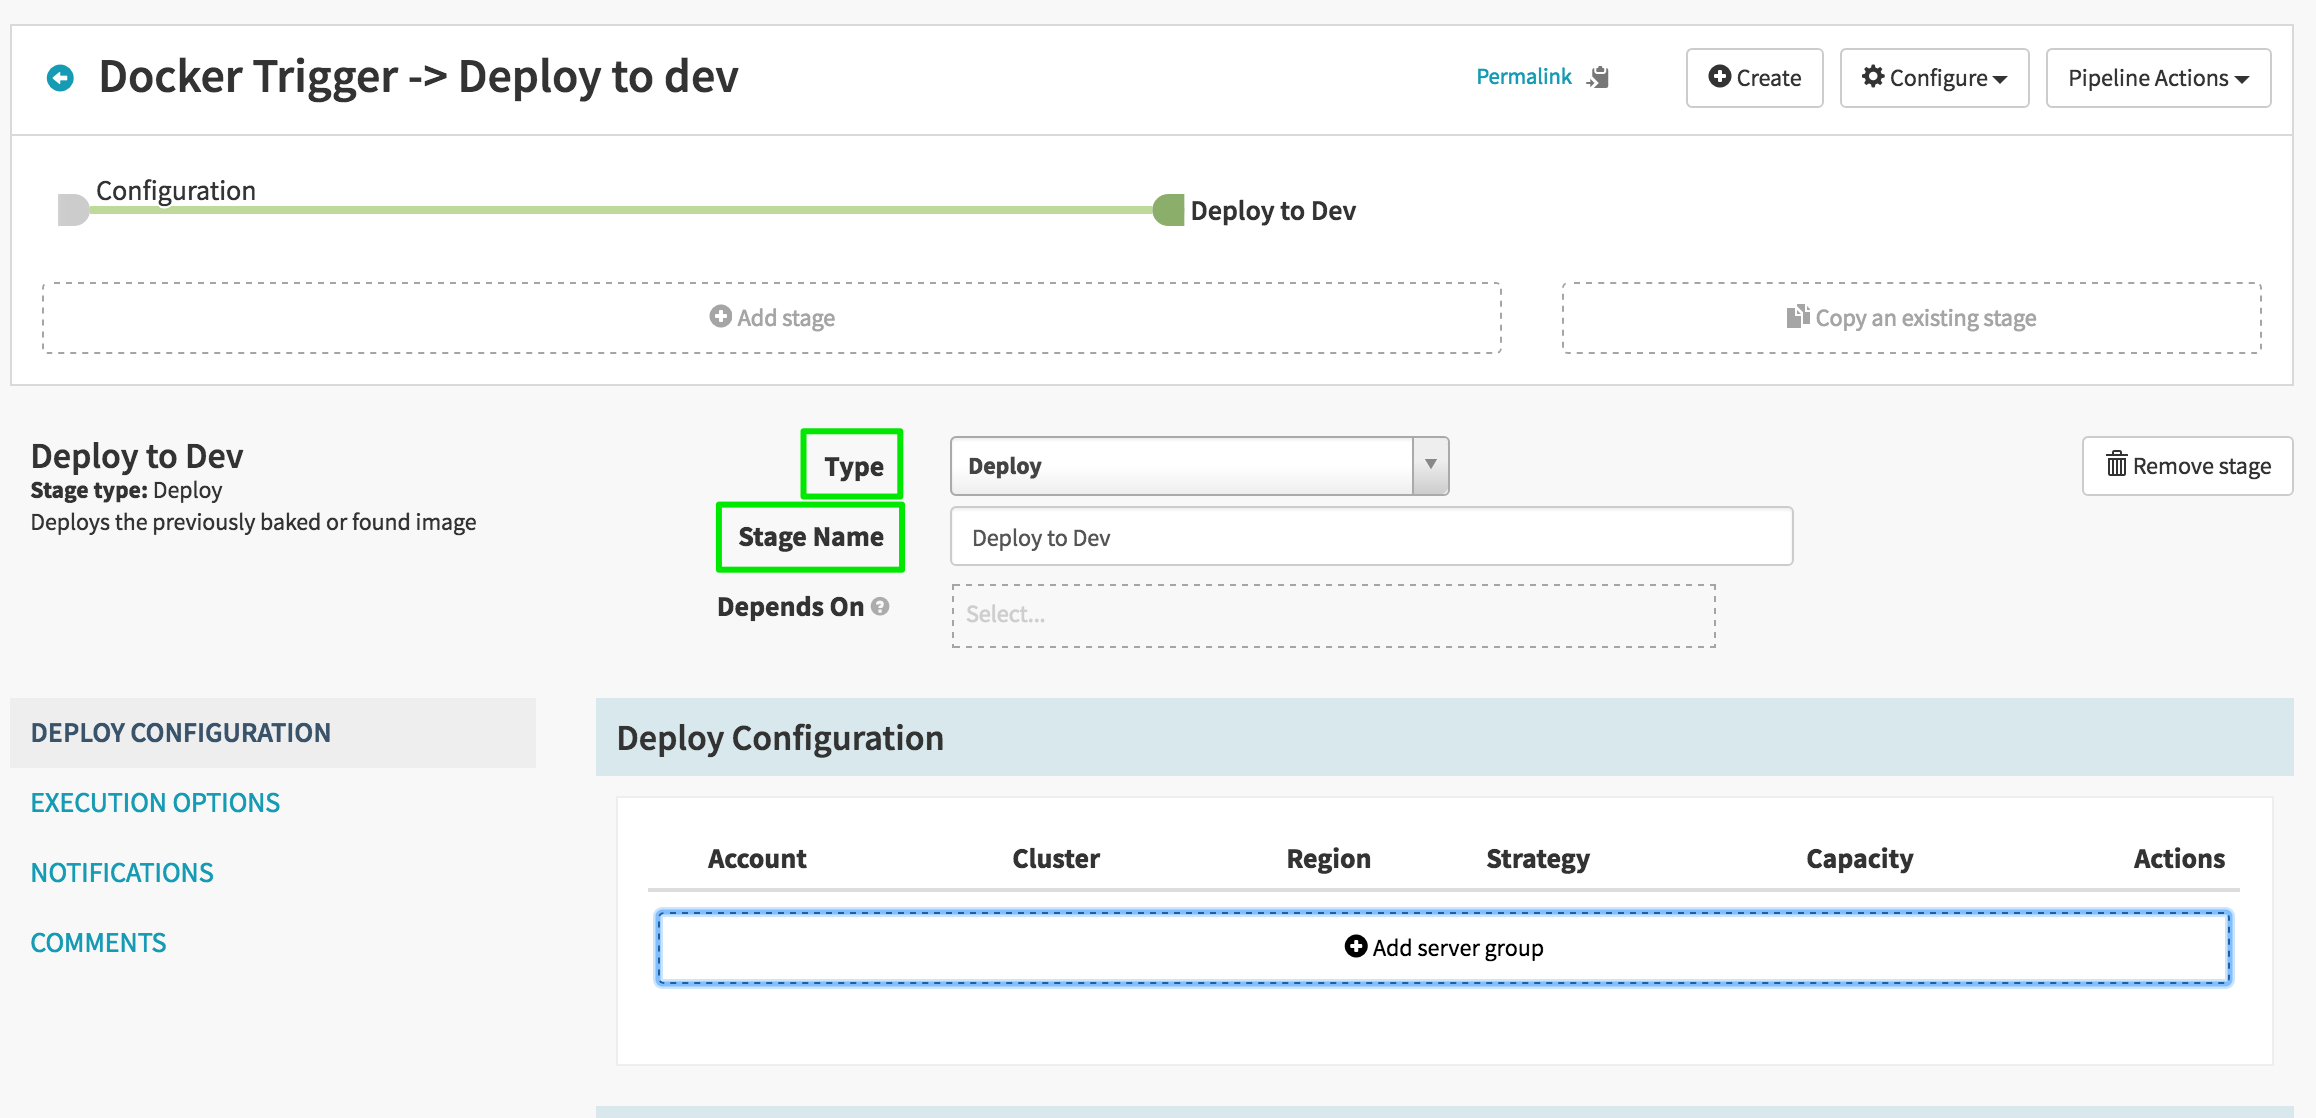
Now select Add Stage just below Configuration, and fill out the form as follows:
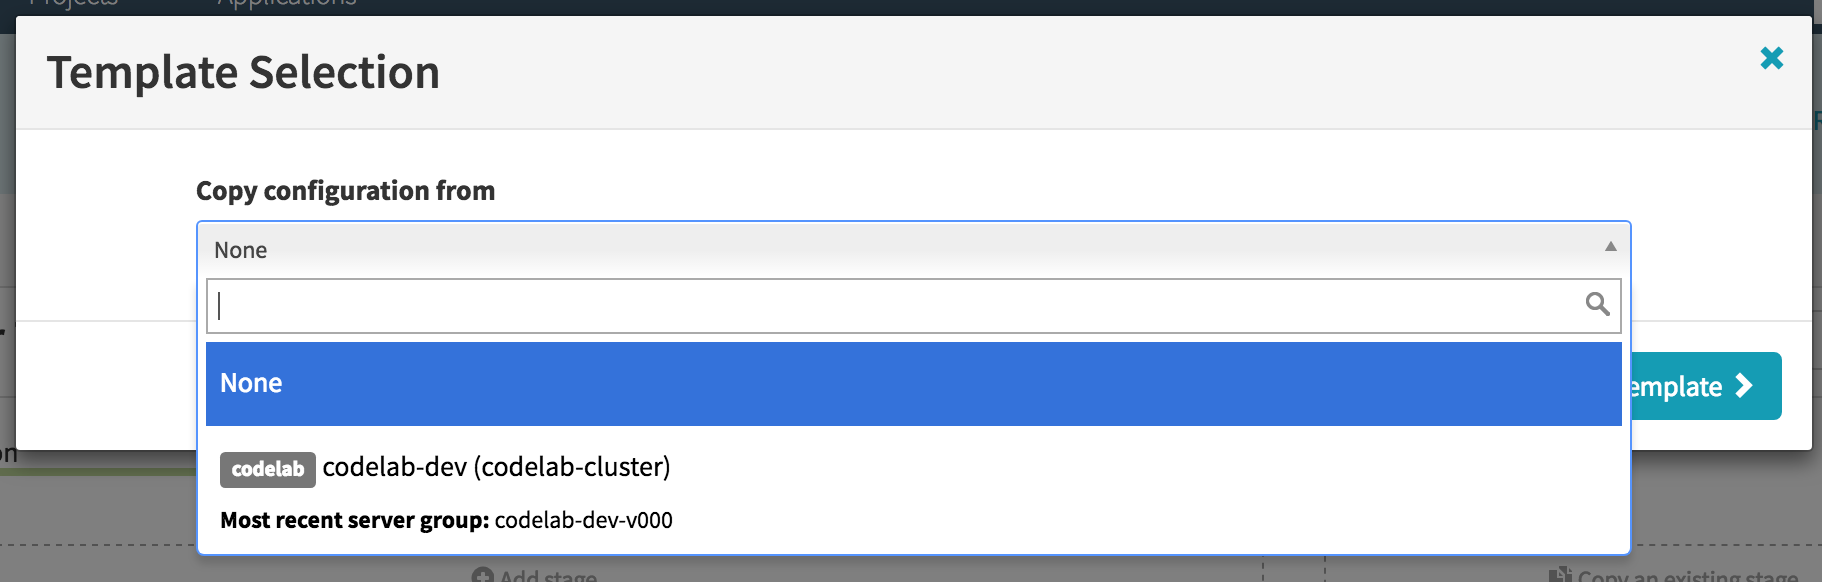
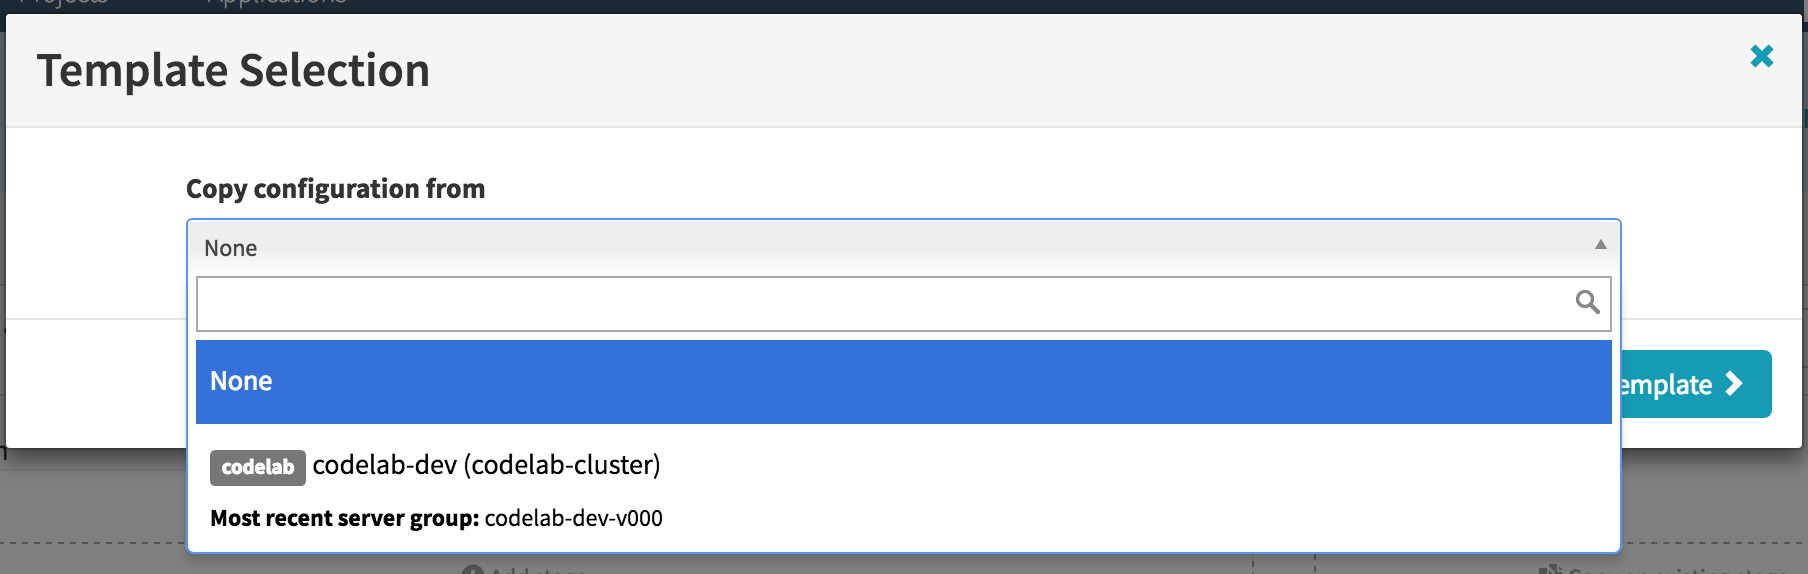
Next, in the Server Groups box select Add Server Group, where you will use the already deployed server group as a template like so:
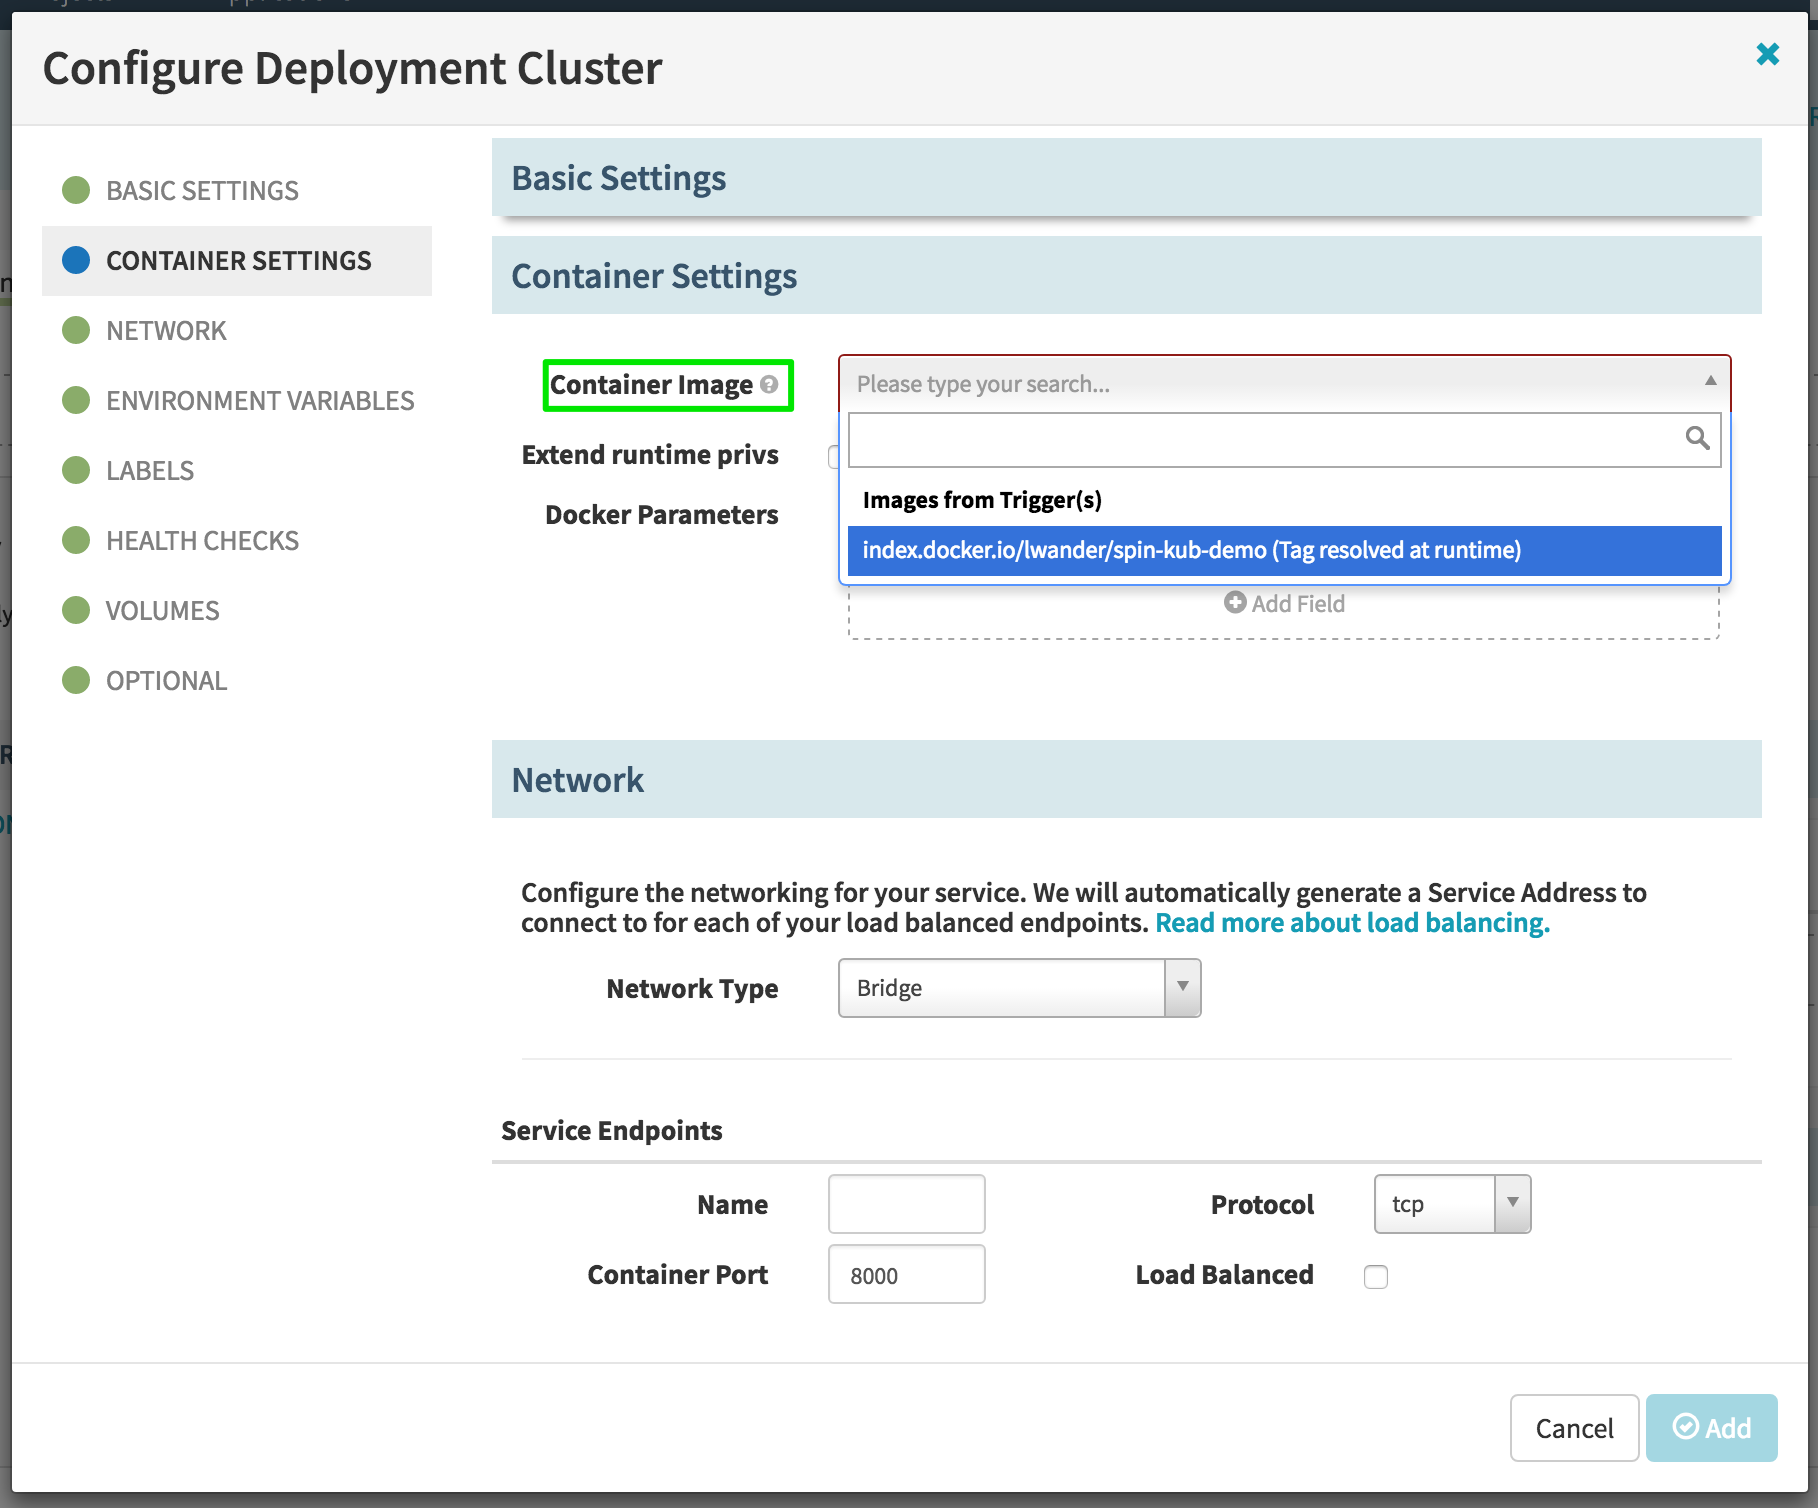
In the resulting dialog, we only need to make one change down in the Container subsection. Select the image that will come from the Docker trigger as shown below:
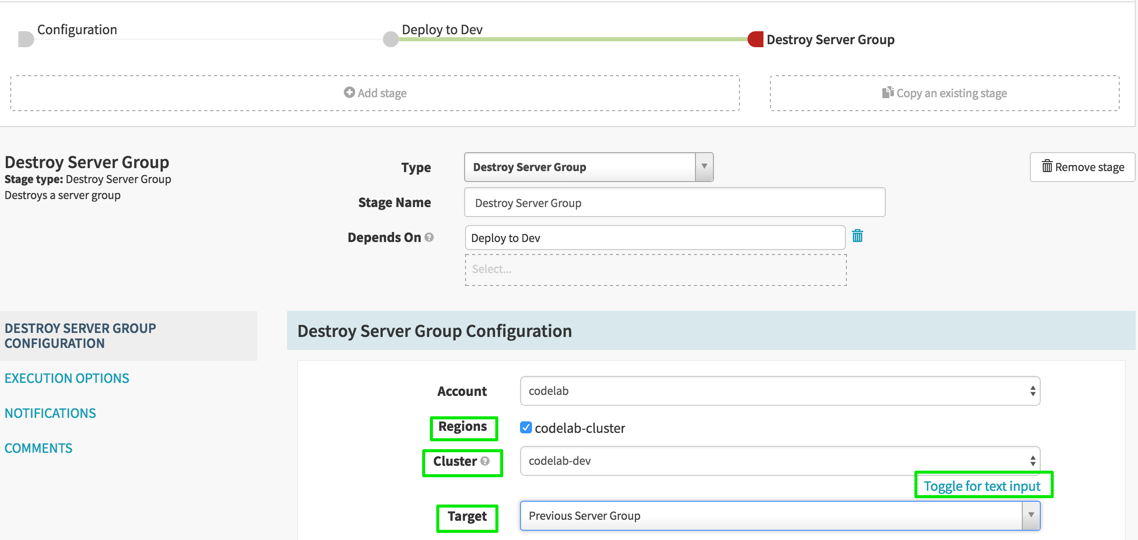
Lastly, we want to add a stage to destroy the previous server group in this dev cluster. Select Add Stage, and fill out the form as follows:
4. Verification pipeline
Back on the Pipelines dialog, create a new pipeline as before, but call it “Manual Judgement”. On the first screen, add a Pipeline trigger as shown below:
We will only add a single stage, which will serve to gate access to the prod environment down the line. The configuration is shown here:
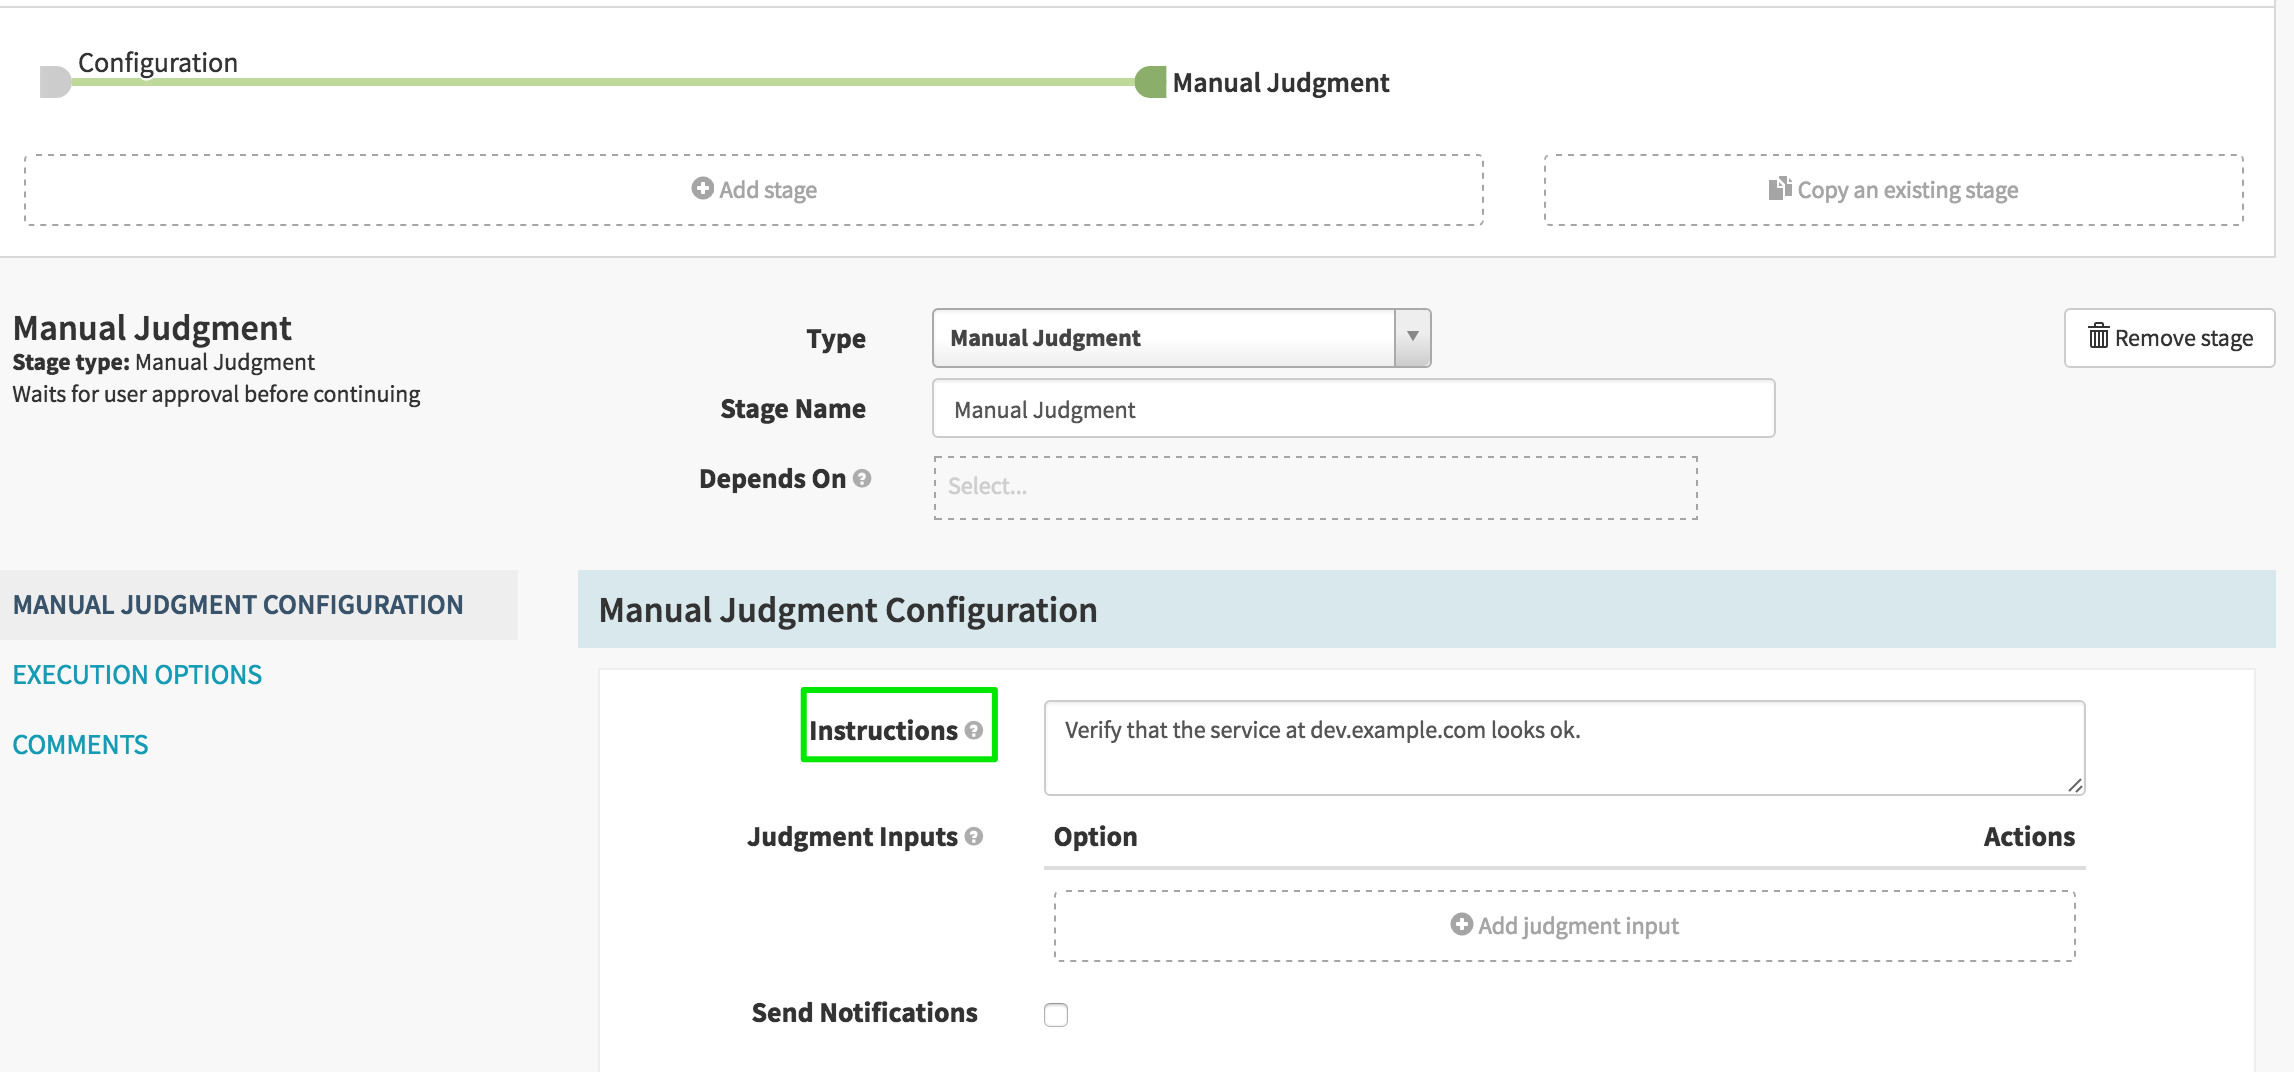
Keep in mind, more advanced types of verification can be done here, such as running a DC/OS batch job to verify that your app is healthy, or calling out to an external Jenkins server. For the sake of simplicity we will keep this as “manual judgement”.
5. Promote to prod
Create a new pipeline titled “Deploy to Prod”, and configure a pipeline trigger as shown here:
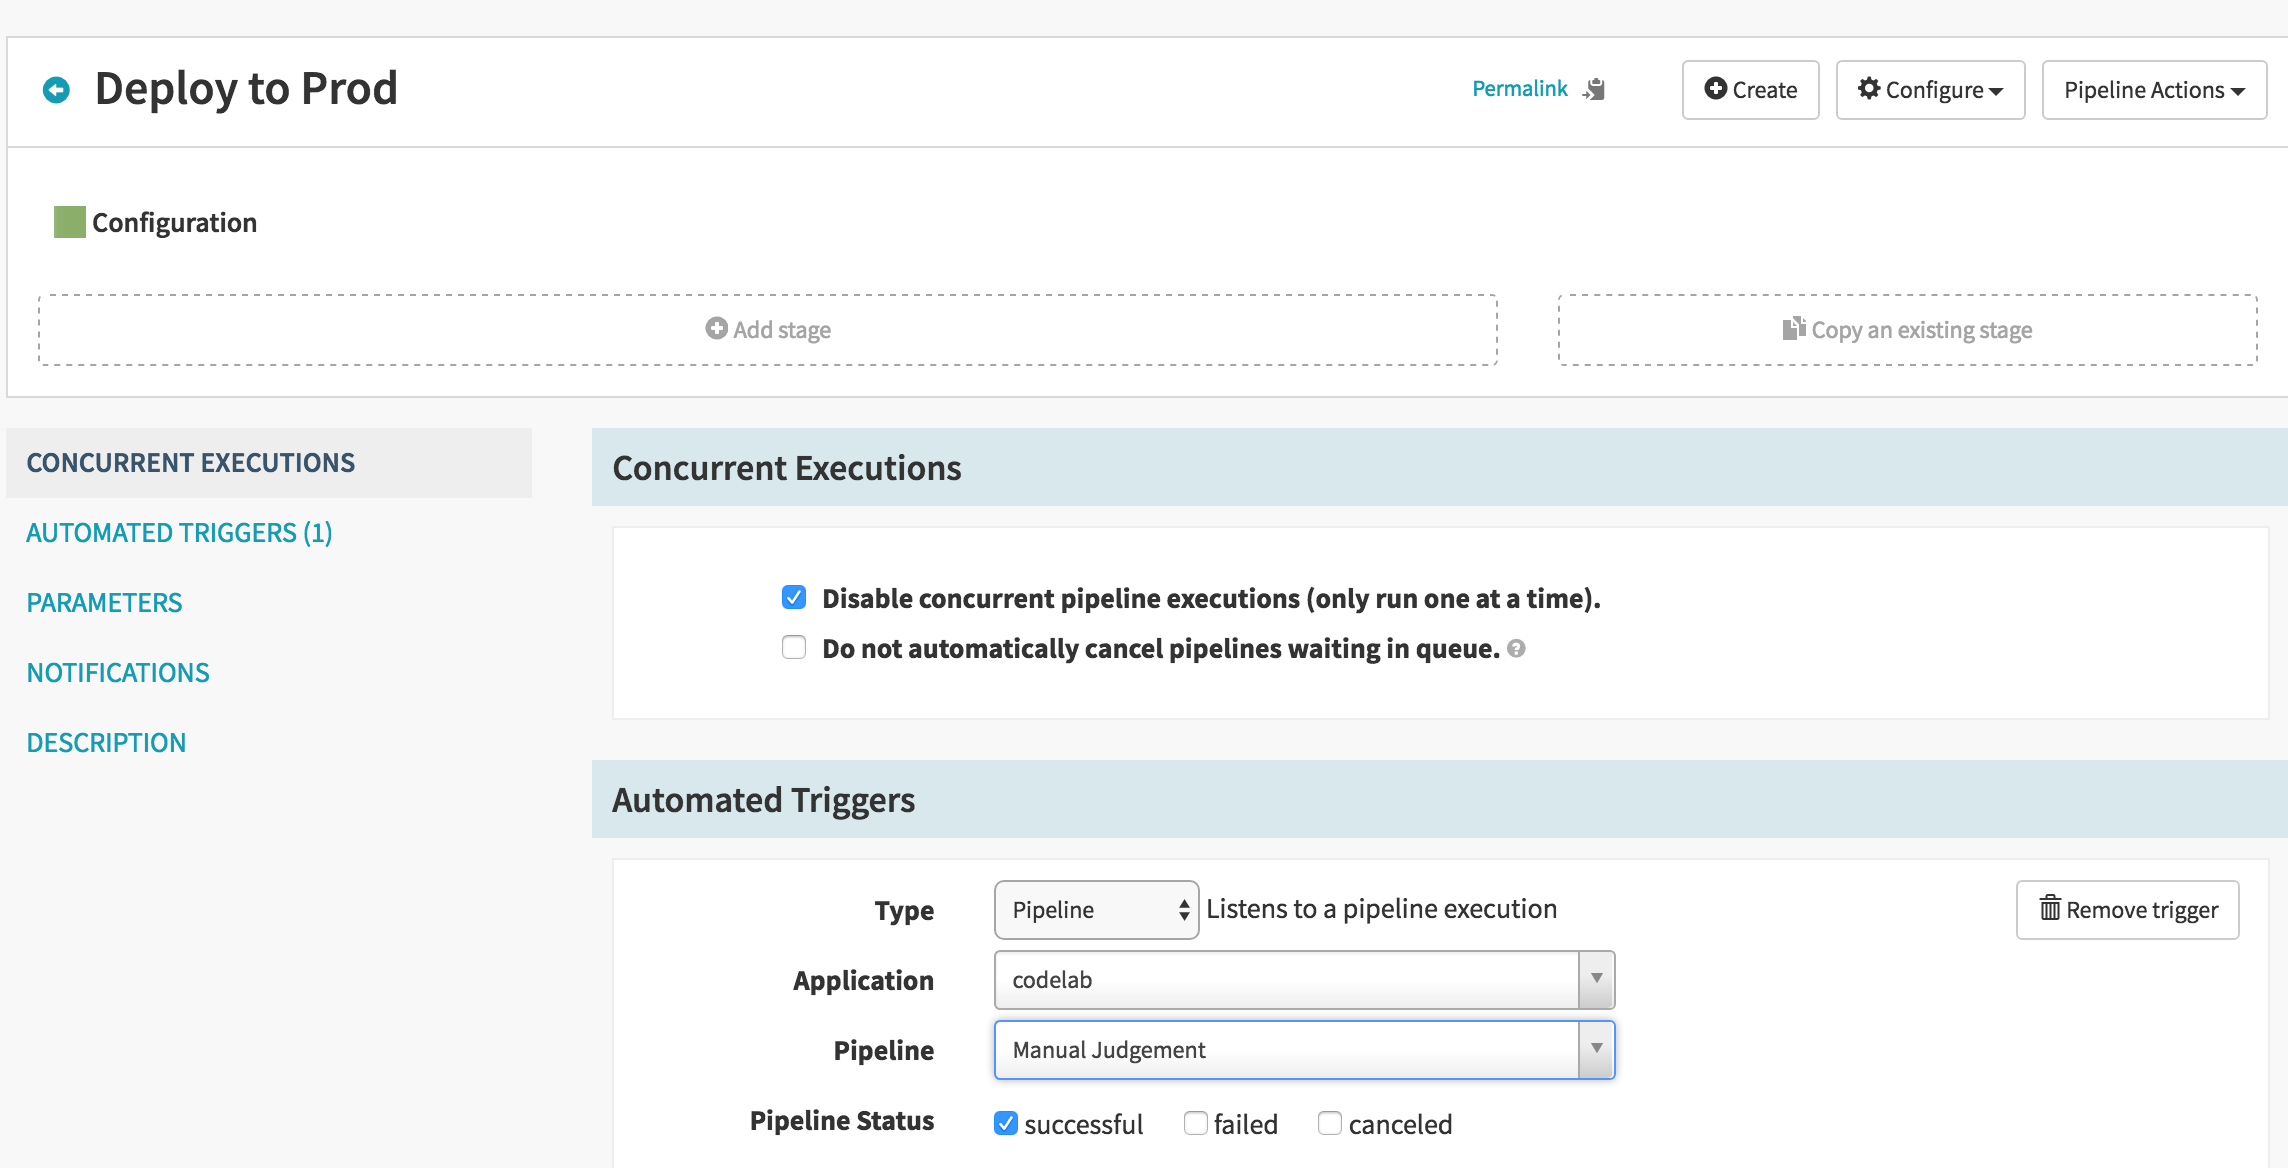
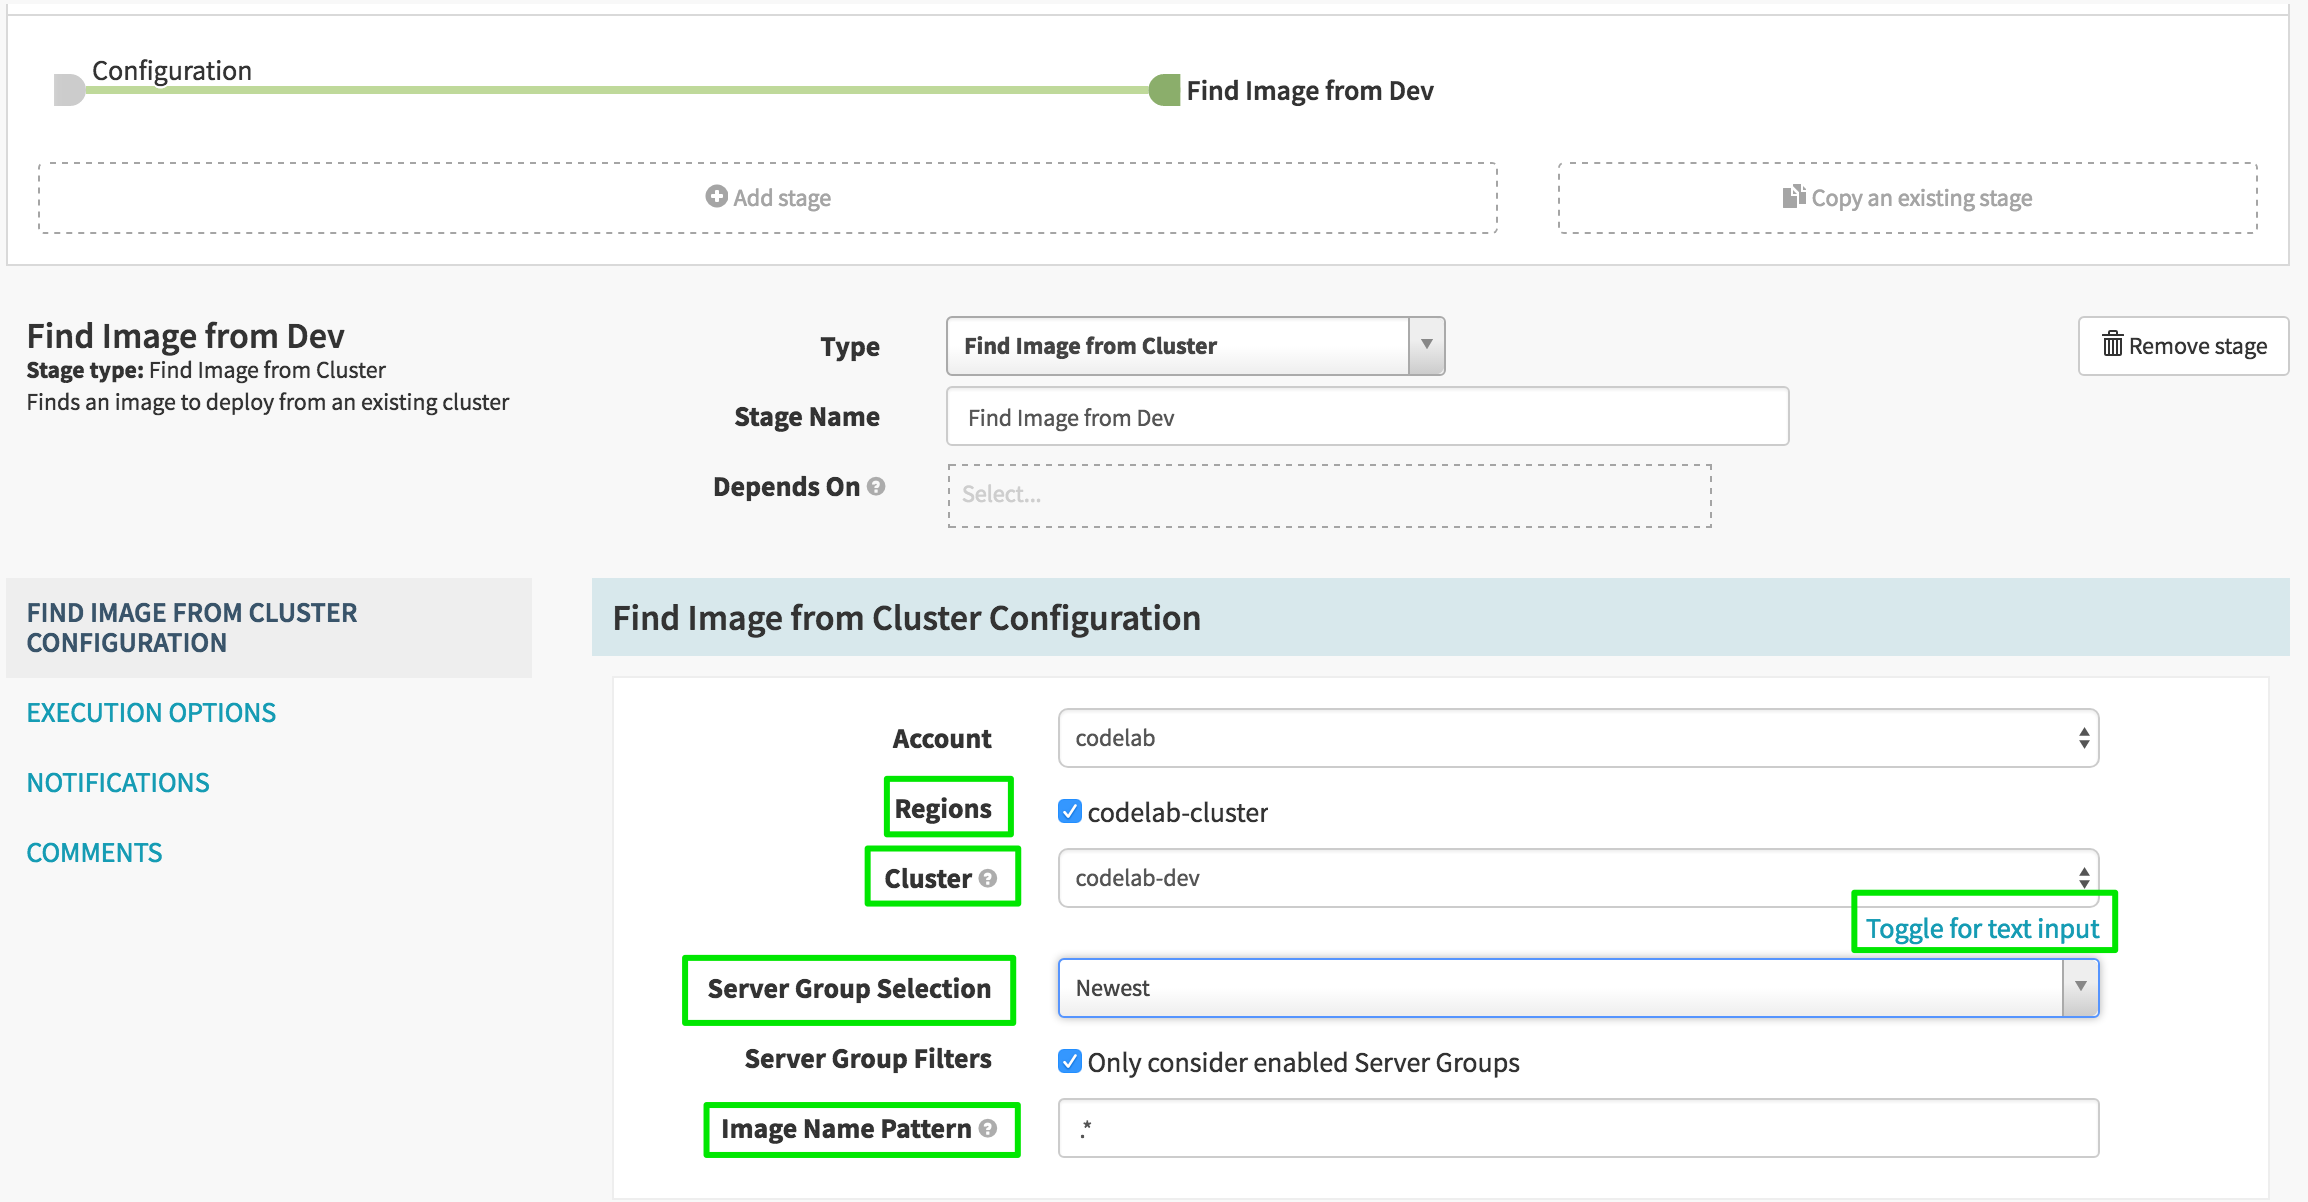
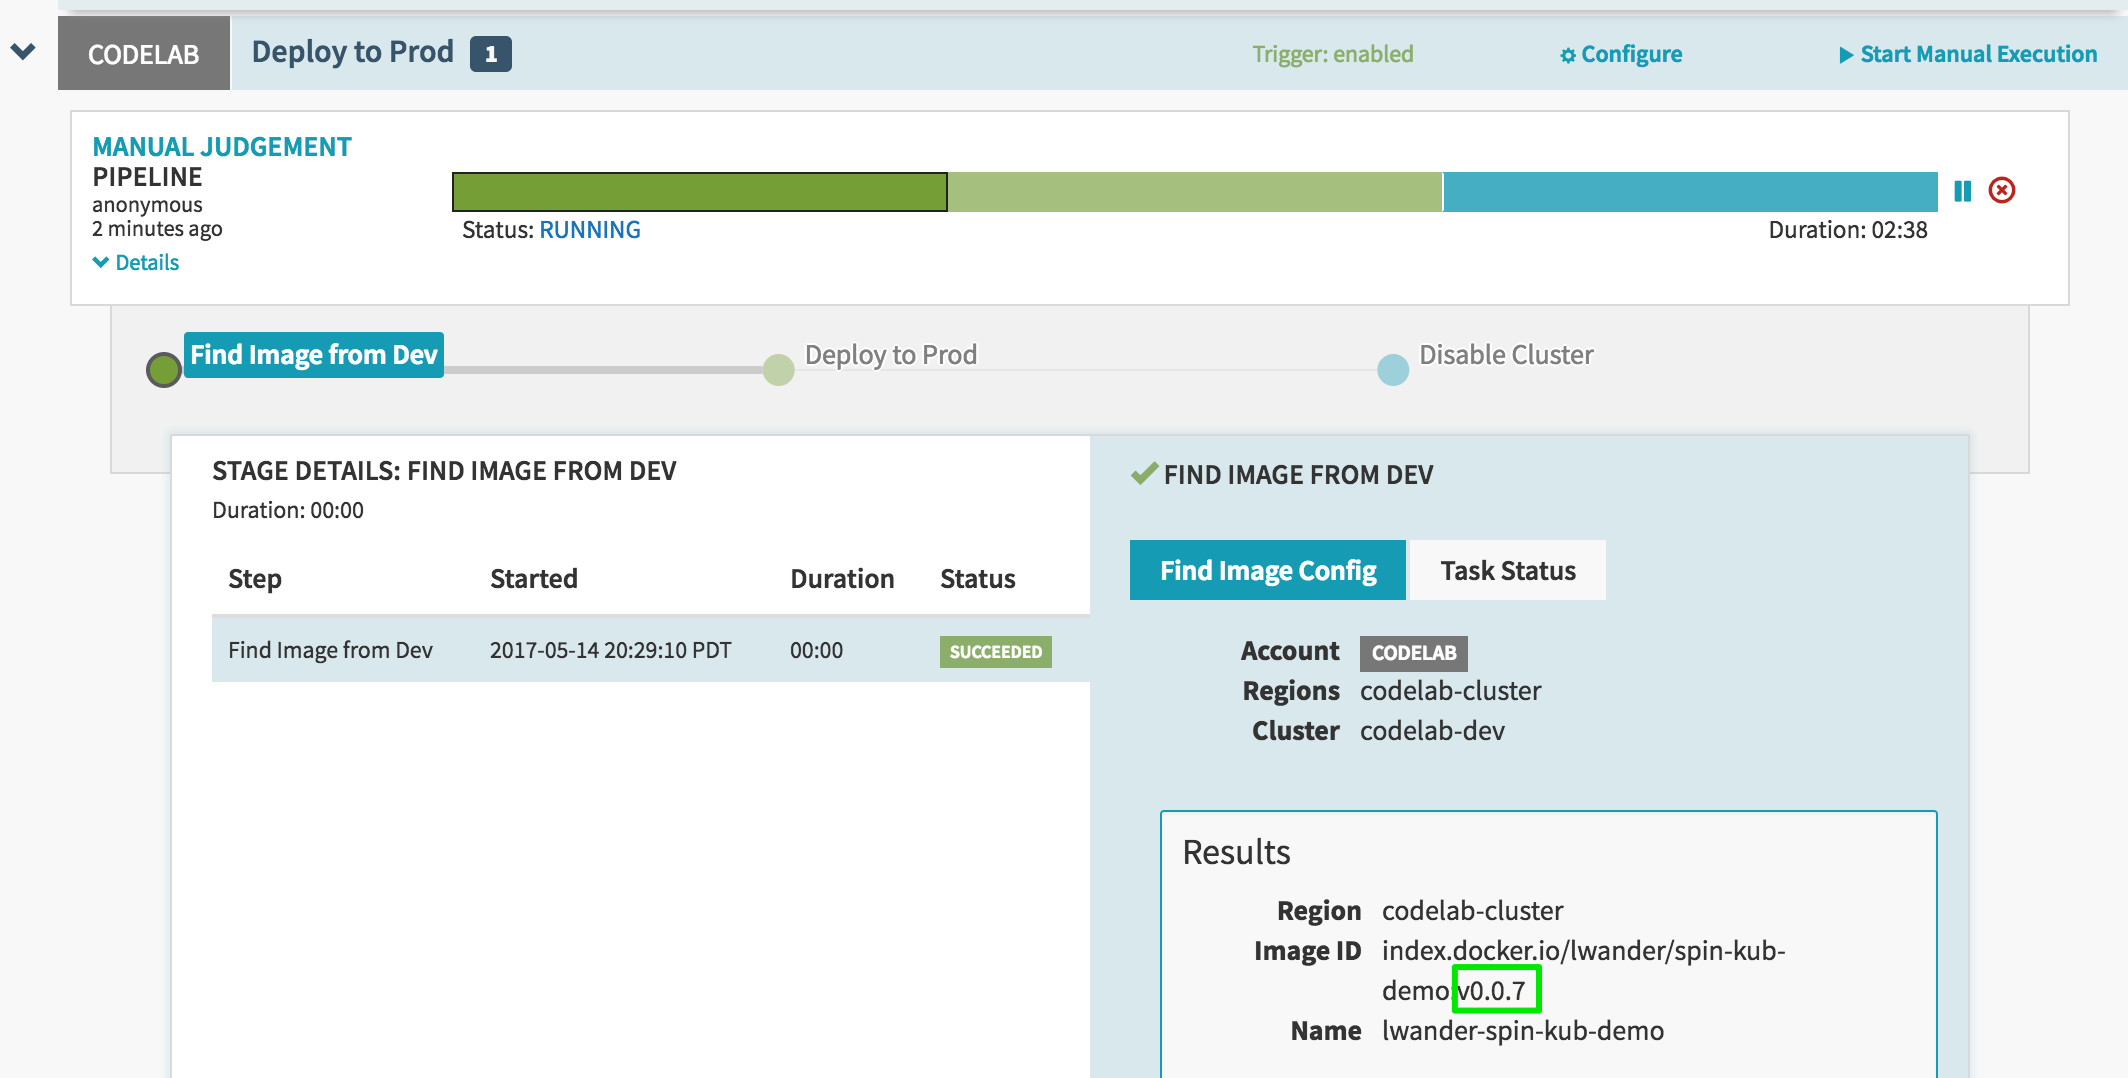
Now we need to find the deployed image in dev that we previously verified. Add a new stage and configure it as follows:
Now, to deploy that resolved image, add a new stage and configure it as follows.
Select Add Server Group, and again use the dev deployment as a template:
This time we need to make three changes to the template. First, change the “stack” to represent our prod cluster:
Next in the container section:
Lastly in the labels section:
Now to prevent all prior versions of this app in production from serving traffic once the deploy finishes, we will add a “Disable Cluster” stage like so:
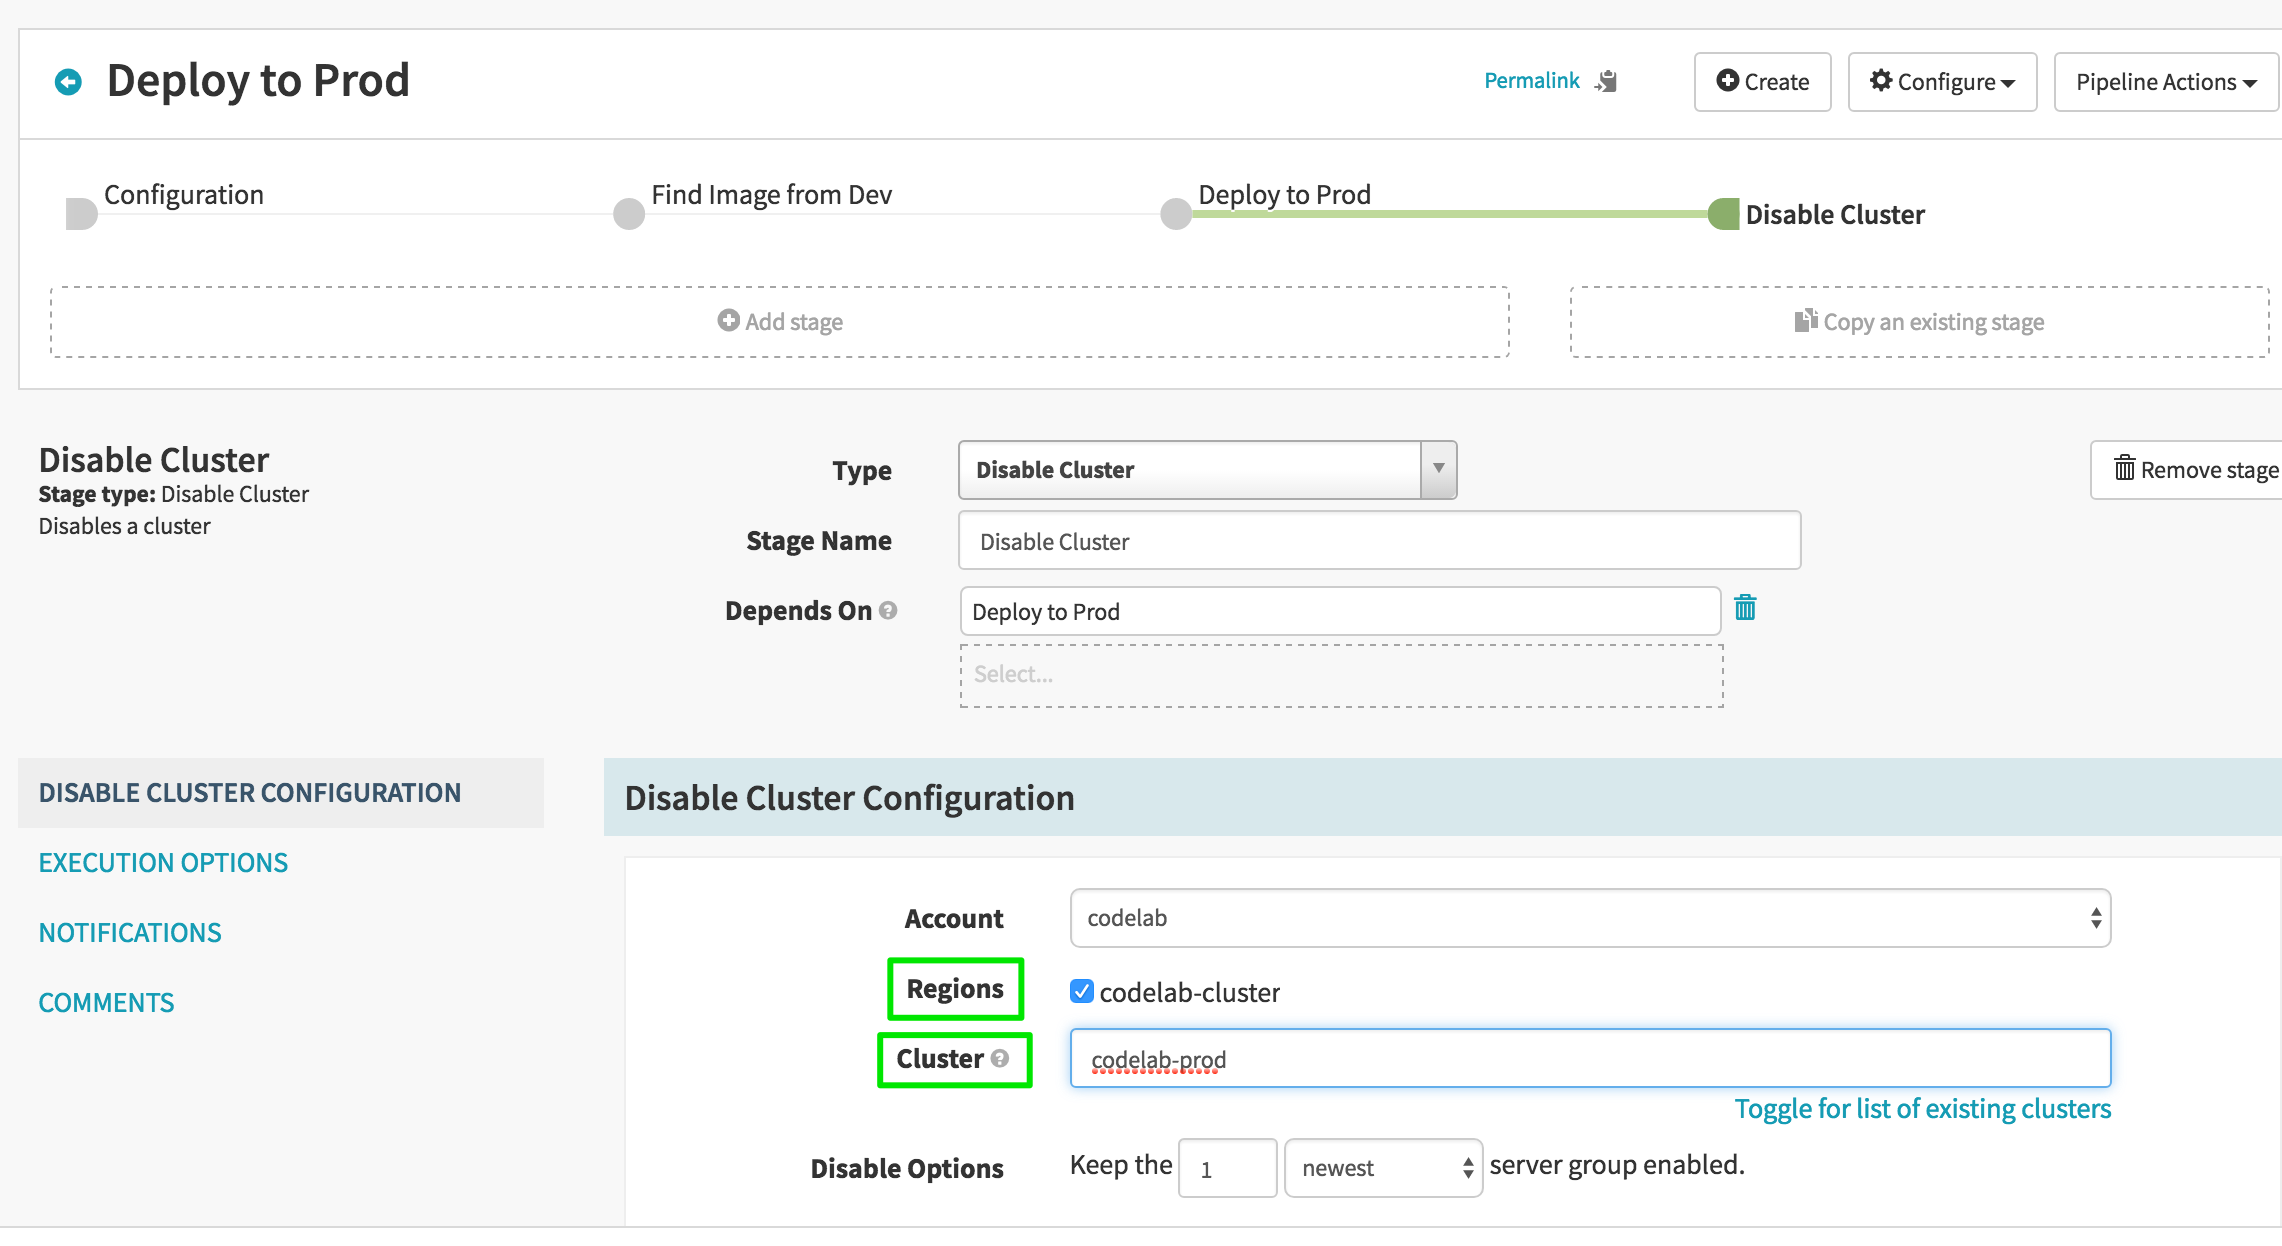
Save the pipeline, and we are ready to go!
7. Run the pipeline
Push a new branch to your repo, and wait for the pipeline to run.
NEW_VERSION=v1.0.0
git checkout -b $NEW_VERSION
git push origin $NEW_VERSION
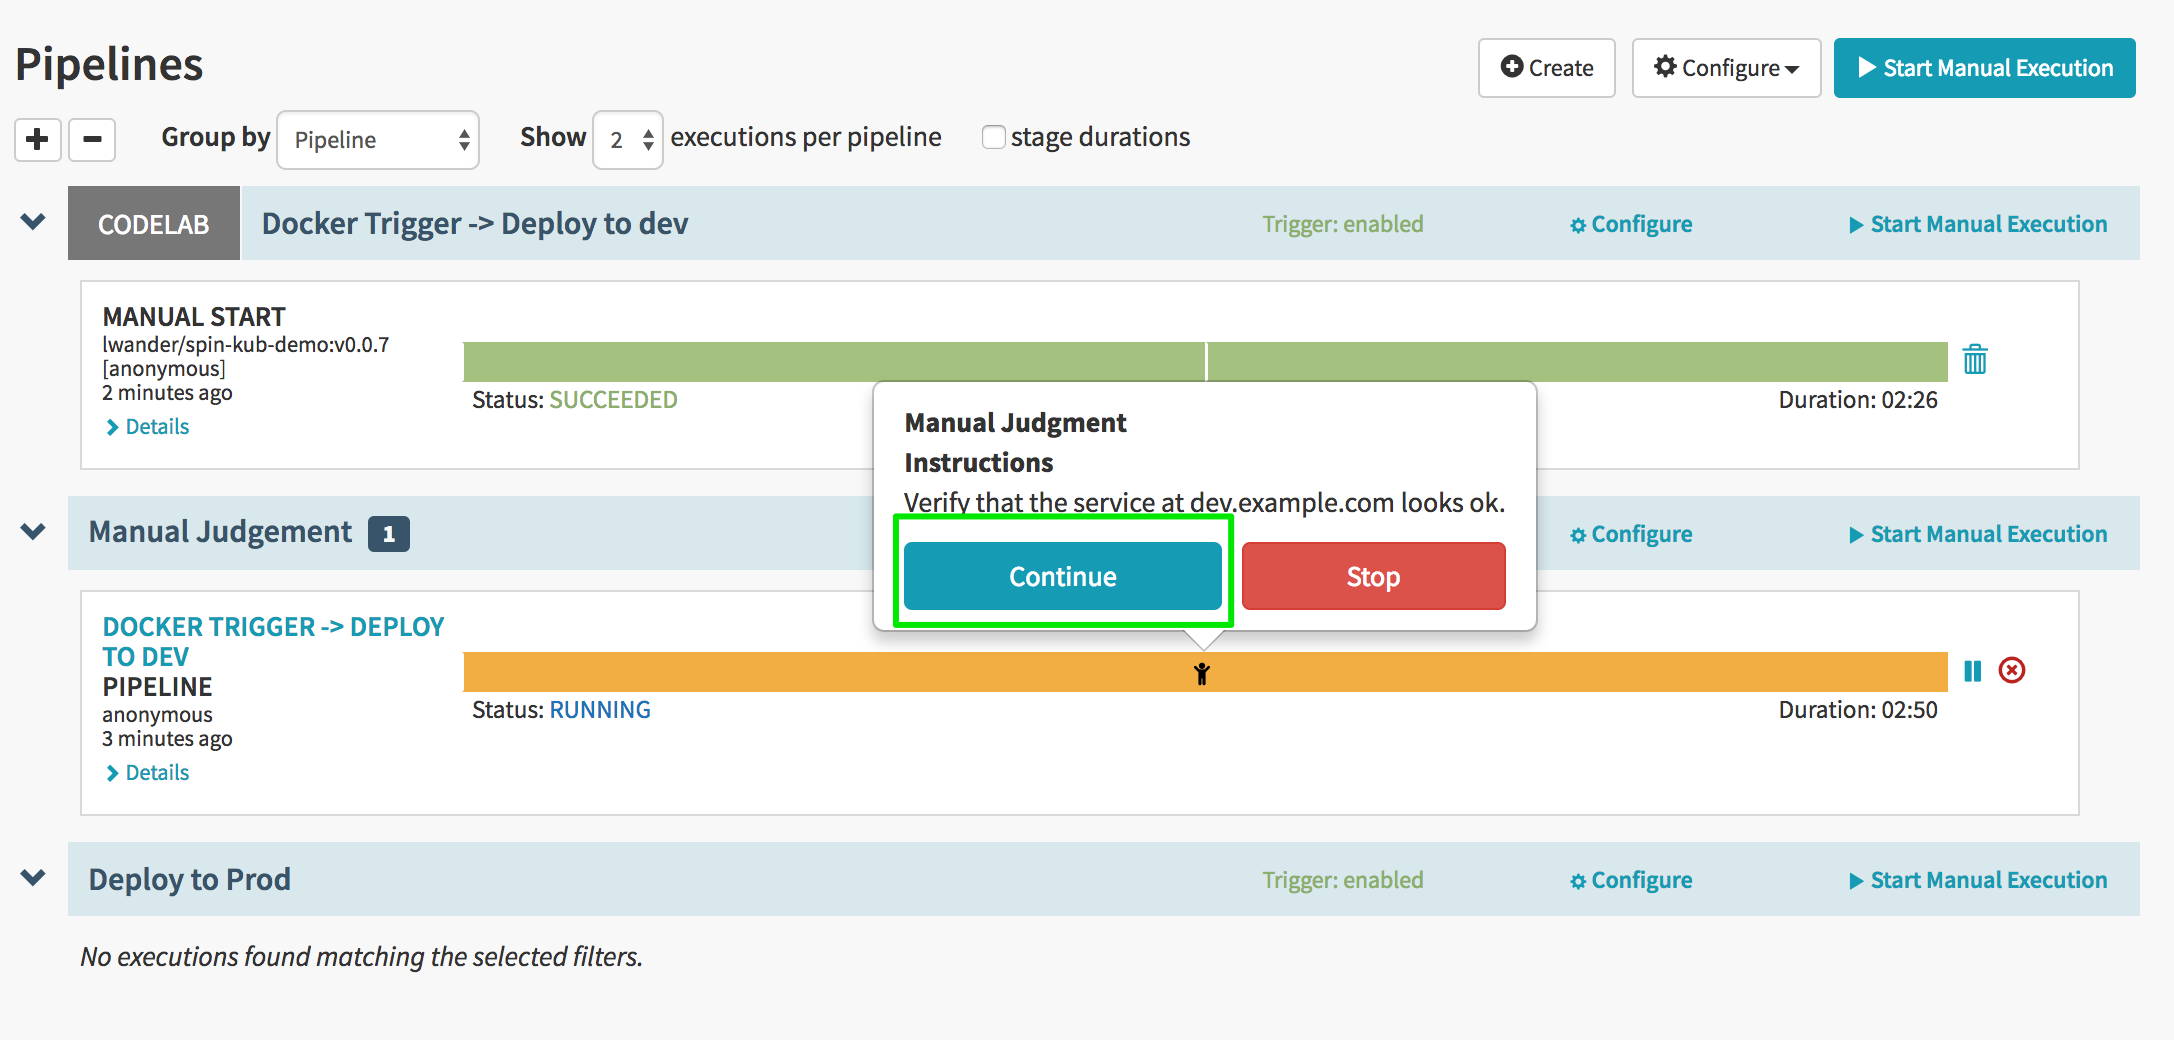
Once the Manual Judgement stage is hit, use curl to “verify” your deployment.
curl --header "Host: dev.example.com" http://$PUBLIC_AGENT
Hit continue once you are ready to promote to prod.
To verify, use curl again:
curl --header "Host: prod.example.com" http://$PUBLIC_AGENT
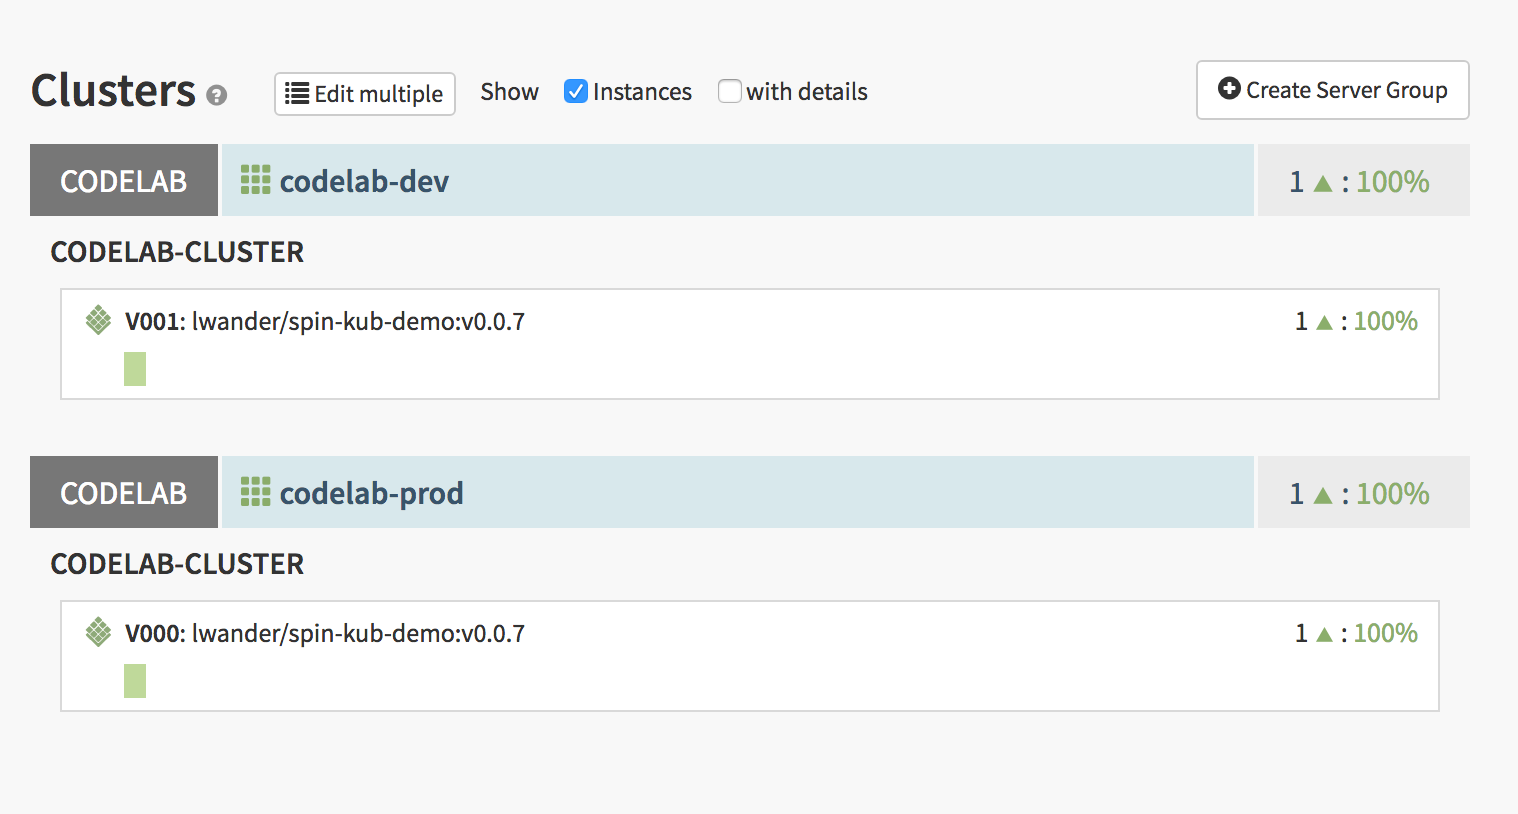
Once the pipelines are done, you can see the dev and prod stacks in the Clusters tab: