Deploy Artifacts from Artifactory to CF
In this codelab, you will deploy an artifact to Cloud Foundry via a Spinnaker pipeline. The pipeline is triggered by an artifact published to a JFrog Artifactory Maven repository or by an app manifest stored in a GitHub repository.
Prerequisites
This codelab assumes you have the following:
- Artifact support enabled .
- An Artifactory repository configured to accept a Maven artifact—the JAR for your application
- A GitHub repository containing a manifest with which to deploy your application
1. Add Artifactory Search to Spinnaker
a. Enable the Artifactory repository:
$ hal config repository artifactory enable
b. Add a search for your repository:
$ hal config repository artifactory search add spring-artifactory --base-url https://my.repo.example.com \
  	--repo my-example-repo --groupId com.example.mygroup --username example --password mypassword
2. Add Maven Account to Spinnaker
a. Enable the Maven artifact provider:
$ hal config artifact maven enable
b. Add an artifact account for Maven:
$ hal config artifact maven account add spring-artifactory-maven --repository-url https://my.repo.example.com
3. Add GitHub Account to Spinnaker
See the documentation about how to Configure a GitHub artifact account .
a. After generating an access token with the repo scope, store that token in a token file (TOKEN_FILE).
$ TOKEN_FILE=<Insert Path to Token File>
b. Enable the GitHub artifact provider:
$ hal config artifact github enable
c. Add an artifact account (GITHUB_ACCOUNT) for GitHub:
$ GITHUB_ACCOUNT=<Insert GitHub Account Name>
$ hal config artifact github account add $GITHUB_ACCOUNT \
  --token-file $TOKEN_FILE
d. Apply your changes:
$ hal deploy apply
4. Configure GitHub Repository Webhook
a. Follow the documentation about Configuring GitHub Webhooks . Take note of the secret you provide to GitHub for the webhook.
5. Configure the Application and Pipeline
a. Create a new pipeline for your application. In the pipeline configuration, add an Artifactory trigger to the Automated Triggers, as shown below.
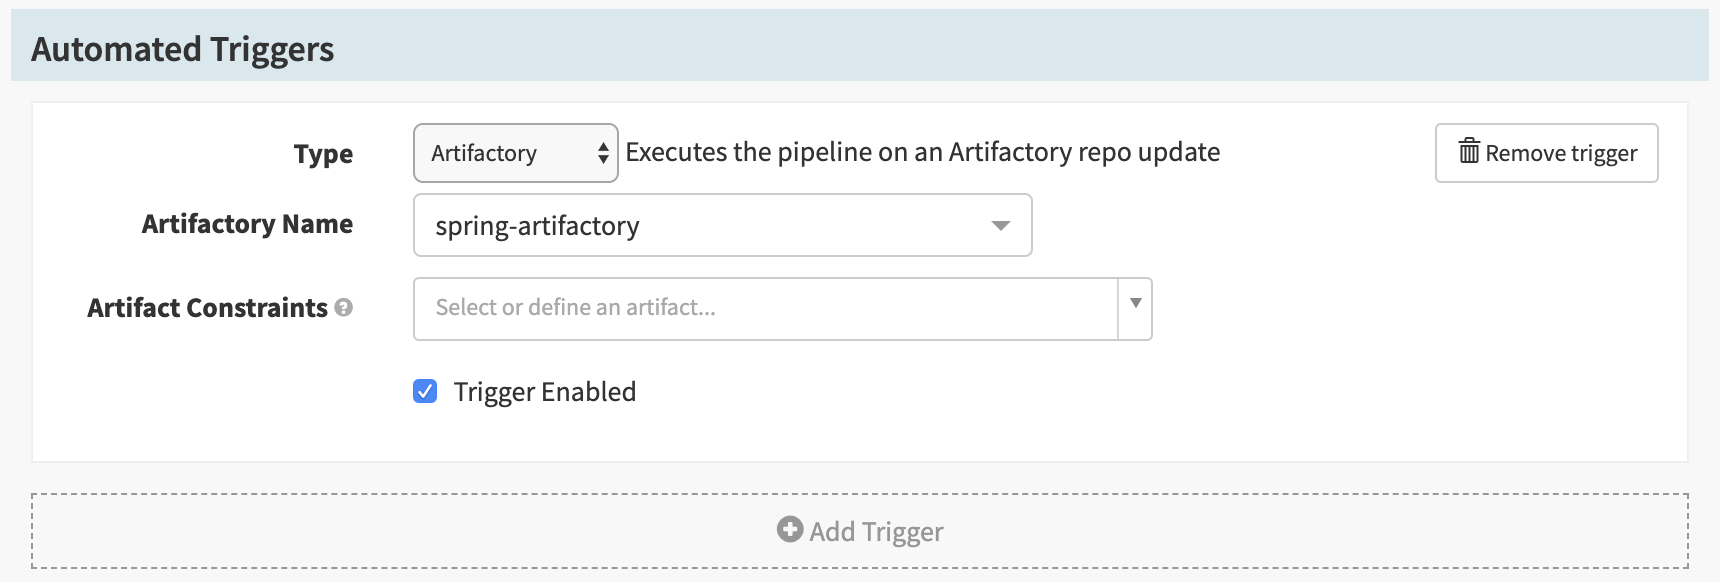
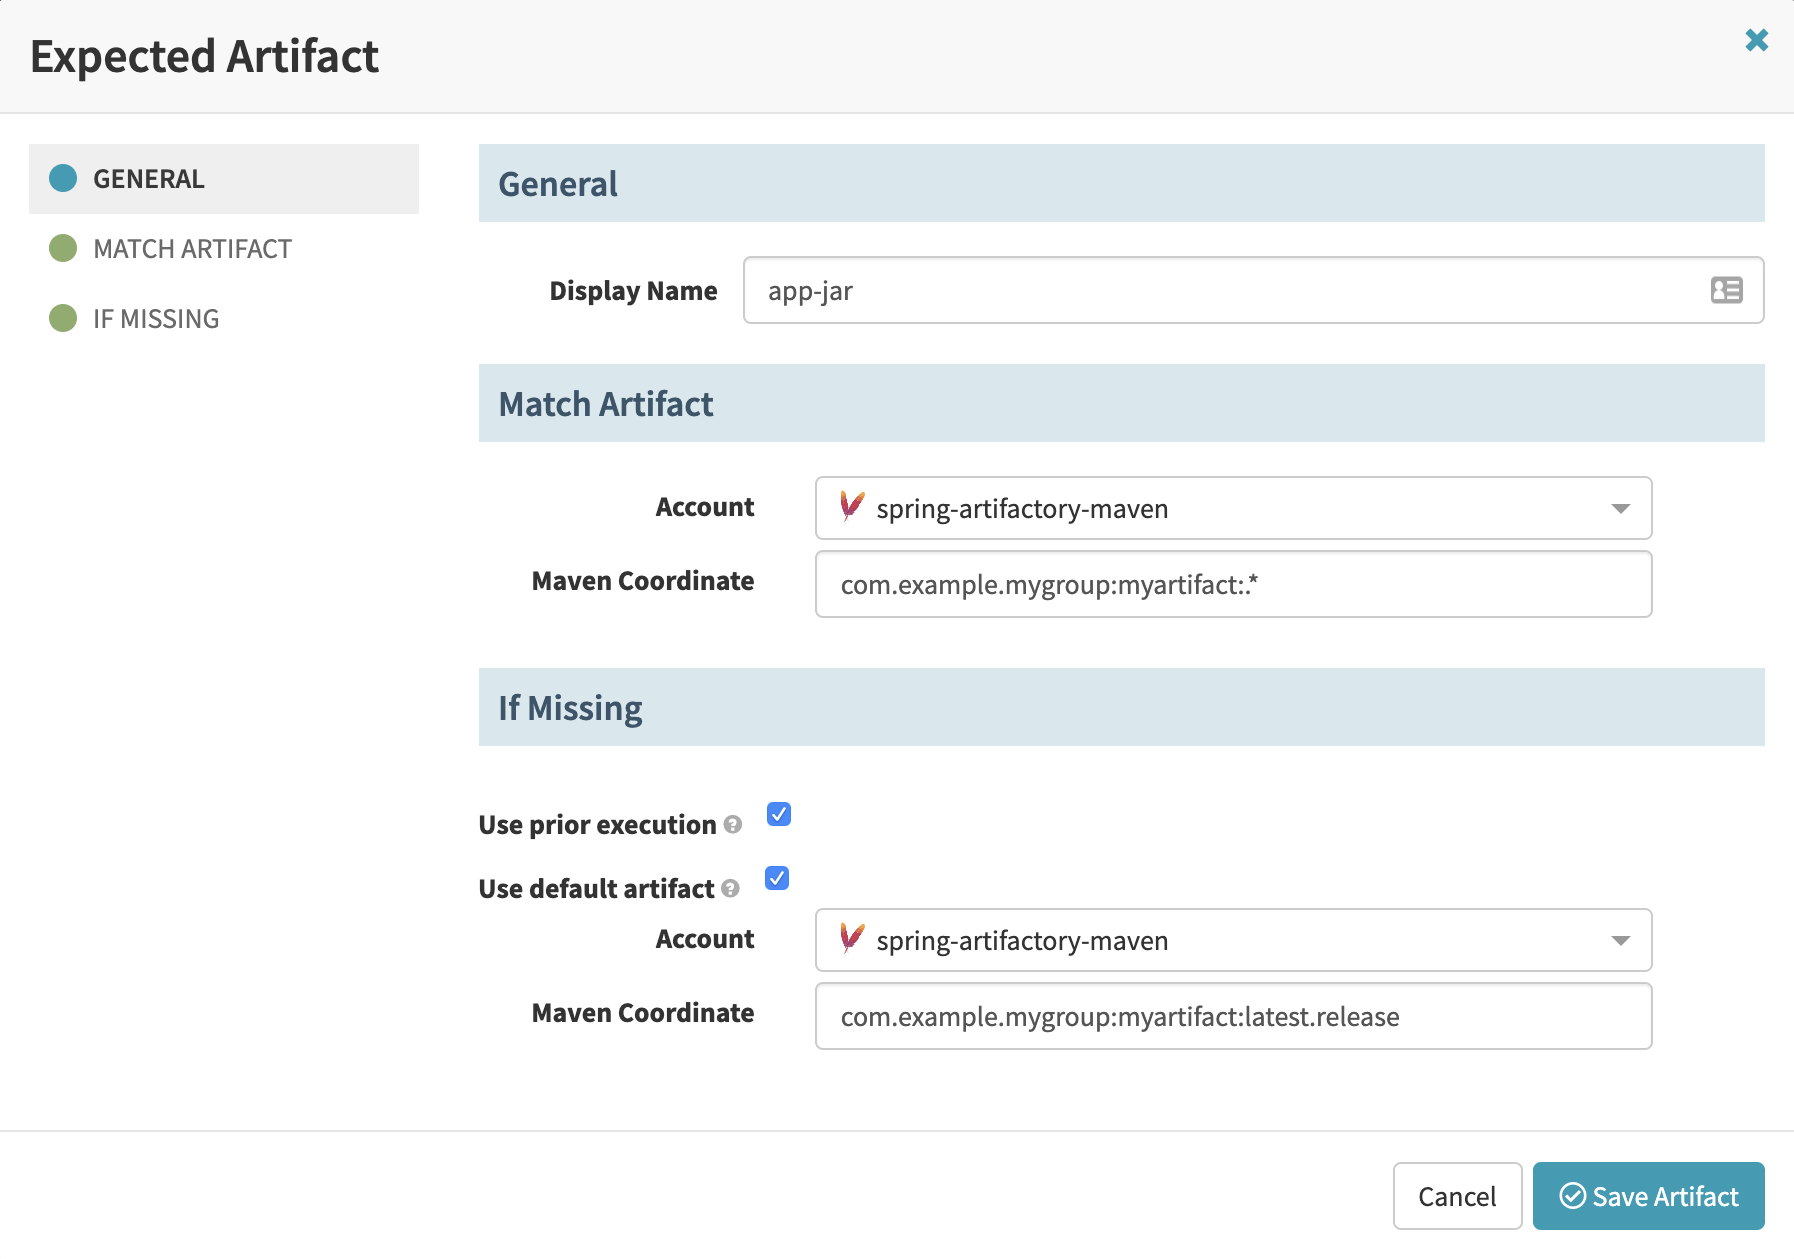
b. In the Artifact Constraints dropdown for the Artifactory trigger, select “Define a new artifact…” and populate the Expected Artifact form with the details of the artifact that will be published to the Artifactory repository.
c. Add a Git trigger to the Automated Triggers, as shown below. Supply the secret you used in Step 4a.
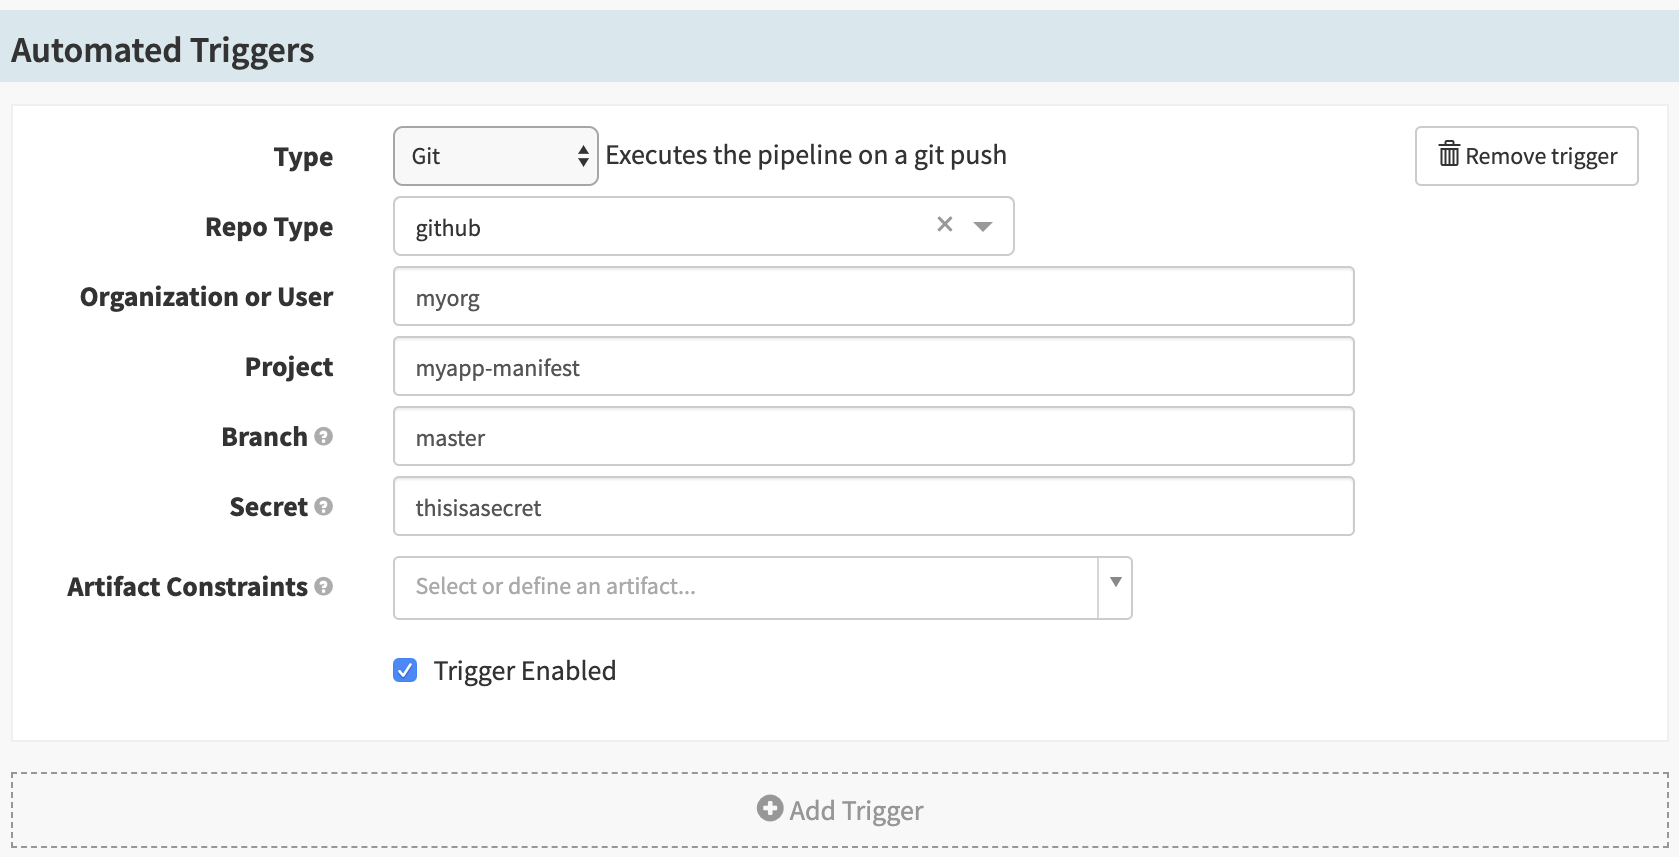
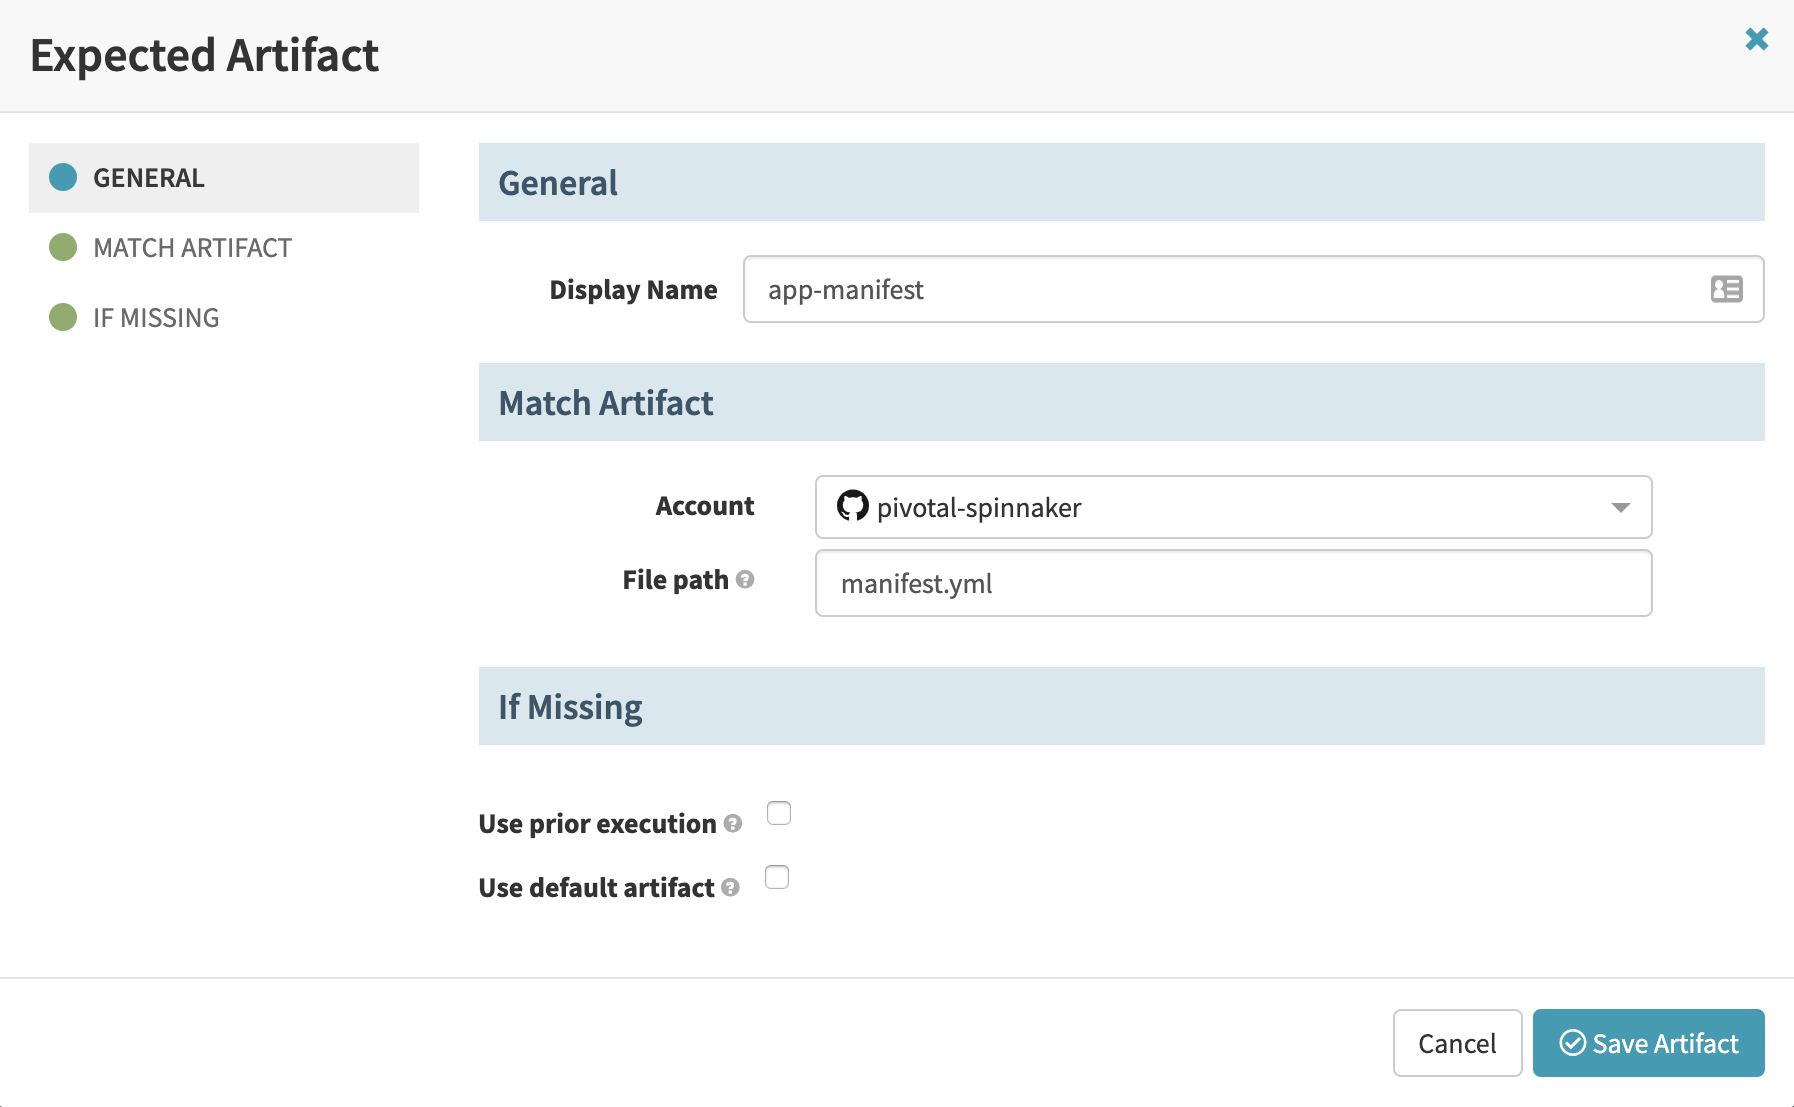
d. In the Artifact Constraints dropdown for the Git trigger, select “Define a new artifact…” and populate the Expected Artifact form with the details of the manifest stored in the GitHub repository.
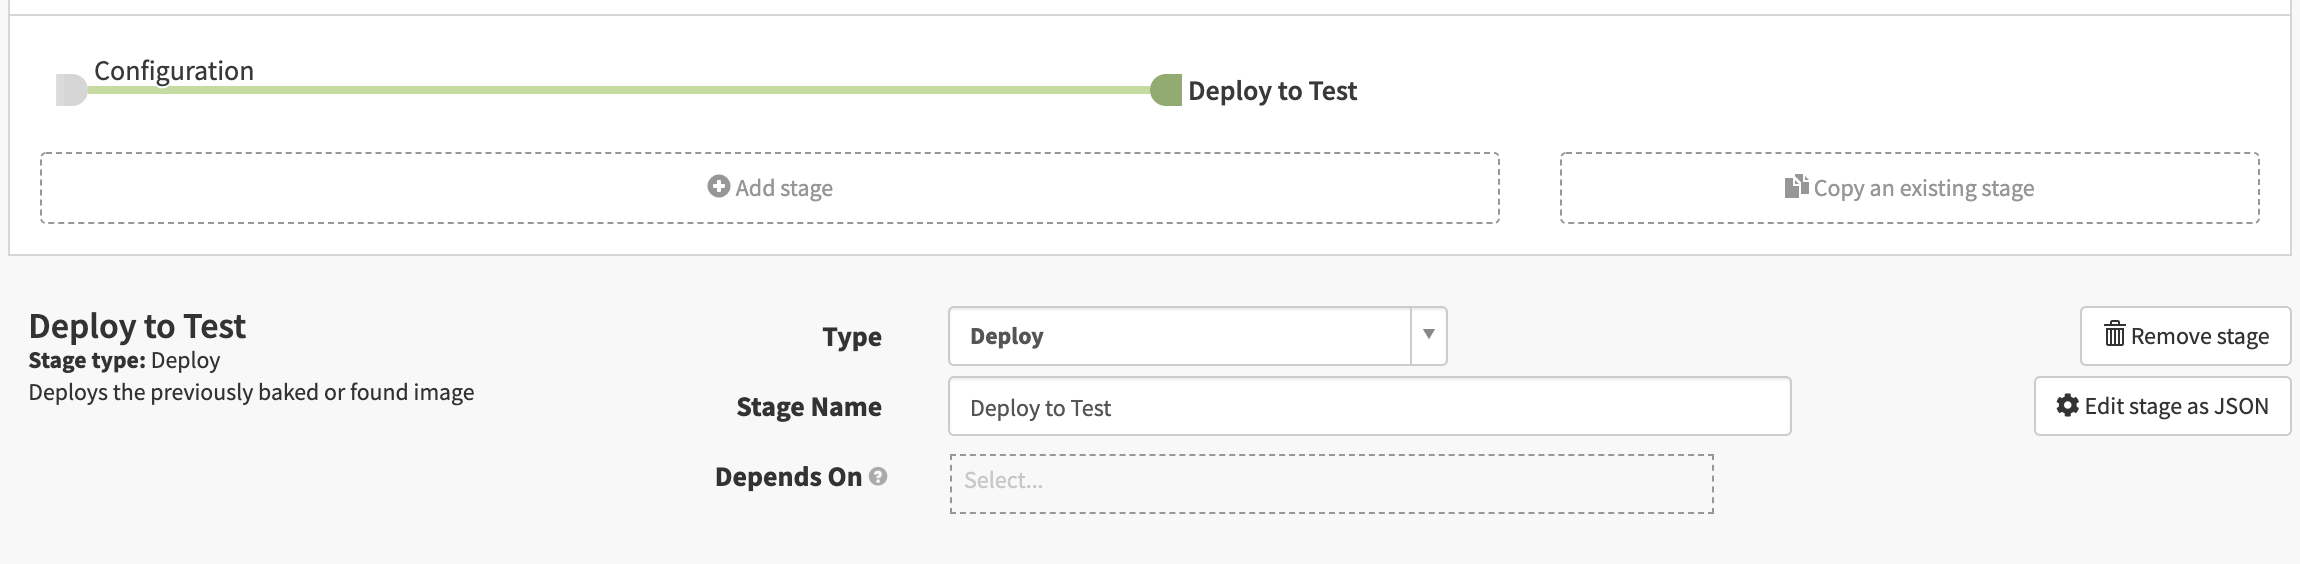
e. Add a “Deploy” stage to the pipeline. This stage deploys to the test environment.
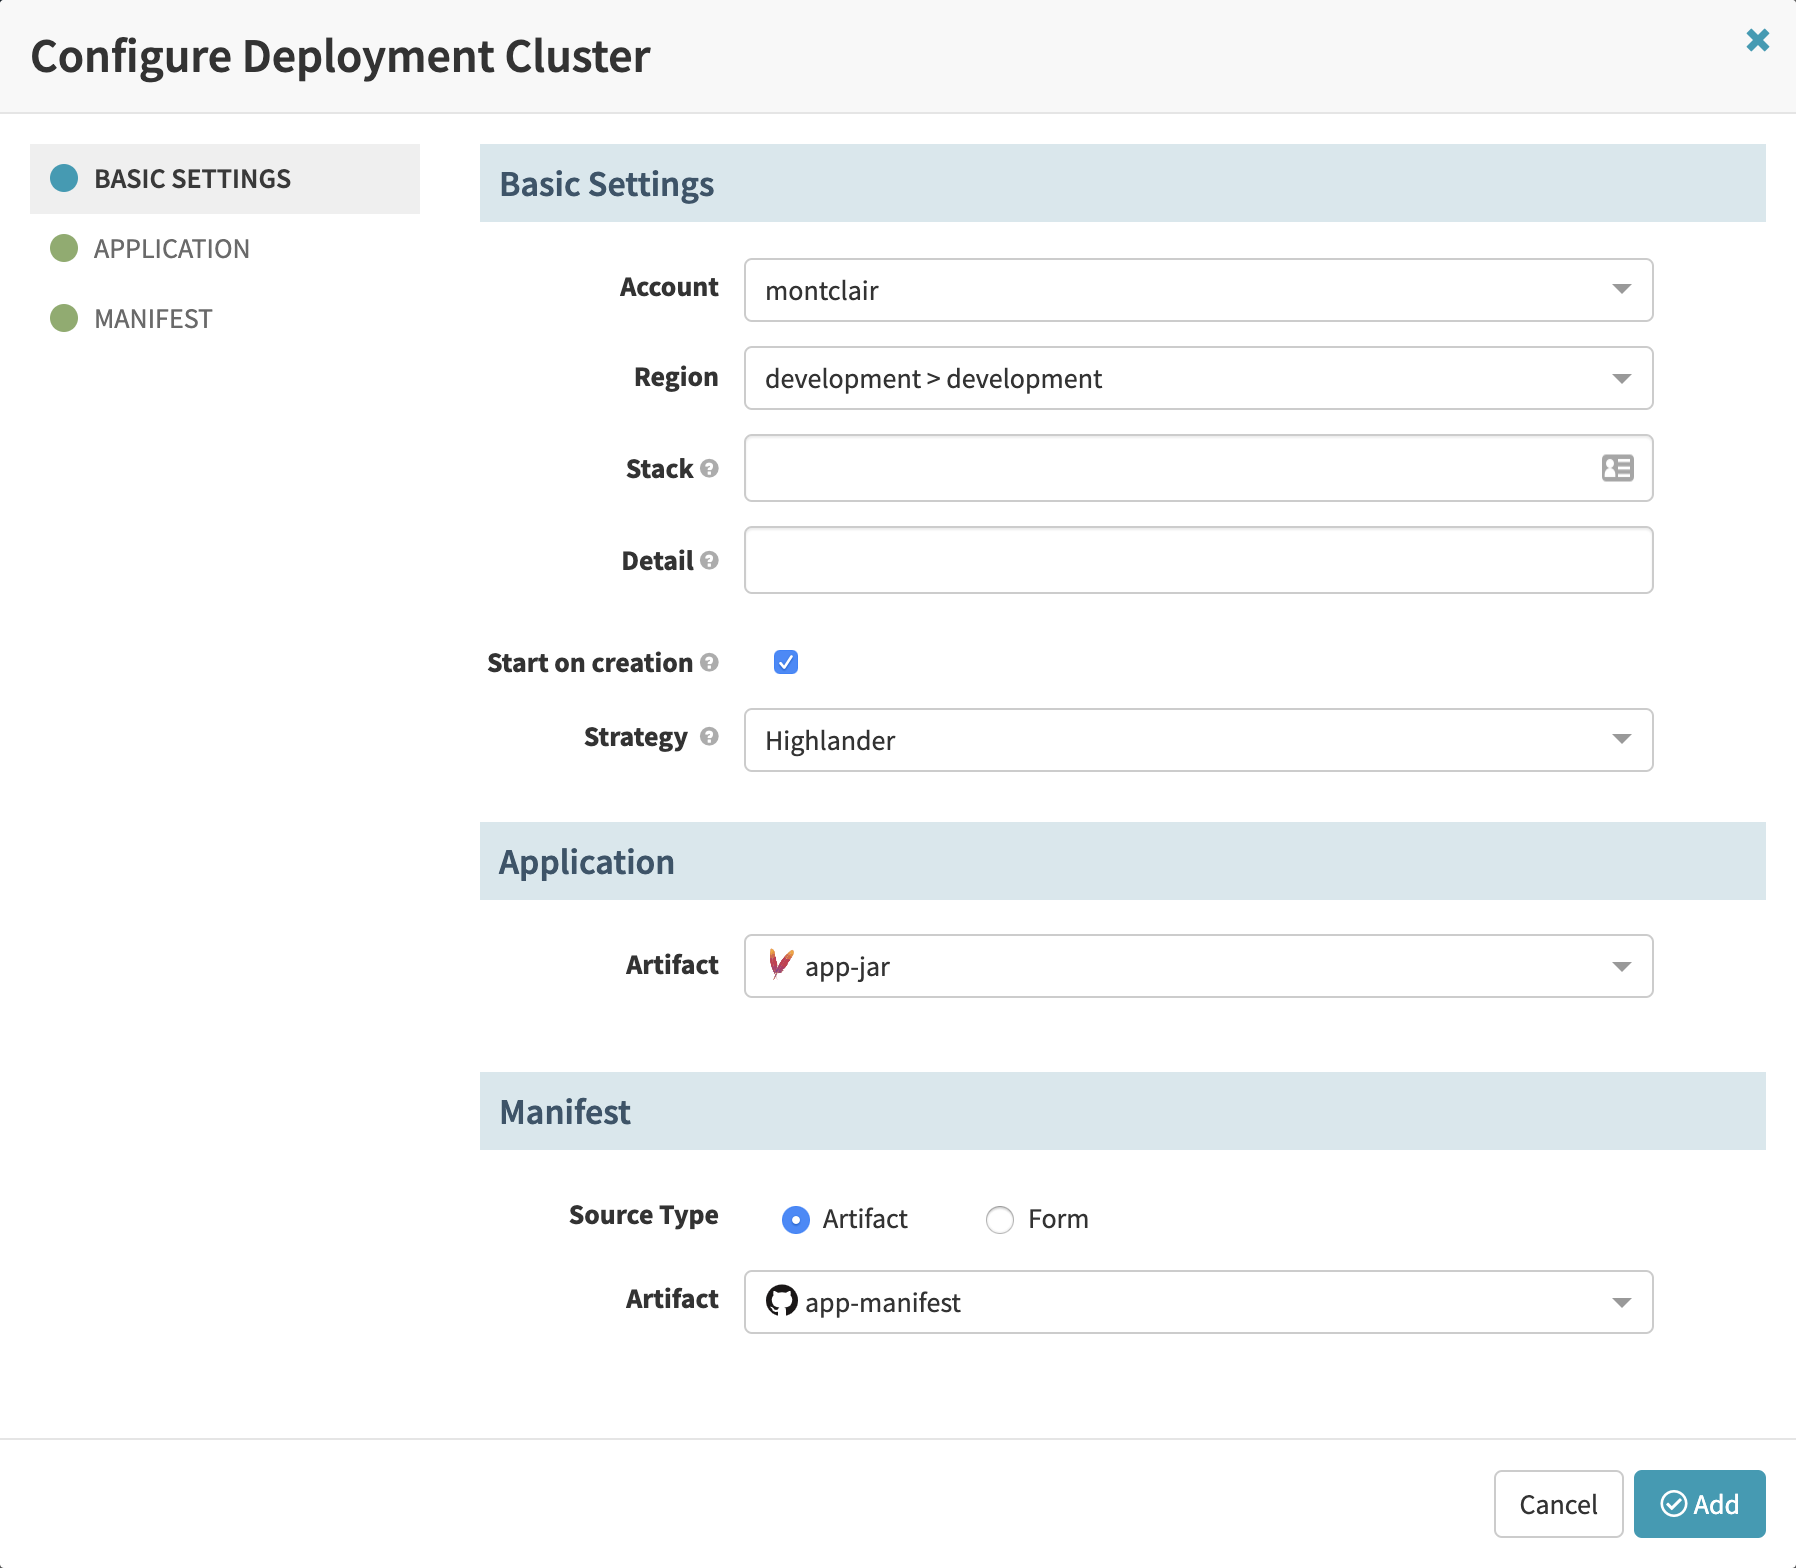
f. Add a new server group and provide details on deployment settings, the application artifact, and the manifest artifact:
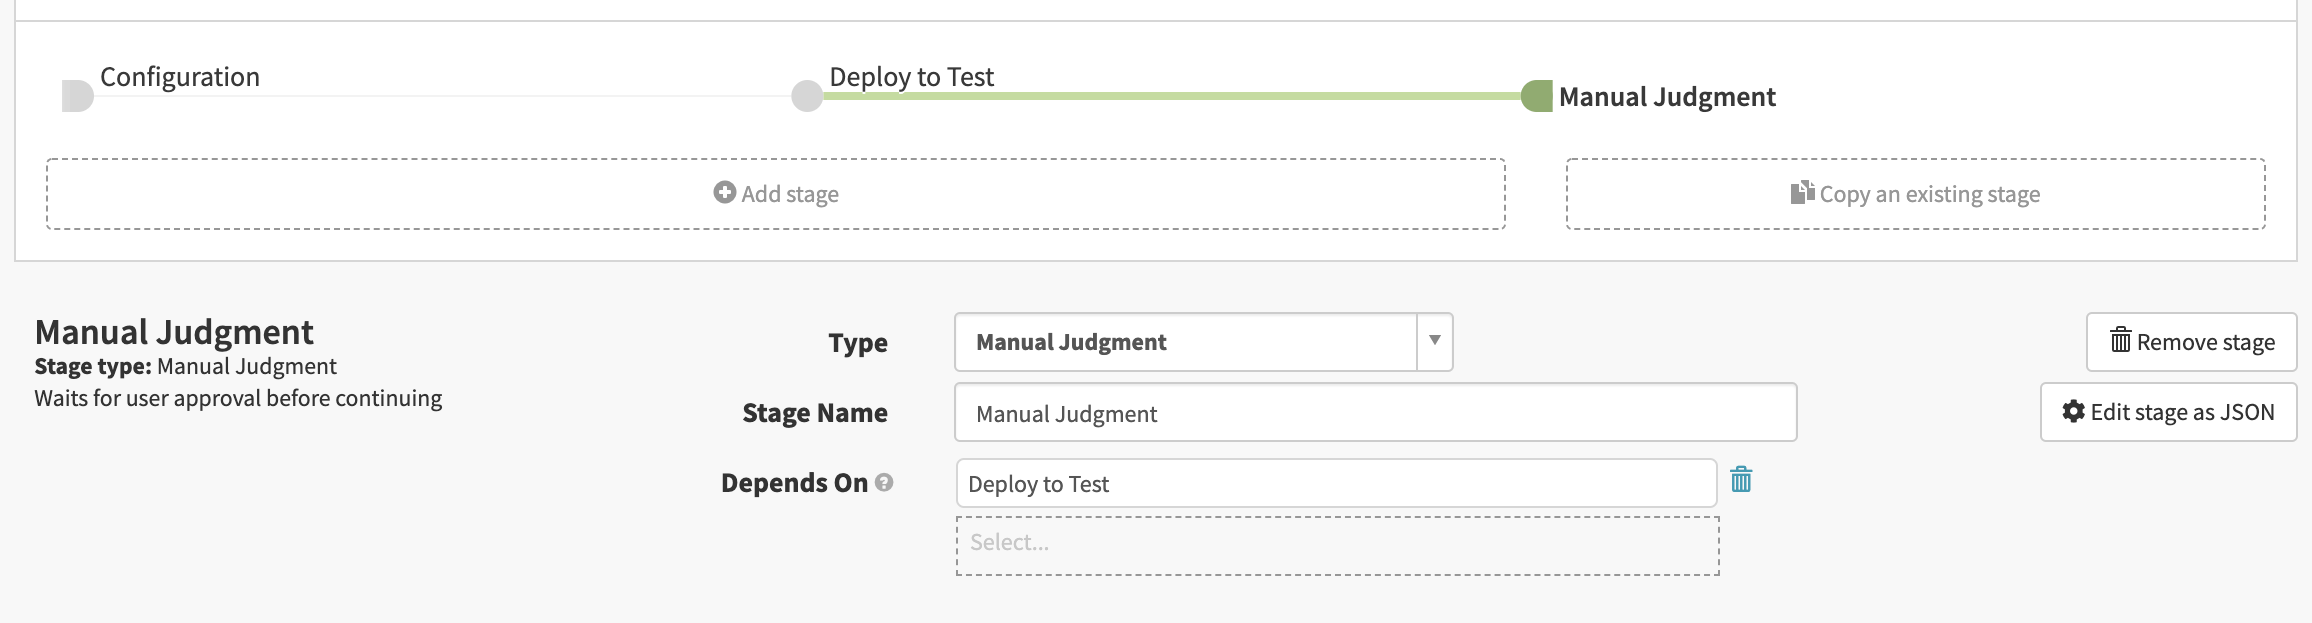
g. Add a “Manual Judgment” stage. You can use this stage, or stages such as “Script” or “Canary Analysis”, to verify a deployment before promoting it from the test environment.
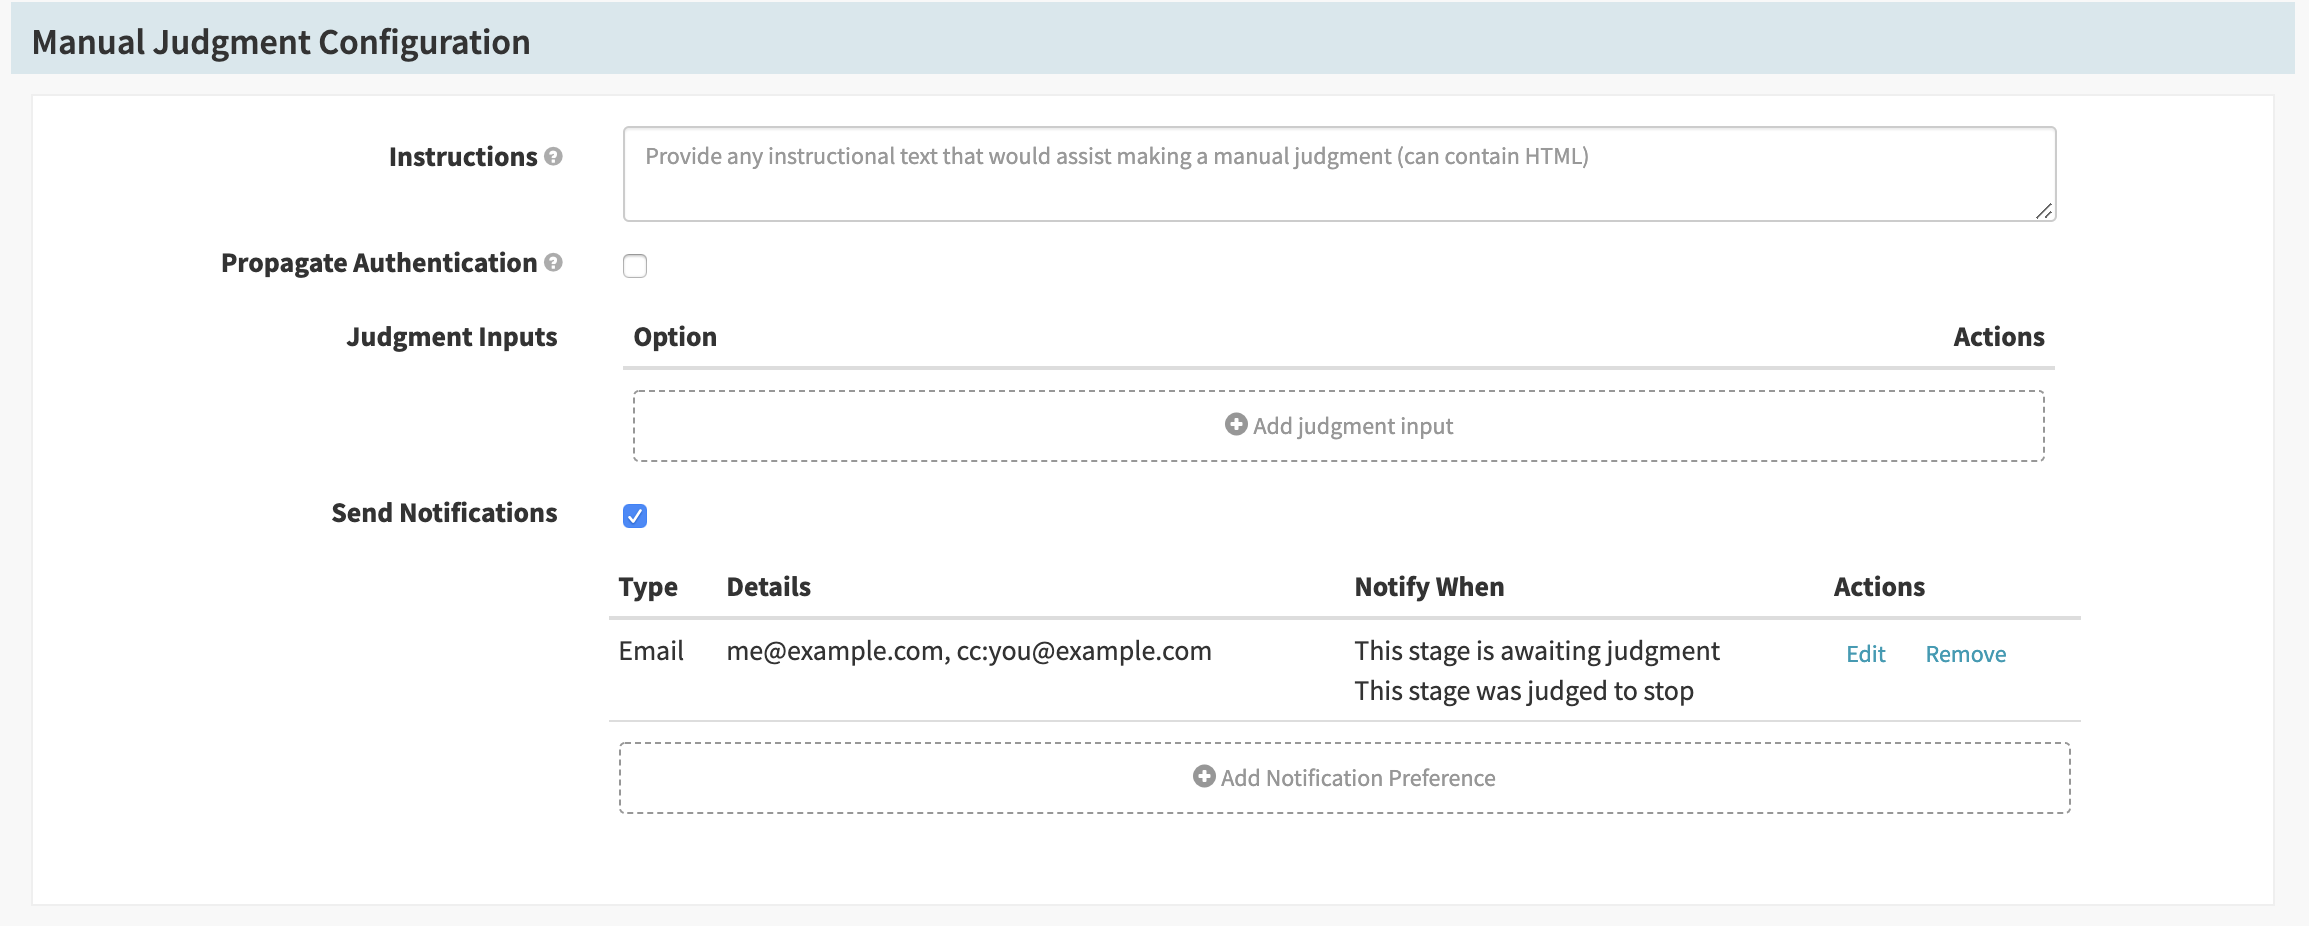
Add any desired configuration, such as notifications for when the stage is awaiting judgment or is manually judged to continue or stop.
After you have validated and approved the deployment, the next stage (following this “Manual Judgment” stage) deploys to the production environment.
h. Add a “Clone Server Group” stage to the pipeline. This stage promotes the deployed application to the production environment.
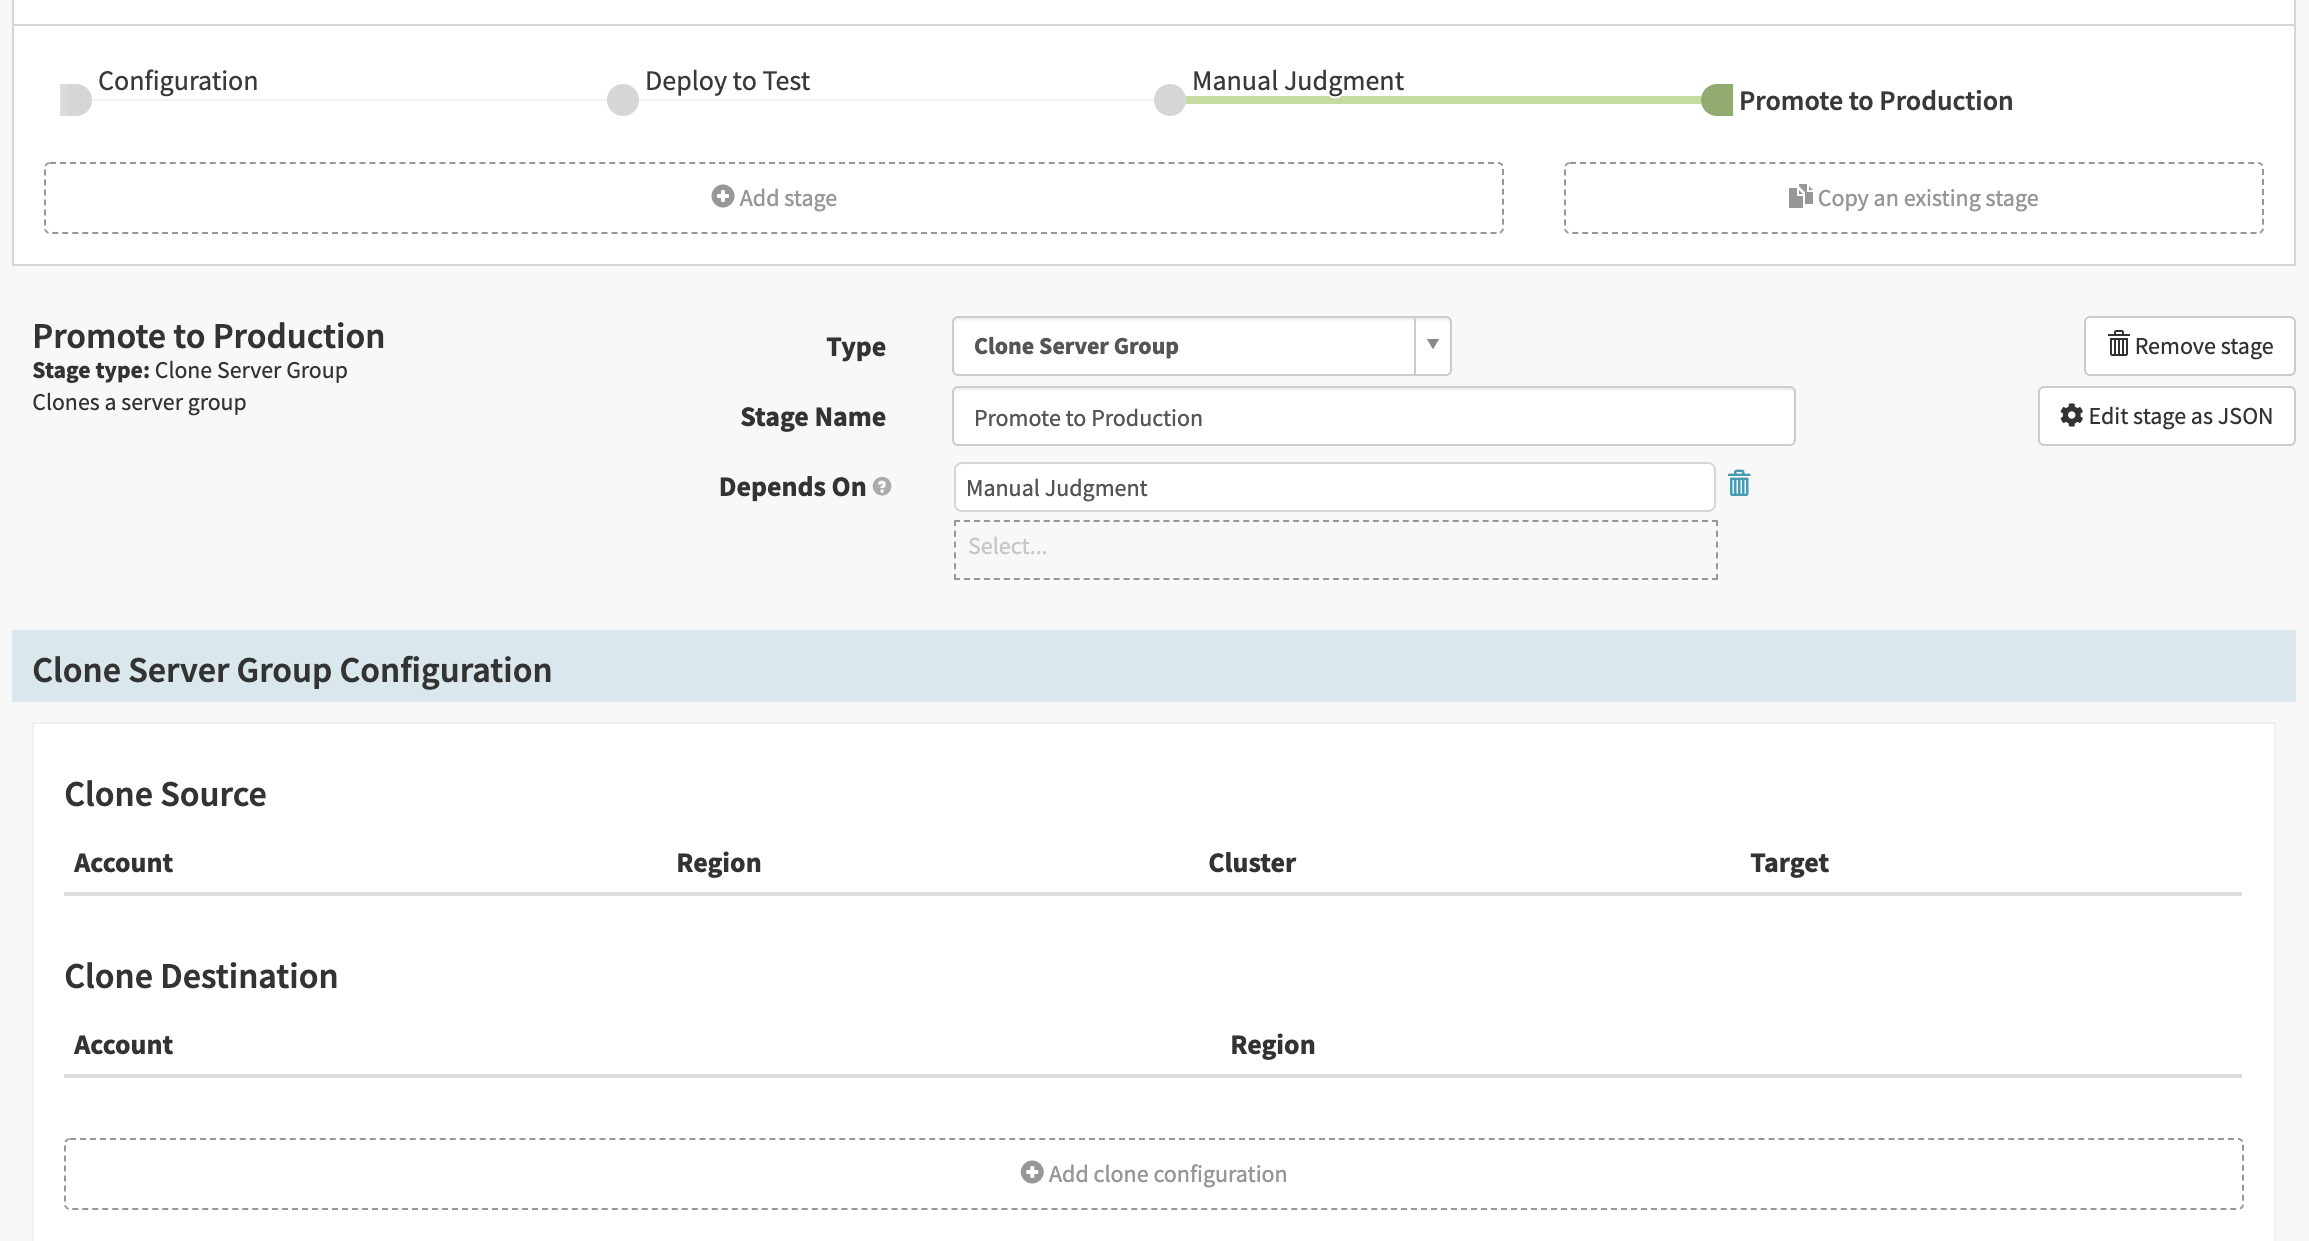
i. Add a clone configuration and provide details on deployment settings, the source server group, and the manifest:
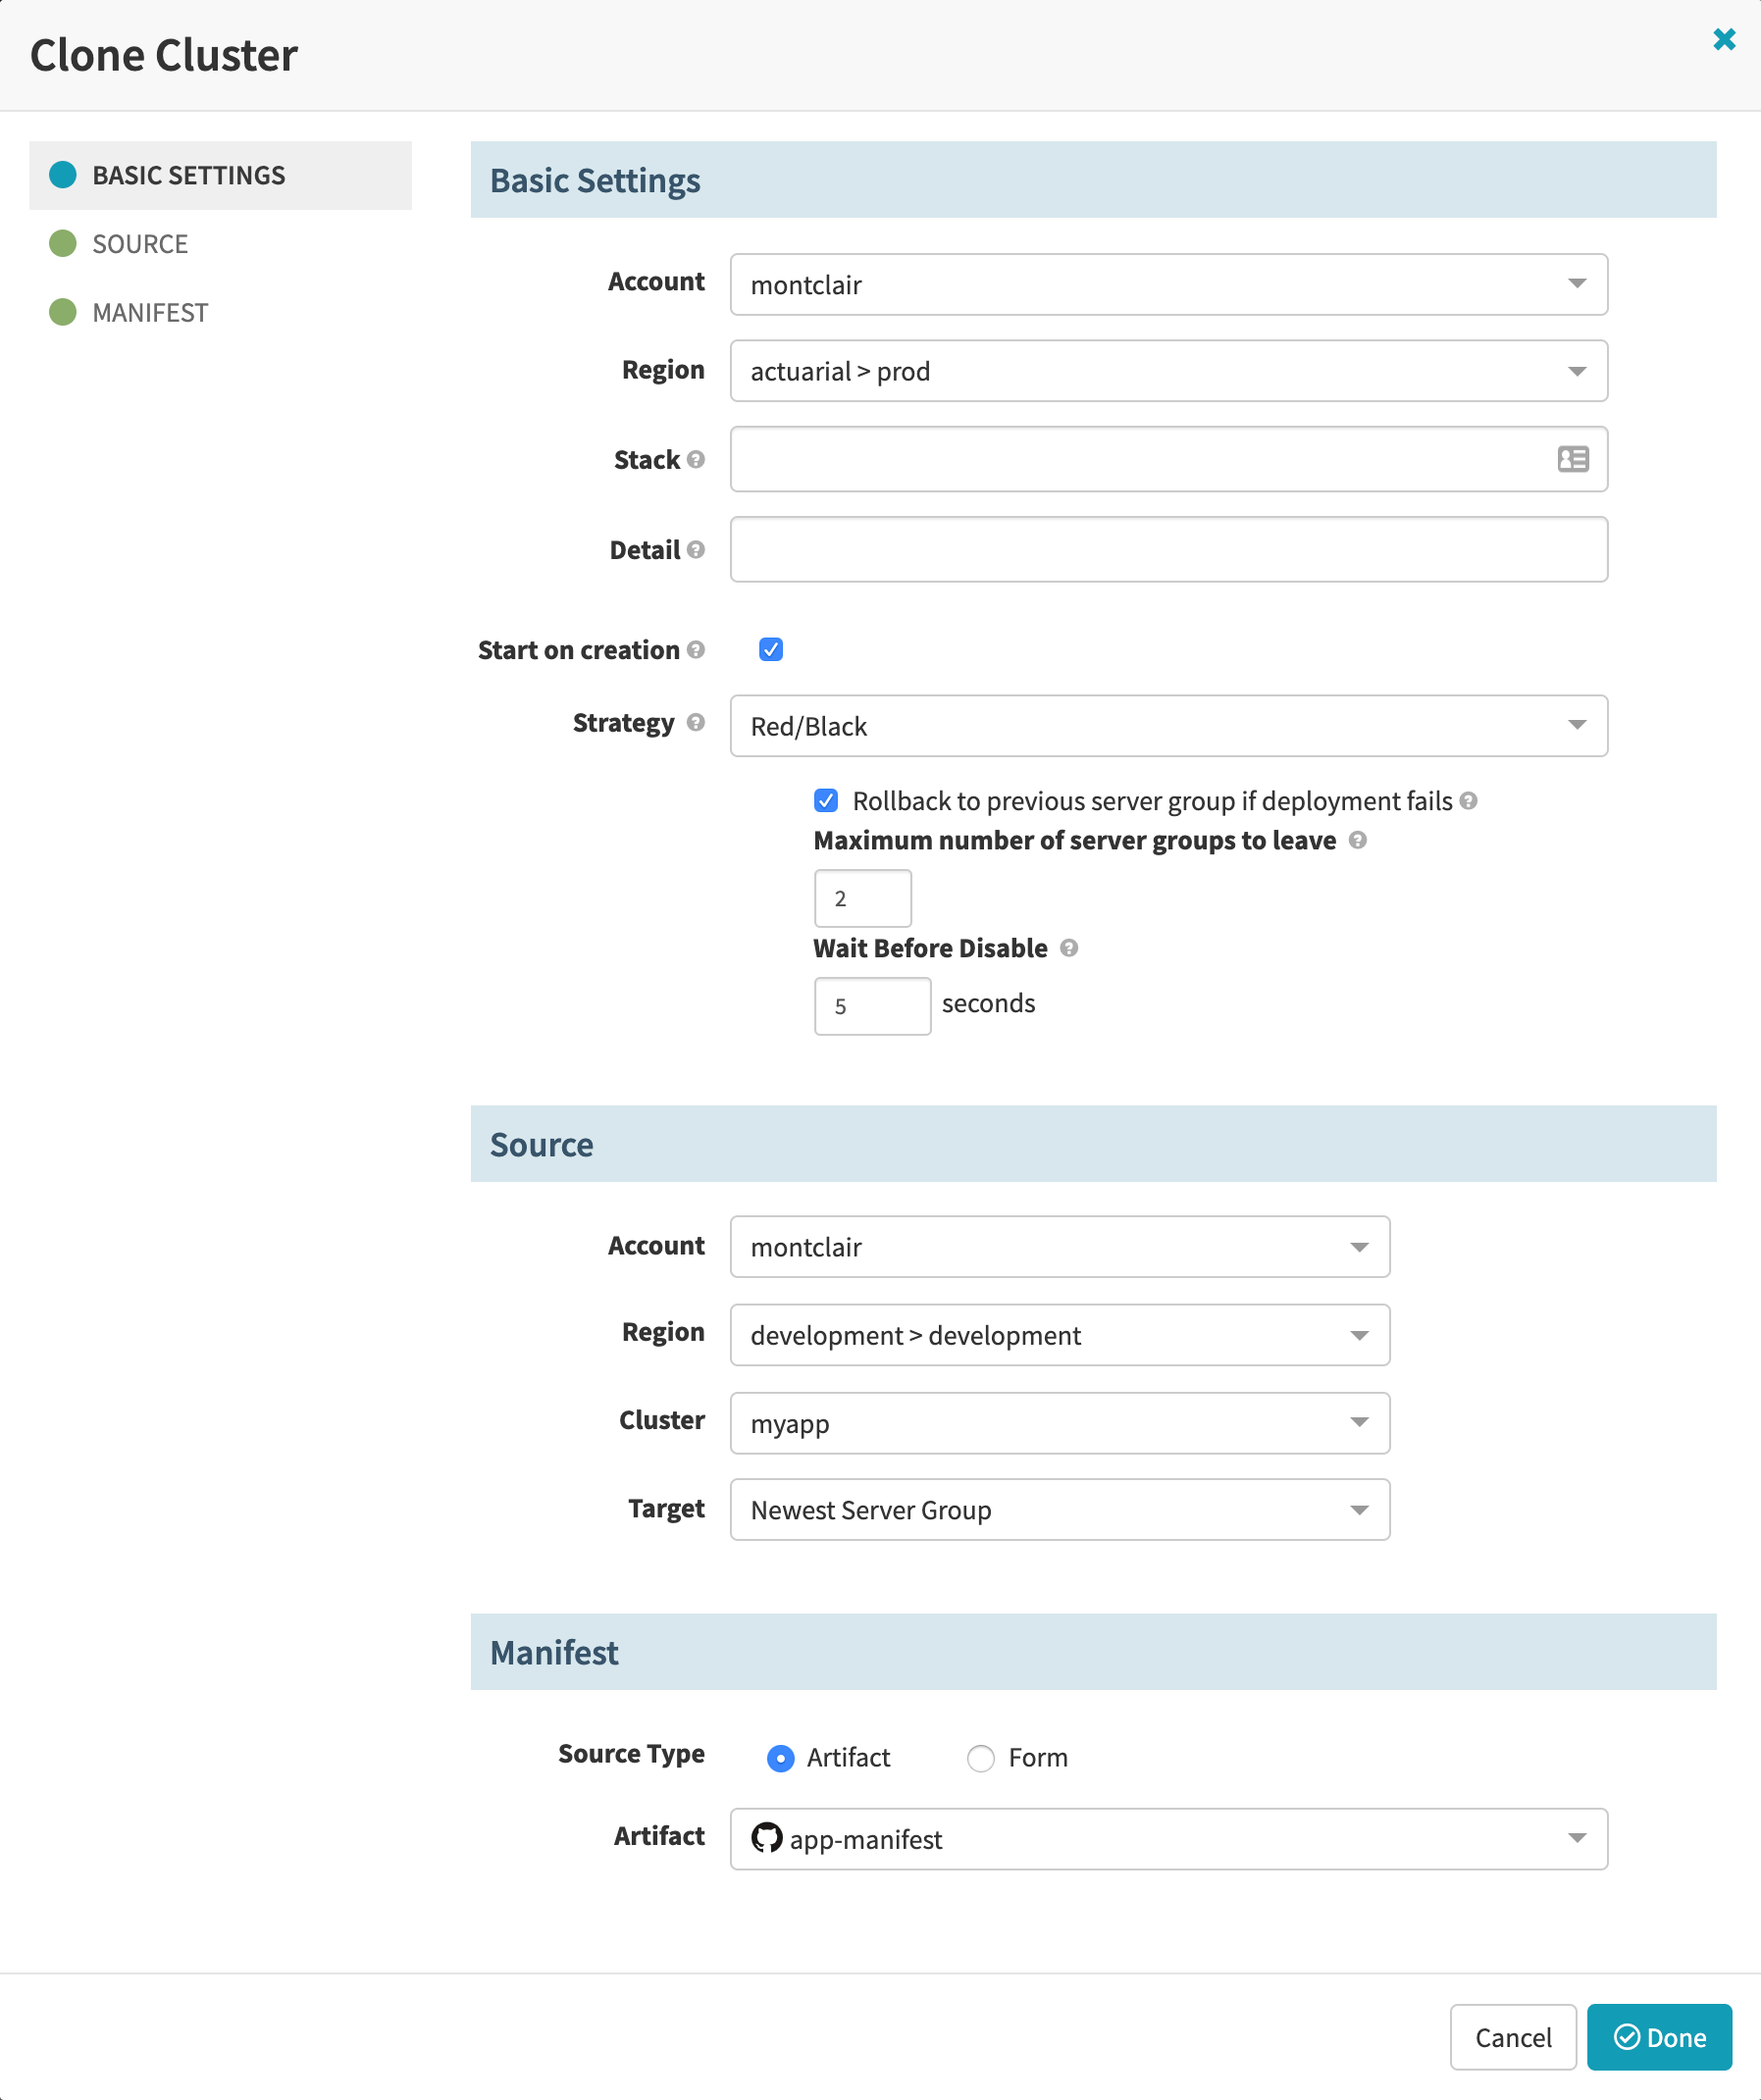
This clone configuration promotes the exact same application to the production environment as you deployed to the test environment with the “Deploy” stage in Step 5e.
You may wish to provide a different manifest when deploying the application to the production environment. For this alternate manifest to trigger pipeline executions, you would need to create a separate pipeline that deploys to the production environment.
6. Publish the Application Artifact or Commit Configuration Changes
a. Publish the application artifact to your Artifactory repository. You can also update the application manifest and push a new commit to its GitHub repository.
b. The published artifact or Git repository push triggers your pipeline, and you should see it deploy a new server group for the application, then promote the application to staging.