Custom Webhook Stages
Custom webhook stages provide a simple, yet powerful, way of adding custom stages to Spinnaker. These stages are typically used to make quick API calls to an external system as part of a pipeline. Instead of extending the various components through code, users can simply add configuration to Orca for these stages. They appear in the UI as if they were a native stage.
Creating a Custom Webhook Stage
To set up a custom webhook stage, you’ll need to modify the orca-local.yml configuration file. The webhook.preconfigured property allows you to define multiple webhook stages. Here’s an example configuration:
webhook:
  preconfigured:
    - label: GitHub - Update Commit Status
      type: githubStatus
      enabled: true
      description: Update a GitHub Commit Status
      method: POST
      url: https://api.github.com/repos/your-repo/statuses/${parameterValues['gitCommit']}
      customHeaders:
        Authorization:
          - token YOUR_API_TOKEN
      payload: |-
        {
          "state": "${parameterValues['status']}",
          "target_url": "${parameterValues['targetUrl']}",
          "context": "${parameterValues['context']}"
        }
      parameters:
        - label: Git Commit
          name: gitCommit
          description: The Git commit SHA
          type: string
        - label: Status
          name: status
          description: The state of the status (e.g., success, failure)
          type: string
        - label: Target URL
          name: targetUrl
          description: The URL associated with this status
          type: string
        - label: Context
          name: context
          description: A string label to differentiate this status from others
          type: string
In this configuration:
label: The name displayed in the UI for the stage.type: A unique identifier for the stage.enabled: Determines if the stage is available in the UI.description: A brief explanation of the stage’s purpose.method: The HTTP method used for the webhook (e.g., GET, POST).url: The endpoint for the webhook, which can include parameters.customHeaders: Any headers required for the HTTP request, such as API tokens.payload: The JSON payload sent with the request.parameters: Defines user-input fields in the UI, which can be referenced in theurlandpayloadusing SpEL expressions.
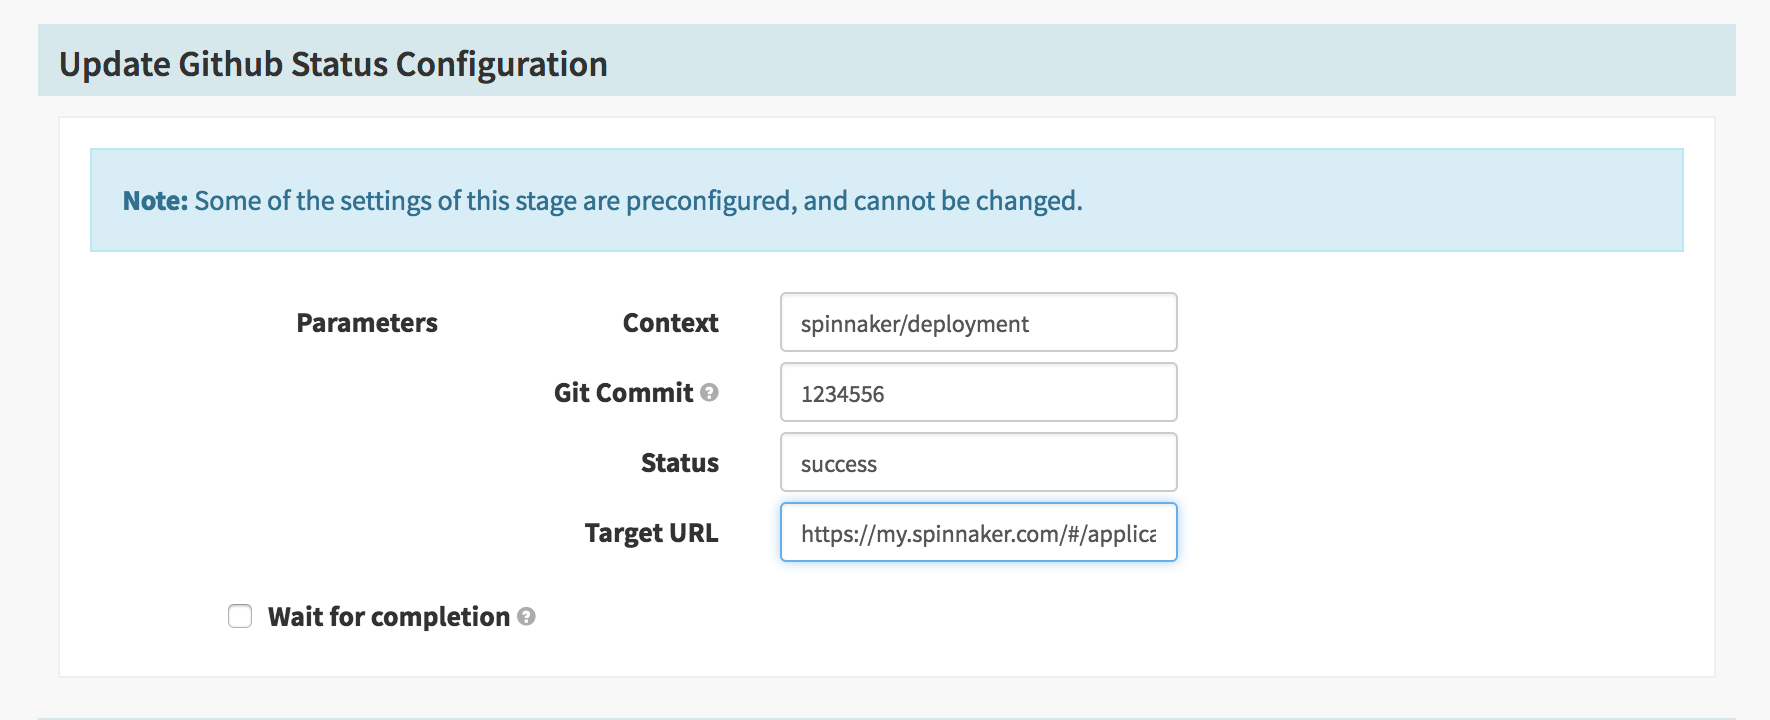
Note: Once a property is set within a custom webhook stage, users cannot override that setting via the UI.
Configuring Parameters for Custom Webhook Stages
Parameters allow users to input values when configuring the stage in a pipeline. These values can be dynamically accessed using SpEL (Spring Expression Language) expressions. For example, to set up a parameter for a Git commit SHA:
parameters:
  - label: Git Commit
    name: gitCommit
    description: The Git commit SHA
    defaultValue: ''
    type: string
Currently, only the string type is supported for parameters.
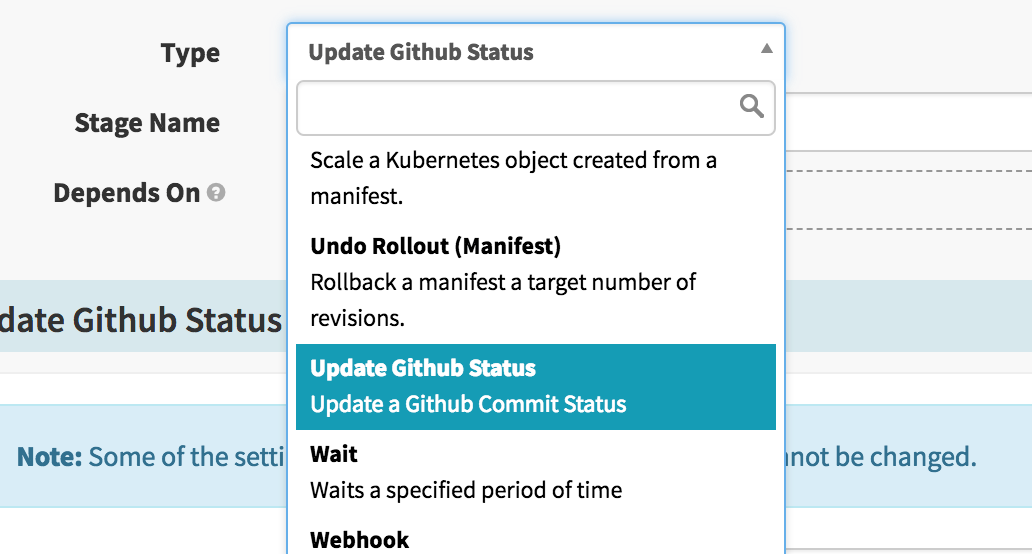
Using a Custom Webhook Stage
Once configured, your custom webhook stage will appear in the list of available stages within the Pipeline editor. You can add it to your pipeline like any other stage. If you’ve specified any parameters, they will be rendered and editable as part of the stage configuration. You can also use SpEL to set these values dynamically during pipeline execution.
Useful Custom Webhook Stage Examples
Update GitHub Commit Status
This stage updates a commit status in GitHub as part of a pipeline execution.
label: GitHub - Update Commit Status
type: githubStatus
enabled: true
description: Update a GitHub Commit Status
method: POST
customHeaders:
  Authorization:
    - token YOUR_API_TOKEN
url: https://api.github.com/repos/your-repo/statuses/${parameterValues['gitCommit']}
payload: |-
  {
    "state": "${parameterValues['status']}",
    "target_url": "${parameterValues['targetUrl']}",
    "context": "${parameterValues['context']}"
  }
parameters:
  - label: Git Commit
    name: gitCommit
    description: The Git commit SHA
    type: string
  - label: Status
    name: status
    type: string
  - label: Target URL
    name: targetUrl
    type: string
  - label: Context
    name: context
    type: string
Create a New Relic Deployment
This stage sends deployment details to New Relic for tracking.
label: New Relic - Create Deployment
type: newRelicDeployment
enabled: true
description: Create a Deployment in New Relic
method: POST
customHeaders:
  X-Api-Key:
    - YOUR_API_KEY
  Content-Type:
    - application/json
url: https://api.newrelic.com/v2/applications/${parameterValues['appId']}/deployments.json
payload: |-
  {
    "deployment": {
      "revision": "${parameterValues['revision']}",
      "user": "${parameterValues['user']}",
      "description": "${parameterValues['description']}"
    }
  }
parameters:
  - label: Application ID
    name: appId
    description: New Relic Application ID
    type: string
  - label: Revision
    name: revision
    type: string
  - label: User
    name: user
    type: string
  - label: Description
    name: description
    type: string
Testing Webhook Stages
To test your webhook stages before adding them to your pipeline, you can use services like:
- Beeceptor – Set up a mock API endpoint to inspect webhook requests.
- RequestBin – Capture and analyze HTTP requests to debug your webhooks.
These tools help ensure your webhook stages are correctly configured before deploying them in Spinnaker.